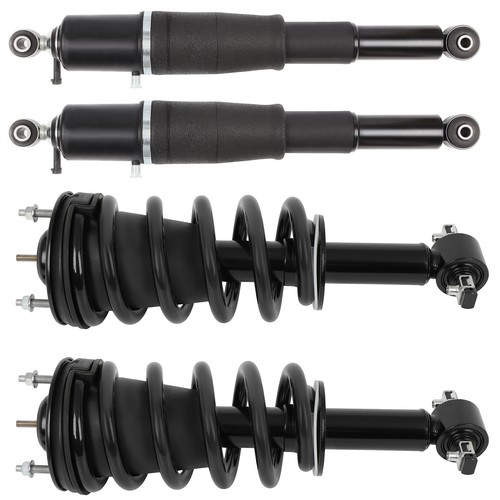
Application:
Mercedes-Benz E-Class 2010-2016 RWD
Mercedes-Benz E63 AMG 2010-2016 RWD
Mercedes-Benz CLS63 AMG 2012-2013 RWD
Mercedes-Benz CLS400 2015-2017 RWD
Mercedes-Benz CLS550 2012-2018 RWD
Important Fitment Notes(Must Read):
For With RWD Suspension Only.
NOT fit on Vehicles Equipped with AWD or Active Body Control(ABC) Suspension Models
OE Number:
A2123200813, A2123201838, A2123202338, A2123203238
A2123203038, A2183203213, A2183206613
Generation & Evolution??
Mercedes-Benz E-Class
W124 First generation (1993-1995)
W210 Second generation (1996-2002)
W211 Third generation (2003-2009)
W212 Fourth generation (2009-2016)
W213 Fifth generation (2016-present)
Mercedes-Benz CLS-Class
W219 First generation (2004-2010)
W218 Second generation (2011-2018)
C218 4-Door Coupe
X218 5-Door Estate With Shooting Brake
C257 Third generation (2019-present)
Signs that your air suspension needs to be replaced include:
1.Abnormal Sounds
2.Poor Handling Stability
3.Air Leakage
4.Car Body Slant
5.Irregular Tire Wear
6.Over Bend
Note Before Installation:
1.To avoid the possibility of short circuits while working with electric components consult your owner's manual on how to disconnect your battery.
2.Consult your vehicle owner's manual, service manual, or car dealer for the correct jacking points on your vehicle and for additional care, safety and maintenance instructions. Under no circumstances should any work be completed underneath the vehicle if it is not adequately supported, as serious injuries and death can occur.
Removal Guideline:
1. Set steering to straight ahead.
2. Raise vehicle.
3. Remove the left front wheel. (Figure 1)

4. Remove the strut cap to gain access to the air line. (Figures 2, 3)

5. Loosen and remove the air line fitting from the top of the strut. (Figures 4, 5)

6. Disconnect electrical connection on the bottom mount of the strut. (Figure 6)

7. Remove the strut wire bracket. Bracket will be reused in installation. Ensure all wires and brake line are
free from possible entanglement during strut removal. (Figure 7)

8. Remove the sway arm link nut and disconnect the sway arm from the strut. (Figures 8, 9)

9. Remove the two (2) lower strut bolts located opposite of each other at the wheel carrier. (Figures 10, 11)

10. Remove the upper strut bolt at the wheel carrier. (Figures 12, 13)

11. Support the body of the strut and remove the three (3) top mount bolts. (Figures 14, 15)

12. Remove the air strut from the vehicle. (Figure 16)

13. Removal complete.
Installation Guideline
Installation is in reverse order of air strut removal.
Highlight:
1. 100% Air Tightiness testing
2. 24 hours air tightness test ≤0.02MPa
3. Anti-corrosion and provide a more consistent wear surface
4. Built to strict quality control standards
5. CNC Machined Components
6. Designed for Comfort Suspension
7. Direct replacement for OEM strut without modification
8. Easy to install
9. Eliminating abnormal sound
10. Gives the driver more control of ride
11. Good heat dissipation
12. It has a high compressive strength and good sound insulation to ensure our driving comfort and safety
13. Restore the original ride height and improve ride quality
14. Test more than 3 million times
15. Sturdy & Durable Material
Package Included:
Single for Front Right Air Suspension Shock Struts
Note:
1.Please double confim the compatibility as well as the OEM number before purchasing.
2.Instruction is not included. Professional installation is recommended
3.Please feel free to contact us for whatever we can help via eBay message; every message will be replied in 12 hours.