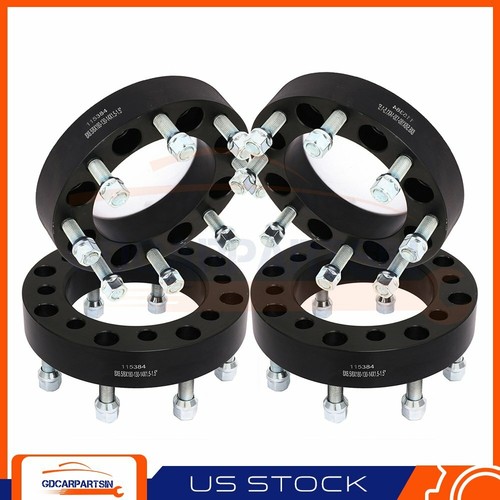
Compatibility :
1999-2000 Ford Contour 2.5L
1999-2006 Ford Crown Victoria 4.6L
2003 Ford E-150 4.2L
2003 Ford E-150 Club Wagon 4.2L
1997-2002 Ford E-150 Econoline 4.2L
1998-2001 Ford E-150 Econoline 5.4L
1996 Ford E-150 Econoline 5.8L
1997-2002 Ford E-150 Econoline Club Wagon 4.2L
1998-2001 Ford E-150 Econoline Club Wagon 5.4L
2003 Ford E-250 4.2L
1997-2002 Ford E-250 Econoline 4.2L
1996 Ford E-250 Econoline 4.9L
1998-2000 Ford E-250 Econoline 5.4L
1996 Ford E-250 Econoline 5.8L
1998-2000 Ford E-350 Econoline 5.4L
1998 Ford E-350 Econoline 6.8L
1998-2000 Ford E-350 Econoline Club Wagon 5.4L
1998-2001 Ford E-350 Econoline Club Wagon 6.8L
2000 Ford E-350 Super Duty 5.4L
2000 Ford E-450 Econoline Super Duty 5.4L
2009 Ford Escape 3.0L
2000-2005 Ford Excursion 5.4L
2000-2005 Ford Excursion 6.8L
1997-1998 Ford Expedition 4.6L
1997-1998 2000-2002 Ford Expedition 5.4L
2004-2010 Ford Explorer 4.0L
2004-2010 Ford Explorer 4.6L
1997-2003 Ford F-150 4.2L
1997-2003 Ford F-150 4.6L
1997 1999-2003 Ford F-150 5.4L
2004 Ford F-150 Heritage 5.4L
1997-1999 Ford F-250 4.6L
1997 Ford F-250 5.4L Calif
1999 Ford F-250 5.4L Calif
1999-2004 2010 Ford F-250 Super Duty 5.4L
2008-2009 Ford F-250 Super Duty 5.4L USA Built
1999-2004 2010 Ford F-250 Super Duty 6.8L
2008-2009 Ford F-250 Super Duty 6.8L USA Built
1999-2004 Ford F-350 Super Duty 5.4L
1999-2004 Ford F-350 Super Duty 6.8L
2000 Ford Taurus 3.0L w/ 15"
2005-2007 Ford Taurus 3.0L
1998 2001-2002 Lincoln Navigator 5.4L
1998-1999 Lincoln Town Car 4.6L Calif.
2006 Lincoln Town Car 4.6L To 12/05/05
2000 2002-2005 Lincoln Town Car 4.6L
2000-2002 Mercury Cougar 2.5L
1999-2000 2002-2005 Mercury Grand Marquis 4.6L
2006 Mercury Grand Marquis 4.6L To 12/05/05
2007-2009 Mercury Milan 3.0L
2004-2010 Mercury Mountaineer 4.0L
2004-2010 Mercury Mountaineer 4.6L
1999-2000 Mercury Mystique 2.5L
2000 Mercury Sable 3.0L
2005 Mercury Sable 3.0L VIN 2 & U; w/ 15"
Features:
- Porous PTFE Filter - Allows atmospheric oxygen to enter the sensor without permitting water or engine contaminants to seep into the casing.
- Double Protection Cover - Maintains proper unit temperature for quicker response times and protects the ceramic element against silicone and lead poisoning.
- Stainless Steel Housing - Resists corrosion and contamination with a rugged, watertight body.
- Aluminum-Oxide Trap Layer - Keeps silicone and lead outside the ceramic elient through, preventing damage to the platinum electrode.
Where is the oxygen sensor in your vehiche?

Whow to install an oxygen sensor?
1.Locate the oxygen sensor on your vehicle by looking for a part that looks like a spark plug that sticks out from the exhaust pipe. It will have an electrical connection attached to it.

2.Disconnect the electrical connection on the oxygen sensor. Use a flat tip screwdriver to push in the tabs and pull the connection apart.

3.Unscrew the oxygen sensor off the exhaust pipe using either an open-end wrench or a special socket made to remove it. The majority of oxygen sensors will take an SAE 7⁄8 inch (2.2 cm) wrench.

4.Compare your new oxygen sensor to the old one. If the new one did not come with an electrical connection, but just with the wires stubbed out, you need to do a little work.
· Cut off the old connector from the bad oxygen sensor, strip the wires and solder the wires to the new oxygen sensor. You can also use butt connectors.
· Use heat sensitive shrink tape to seal the connections.
· Follow manufacturer's instructions to know which wires to tie together.

5.Reverse the steps used in removing the oxygen sensor and install the new part.Add a small amount of anti-seize to the threads of the new sensor. Screw it in place clockwise and snug it down with the socket or open-end wrench. Do not over tighten the sensor as you might strip the threads.

6.Plug the electrical connections back in.

7.Turn on the ignition key, but do not start your vehicle. Use the diagnostic scanner/reader to clear the code from the vehicle's computer.
8.Start the car. You should notice an immediate improvement.
NOTE:
If you can't determine whether the oxygen sensor fit your vehicle or not, please contact us.