|
|
|

|

|

|

|
Fitment:
1999-04 Chrysler 300M Front Passenger Side
1999-04 Chrysler 300M Rear Driver or Passenger Side
1998-04 Chrysler Concorde Front Passenger Side
1998-04 Chrysler Concorde Rear Driver or Passenger Side
1999-01 Chrysler LHS Front Passenger Side
1999-01 Chrysler LHS Rear Driver or Passenger Side
2001-03 Chrysler Sebring Sedan Rear Driver or Passenger Side
2001-03 Chrysler Sebring Sedan Front Passenger Side
2001-03 Chrysler Sebring Convertible Front Passenger Side
2001-04 Dodge Dakota Rear Driver or Passenger Side
2001-04 Dodge Dakota Front Passenger Side
2000 Dodge Dakota Rear Driver or Passenger Side
1998-03 Dodge Durango Front Passenger Side
1998-03 Dodge Durango Rear Driver or Passenger Side
1998-04 Dodge Intrepid Front Passenger Side
1998-04 Dodge Intrepid Rear Driver or Passenger Side
2009 Dodge Ram 1500 Truck Crew Cab Front Passenger Side
2009 Dodge Ram 1500 Truck Crew Cab Rear Driver or Passenger Side
2002-08 Dodge Ram 1500 Truck Front Passenger Side
2002-08 Dodge Ram 1500 Truck Rear Driver or Passenger Side
2003-09 Dodge Ram 2500 Truck Front Passenger Side
2003-09 Dodge Ram 2500 Truck Rear Driver or Passenger Side
2003-09 Dodge Ram 3500 Truck Front Passenger Side
2003-09 Dodge Ram 3500 Truck Rear Driver or Passenger Side
2008-10 Dodge Ram 4500 Truck Front Passenger Side
2008-10 Dodge Ram 4500 Truck Rear Driver or Passenger Side
2008-10 Dodge Ram 5500 Truck Front Passenger Side
2008-10 Dodge Ram 5500 Truck Rear Driver or Passenger Side
2001-03 Dodge Stratus Sedan Rear Driver or Passenger Side
2001-03 Dodge Stratus Sedan Front Passenger Side
1997-01 Jeep Cherokee Rear Driver or Passenger Side
Position:
Front Right
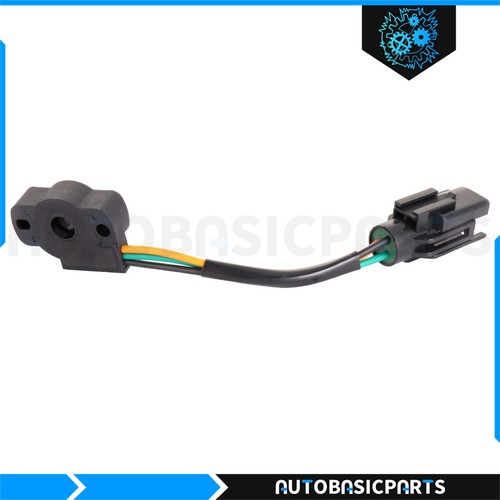
Package Included:
1 x Window Switch
How To Replace Window Switch
1. Prepare tools: You need a Phillips screwdriver, a 10mm wrench and a plastic pry bar.
2. First, locate the control panel of the door lifter. Usually it is located on the front or rear of the armrest inside the door.
3. Use a screwdriver and wrench to remove the screws securing the control panel. This screw is usually 10mm.
4. After removing the screws, carefully pry open the control panel cover to separate it from the door lining.
5. Next, locate the screws on the lifter motor and remove. This screw is usually on the bottom of the motor.
6. After removing the screws, pull out the wire connector connected to the motor. These connectors usually come in the form of plugs that can be disconnected by simply pulling them back slightly.
7. At this point, the entire window lift switch has been removed. If parts need to be replaced, you can start installing the new parts. Just follow the disassembly sequence in reverse order.
8. Reconnect the wire connector and secure it to the motor. Make sure all connectors are connected correctly to their respective locations.
9. Put the lift motor back into place and tighten the screws at the bottom with a screwdriver and wrench.
10. Reinstall the control panel cover onto the door lining and secure it in place with a plastic spudger.
11. Finally, use a screwdriver and wrench to tighten the screws on the control panel.
Now, the window lift switch has been successfully replaced or repaired. When performing these operations, make sure the vehicle is turned off and stationary to prevent accidents.
| Item Specifics | |
|---|---|
| Brand | ZoneMotive |
| Manufacturer Part Number | 12544181 |
| Manufacturer Warranty | 1 Year |
| Placement on Vehicle | Front Left Rear Right |
| Type | Push Pull Switch |
| Material | Plastic |
| OE/OEM Part Number | 901-437,DS1185?? 1S2976,56007695AD, 5GS20DX9AA |
| Interchange Part Number | 56007695??4602465AA??56007695AB??56007695AC??56007695AD |
| Superseded Part Number | 4602465AA, 56007695, 56007695AB, 56007695AC |
| Items Included | 1 x Window Switch |
| Performance Part | No |
| Universal Fitment | No |
| Vintage Car Part | No |
| Finish | Polished |
| Color | Shown as picture |
| Features | Durable |
| Fitment Type | Direct Replacement |
| Package Type | Box |
| Manufacturer Warranty | 1 Year |
| OE Spec or Performance/Custom | OE Spec |
| Connect Gender | Female |
| Terminal Gender | Male |
Special Note: DO check the compatible chart before you paying the items, or contact us for checking the compatibilities for your vehicles / cars / trucks.
Any payment which can be accept by eBay.
2-8 working days in transit.
Product will be shipped within 2 business days after full payment is received and verified.
USPS, UPS, FedEx or DHL shipping will be provided.
Delivery time is about 2-8 business days to most of addresses.
30-Day free return provided.
Any quesiton or problem, do contact us please, we are always online to answer.
Shop Category Hot Item
Delivery
New List Item
Help & Info Payment Policy Shipping Policy Return Policy FAQ About Us |
Fits Dodge Ram 1500 2500 3500 5500 Durango Dakota Chrysler Sebring Window Switch
Fitment: Position: Package Included:
How To Replace Window Switch 1. Prepare tools: You need a Phillips screwdriver, a 10mm wrench and a plastic pry bar. 2. First, locate the control panel of the door lifter. Usually it is located on the front or rear of the armrest inside the door. 3. Use a screwdriver and wrench to remove the screws securing the control panel. This screw is usually 10mm. 4. After removing the screws, carefully pry open the control panel cover to separate it from the door lining. 5. Next, locate the screws on the lifter motor and remove. This screw is usually on the bottom of the motor. 6. After removing the screws, pull out the wire connector connected to the motor. These connectors usually come in the form of plugs that can be disconnected by simply pulling them back slightly. 7. At this point, the entire window lift switch has been removed. If parts need to be replaced, you can start installing the new parts. Just follow the disassembly sequence in reverse order. 8. Reconnect the wire connector and secure it to the motor. Make sure all connectors are connected correctly to their respective locations. 9. Put the lift motor back into place and tighten the screws at the bottom with a screwdriver and wrench. 10. Reinstall the control panel cover onto the door lining and secure it in place with a plastic spudger. 11. Finally, use a screwdriver and wrench to tighten the screws on the control panel. Now, the window lift switch has been successfully replaced or repaired. When performing these operations, make sure the vehicle is turned off and stationary to prevent accidents.
About Us
Special Note: DO check the compatible chart before you paying the items, or contact us for checking the compatibilities for your vehicles / cars / trucks. Payment
Any payment which can be accept by eBay. Shipping
2-8 working days in transit. Product will be shipped within 2 business days after full payment is received and verified. USPS, UPS, FedEx or DHL shipping will be provided. Delivery time is about 2-8 business days to most of addresses. Returns
30-Day free return provided. Contact Us
Any quesiton or problem, do contact us please, we are always online to answer. All right reserved. |
||||||||||||||||||||||||||||||||||||||||||||||||||||||||||||||||||||||||||||||||||||||||||||||