|
|
|

|

|

|
If you want to buy pair of front bearing,pls check this picture as follow:

Specifications:
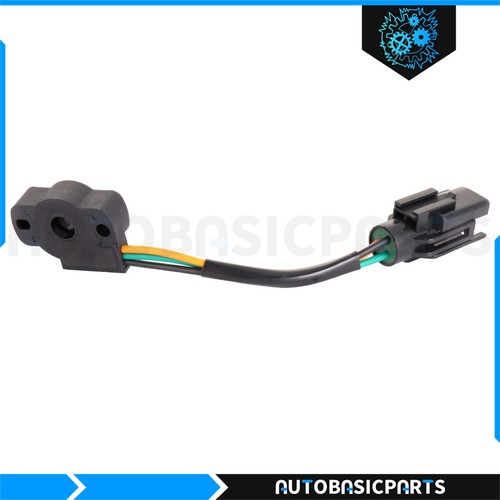
- Fits LH (Driver Side) Or RH (Passenger Side) FRONT
- Has ABS sensor w/stainless steel sensor & plastic wire clips
- Direct fit, designed for vehicle specific application on all makes and models
- Latest generation design used in manufacturing our hub assemblies
- High quality seal design ensures a clean, long lasting hub bearing
- Sensors designed to match specific make and model
- Precision machined and pre-coated with anti-corrosion lubricant
- Manufactured for quick and easy installation
For the following years and models:
- Fits Ford F-150 2000-2003 4WD
Packing include:
1 Pcs wheel hub bearing
1 Year Warranty
How to Install a Wheel Bearing Hub Assembly:

- Park the vehicle on a flat, level paved or concrete surface. Place the vehicle in gear or park and apply the parking brake.
- Place a wheel chock behind a rear tire (or front if you're doing a rear hub-bearing assembly).
- Loosen the lug nuts on the wheel of the hub bearing you're replacing with the breaking bar and a socket; do not remove them.
- Lift the wheel with the floor jack in a safe and secure manner. Support the vehicle on a jack stand, preferably on the frame rail if present.
- Remove the lug nuts and wheel.
- Locate the caliper bolts and remove them with the ratchet and a socket.
- Pry the caliper off gently using a large straight-edged screwdriver and support the caliper on the coil spring with a bungee cord. Do not allow the caliper to dangle on the rubber brake hose.
- Locate the caliper bridge bolts (if applicable) and remove them with the ratchet and a socket. You may want to break them loose with the breaking bar first if they're really tight. On some vehicles, the brake pads will remain in the bridge and can be removed by prying out with the screwdriver. On other models, the pads stay intact and may be clipped to the caliper. If you have to remove the pads, do so by taking note how they were placed in the bridge and be sure you're able to put them back in the same manner they were extracted.
- Remove the rotor. If it is stuck to the hub, you may have to hit it with a large rubber mallet. Use a rubber mallet if you're not going to replace the rotor, so you don't damage the surface.
- Remove any ABS wires attached to the hub bearing assembly (if applicable) or unclip the wire and trace it to the plug. In many applications, if the ABS wire is integrated with the wheel-bearing hub assembly, a new one will come with it. If you're not sure, check the box of the new bearing and if there's an ABS wire, follow the wire until you locate the plug, unplug it and unclip it from its mounts. If ABS is present but not integrated with the bearing assembly, remove the sensor from the bearing with a ratchet and socket.
- Remove the spindle nut with the breaking bar and a spindle nut socket. Remove the washer behind the spindle nut.
- Locate the wheel-bearing assembly bolts behind the knuckle, and loosen them with the breaking bar and socket. The location of these can sometimes create a tight area to place a socket and tool on to remove them with. You may have to apply some ingenuity. Replace the socket on the ratchet to extract the bolts quickly and easier. Most hubs have three or four bolts.
- Install the slide hammer onto the lug studs and secure with tightened lug nuts. This may take several attempts and a couple of breaks in between to remove the hub bearing from the knuckle. Pay close attention to your progress and try to determine when the bearing will separate. Take note of how the backing plate is installed between the knuckle and the bearing so you can replace it in the same manner.
- Sand off the rust and corrosion around the knuckle with a fine- to medium-grade sandpaper. Move the drive-shaft spindle around to get it out of your way. Take your time when doing this and make sure it's as clean as possible.
- Place the backing plate in its original position and place the new bearing onto the knuckle. Manipulate the drive-shaft spindle splines into the center of the hub bearing. Push the bearing on as far as you can, making sure to line it up correctly if ABS lines or plugs are present.
- Replace the wheel-bearing assembly bolts. They're pretty long, so as soon as you can thread them into the new bearing, start to tighten them. Pull the bearing in by tightening the bolts a little bit at a time and then switching to the next bolt to make sure the bearing assembly does not shift in the knuckle and cause damage. Once the bearing is drawn in flush, use the breaking bar to get the bolts as tight as you can get them.
- Replace washer and spindle nut and tighten to proper torque specifications with the half-inch drive torque wrench and spindle socket.
- Replace the brakes in the same manner you extracted them. You may need to push the caliper piston in a bit with a C-clamp to get it over the rotor. Plug in the ABS lines or reattach them to the bearing, if applicable.
- Replace the tire and lug nuts, and tighten the lug nuts as tight as you can get them.
- Lower the vehicle and tighten the lug nuts in an alternate fashion with the torque wrench and socket at the correct wheel nut specifications torque setting.
- Pump the brake pedal if you had to push the caliper piston in with a C-clamp to restore hydraulic pressure to that caliper piston.
- Remove the wheel chock, release the parking brake, and go for a test drive.
| Item Specifics | |
|---|---|
| Manufacturer Part Number | 11055347 |
| Brand | ZoneMotive |
| Manufacturer Warranty | 1 Year |
| Material | steel |
| Placement on Vehicle | Left Right Front |
| Flange Shape | Triangle |
| Weight | 13.23LB |
| Bolt Circle Diameter | 5.31In. |
| Brake Pilot Diameter | 3.53In. |
| Flange Diameter | 7.13In. |
| Flange Offset | 1.95In. |
| Hub Pilot Diameter | 3.91In. |
| Wheel Pilot Diameter | 3.42In. |
| Surface Finish | Polished, Rust Protected |
| Fitment type | Direct replacement |
| Bolt Size | M14X2.0 |
| Interchange Part Number | WA515029 wheel bearings hub |
| Reference OEM number | XL3Z1104AA YL3Z1104AA YL341104AA 1L341104AA |
| Reference part number | 4.6L 5.4L 4.2L King Ranch Lariat XL XLT |
| Wheel Stud Quantity | 5 |
| Interchange Part Number | WA515029 wheel bearings hubx1 |
| Other Part Number | Fits 2002 ford F-150 4WD |
| Interchange Part Number | WA515029 wheel bearings hub |
| Reference OEM number | XL3Z1104AA YL3Z1104AA YL341104AA 1L341104AA |
| Reference part number | 4.6L 5.4L 4.2L King Ranch Lariat XL XLT |
| Reference part number | 4.6L 5.4L 4.2L King Ranch Lariat XL XLT |
Special Note: DO check the compatible chart before you paying the items, or contact us for checking the compatibilities for your vehicles / cars / trucks.
Any payment which can be accept by eBay.
2-8 working days in transit.
Product will be shipped within 2 business days after full payment is received and verified.
USPS, UPS, FedEx or DHL shipping will be provided.
Delivery time is about 2-8 business days to most of addresses.
30-Day free return provided.
Any quesiton or problem, do contact us please, we are always online to answer.
Shop Category Hot Item
Delivery
New List Item
Help & Info Payment Policy Shipping Policy Return Policy FAQ About Us |
Wheel Bearing Hub Assembly Front Fits Ford F-150 2000 2001 2002 2003 4WD W/ABS
If you want to buy pair of front bearing,pls check this picture as follow:
Specifications:
- Fits LH (Driver Side) Or RH (Passenger Side) FRONT
For the following years and models:
Packing include:
1 Pcs wheel hub bearing
1 Year Warranty
How to Install a Wheel Bearing Hub Assembly:
About Us
Special Note: DO check the compatible chart before you paying the items, or contact us for checking the compatibilities for your vehicles / cars / trucks. Payment
Any payment which can be accept by eBay. Shipping
2-8 working days in transit. Product will be shipped within 2 business days after full payment is received and verified. USPS, UPS, FedEx or DHL shipping will be provided. Delivery time is about 2-8 business days to most of addresses. Returns
30-Day free return provided. Contact Us
Any quesiton or problem, do contact us please, we are always online to answer. All right reserved. |
|||||||||||||||||||||||||||||||||||||||||||||||||||||||||||||||||||||||||||||||||||||||||||||||||||||