• Fitment:
  •   Fits Vehicles of the Following Years and Make :
  •  
  • Year Make Model 2002-2004 Honda CR-V  
  •  
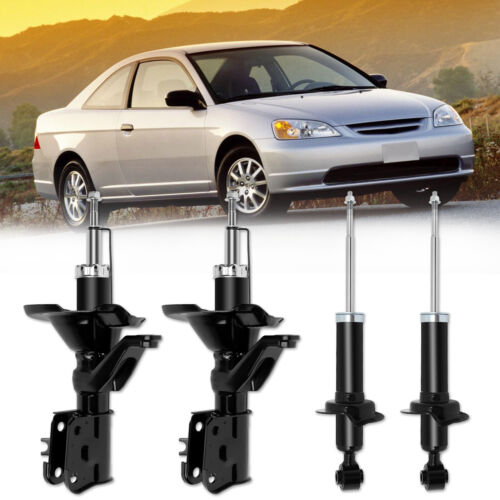
  • Front Rear Full Set Suspension Shocks Struts Fit For Honda CR-V 2002 2003 2004

    Fitment:


     Fits Vehicles of the Following Years and Make :


    Year Make Model
    2002-2004 Honda CR-V


    Description :
     
    1. Made to OE quality standards and performance.
    2.Gas-charged Twin Tube Shocks
    3.High corrosion resistance and long service life. Steel rod is mirco-polished with double chrome plate. (0.02mm (-+0.005) chrome lay on the rod surface. All rod surface finished roughness less than 0.08μm.
    4.Newer Valving technology operates in stages based on the velocity of the car.
    5.Use Teflon bonded piston seal to keep friction down and temperature cooler so that valving stays firmer.
    6.All-around welding on the spring seat.
    7.Piston seal is provided by an OE Supplier.
    8.One year warranty.


    Notes : These are guaranteed exact fit and don't require the use of a dangerous spring compressor to swap springs,

    so they are very easy to install!

    The struts/shocks are nitrogen gas charged and tuned for each specific vehicle application.

    They will greatly improve the ride, handling,and safety of your vehicle!


    Please consult the compatibility table and specifics above for the correct fitment for your Vehicle.


    ??Package Include: 4X Shocks Struts  ??Front Rear Left Right????

    We'll ship the struts separately in two pakages if the full set is over weight. Notice please!


    HOW TO INSTALL :


    Step 1: Before you lift the vehicle, loosen lug nuts one full turn.


    Step 2: Jack up vehicle and use jack stands for safety & remove the tire from the rotor.


    Step 3: (Wheel alignment is necessary after strut replacement.) Marking the position of all the bolts will help

    keep the alignment close to original and save time aligning. Use a colored pencil to mark the old strut on the bolt.


    Step 4: Use penetrating oil (such as WD40) to coat any rusted fasteners, let soak for approximately 1 hour.


    Step 5: (Optional) While waiting for oil to soak, take this time to inspect all other components that may need

    replacement (brake pads, rotors, brake hoses, ball joints, CV boots, tie rod ends, bushings, sway bars, etc).


    Step 6: Remove any brake line or wire attachments from the strut body. Do not disconnect brake lines (if possible)!

    Opening brake lines will require bleeding of the brake system.

    Use extreme caution when removing brake lines from your struts, as any damage to your brake line can result in

    expensive and time consuming repairs.


    Step 7: Remove sway bar attached to the strut assembly or control arm.


    Step 8: Remove the tie rod (only if it attached to the body of the strut, if not leave it attached to the steering knuckle).


    Step 9: Remove the strut to knuckle bolts at the bottom of the strut. On some vehicles, the brake caliper and rotor

    may need to be removed to gain access.


    Step 10: Remove the upper mounting plate bolts located in the engine or trunk compartment. Do not remove the

    center retaining nut! It is not safe to unload the spring from the assembly in this position.


    Step 11: Carefully remove the old strut assembly from the vehicle. Be very cautious not to let the strut "drop" down

    on your brake line, rotor or drum.


    Step 12: Install the new Complete Strut Assembly in the reverse order as above (steps 11-6). Using an anti-seize

    compound on all fasteners is suggested.


    Step 13: Carefully double check your work and make sure everything is tightened to manufacturers torque specifications.


    Step 14: Replace the tire the rotor and tighten to manufacturers torque specifications.


    Step 15: Slowly lower the vehicle down after removing the jack stands. Pay very close attention to any odd sounds

    when the vehicle is lowered onto the new Complete Strut Assemblies.


    Step 16: It is very important that you immediately "road test" your vehicle right away to ensure that installation was done properly.

    Listen and feel for common signs of incorrect installation while driving slowly over speed bumps, rough road or potholes.


    Seller Guarantee:


    • 100% Bran-new and Good Quality
    • Item Located: United State
    • Handling time: 3 working Day
    • 30 Days Money Back + 1 Years Warranty

    Item Specifics
    Brand xluxury-autoparts
    Manufacturer Part Number XL808645UX01
    Type Strut
    Fitment Type Direct Replacement
    Placement on Vehicle Left Right
    Manufacturer Warranty 1 Year
    Features Sealed Gas Charged Shock
    Modified Item No
    Gas Charged Shock Yes
    Interchange Part Number 331035 331036 341488
    Surface Finish Powder Coat
    OE Spec or Performance/Custom OE Spec
    Shock Absorber System Double Pipe
    Shock Absorber Type Gas
    Vintage Car Part No
    Mounting Style Screw-On
    Performance Part No
    Quantity 4Pcs
    Superseded Part Number Shock and Strut
    Universal Fitment No
    Included Hardware Mounting Hardware
    Item Length 21.100"(F),15.710"(R)
    Gross Weight (LB) 45.856
    Compressed Length 14.530"(F),11.020"(R)
    Package Dimension (in.) 22.44*22.44*9.45 (F), 21.26*11.02*5.91 (R)
    Travel Length 6.600"(F),4.690"(R)
    Part Name Shock Absorber and Strut Assembly

    Payment

    Any payment methods accepted by ebay will be acceptale.

    Shipping

    Package will be shipped out within 24 hours (after payment) if there's no problem with the shipping address, or placing wrong order, or we contacted buyer to confirm the compatibilities. 

    It will takes 2-7 days in transit, according to Different address.

    Packages will shipped out by the carriers: 

    * USPS:United States Postal Service 

    * FedEx:FedEx Express

    * UPS:United Parcel Service 

    * DHL:DHL Express

    * Other:Other carriers.

    Returns

    30-Day Free Return.

    Any problem caused by seller, we will provide a 30 days free return. 

    Contact Us

    1.To avoid you buying the wrong parts, please check the Fitment chart above before placing an order.

    2.You could choose a vehicle from the "My Garage" list. Or Enter your vehicle's details with Year / Make / Model / Trim / Engine. OrContact us for double check.

    3. We try to deliver a better online shopping experiencefor our customers. If you have any problem, please feel free to contact us.

    Picture
    Help & Info
    Payment Policy
    Shipping Policy
    Return Policy
    FAQ
    About Us
    Front Rear Full Set Suspension Shocks Struts Fit For Honda CR-V 2002 2003 2004

    Fitment:


     Fits Vehicles of the Following Years and Make :


    Year Make Model
    2002-2004 Honda CR-V


    Description :
     
    1. Made to OE quality standards and performance.
    2.Gas-charged Twin Tube Shocks
    3.High corrosion resistance and long service life. Steel rod is mirco-polished with double chrome plate. (0.02mm (-+0.005) chrome lay on the rod surface. All rod surface finished roughness less than 0.08μm.
    4.Newer Valving technology operates in stages based on the velocity of the car.
    5.Use Teflon bonded piston seal to keep friction down and temperature cooler so that valving stays firmer.
    6.All-around welding on the spring seat.
    7.Piston seal is provided by an OE Supplier.
    8.One year warranty.


    Notes : These are guaranteed exact fit and don't require the use of a dangerous spring compressor to swap springs,

    so they are very easy to install!

    The struts/shocks are nitrogen gas charged and tuned for each specific vehicle application.

    They will greatly improve the ride, handling,and safety of your vehicle!


    Please consult the compatibility table and specifics above for the correct fitment for your Vehicle.


    ??Package Include: 4X Shocks Struts  ??Front Rear Left Right????

    We'll ship the struts separately in two pakages if the full set is over weight. Notice please!


    HOW TO INSTALL :


    Step 1: Before you lift the vehicle, loosen lug nuts one full turn.


    Step 2: Jack up vehicle and use jack stands for safety & remove the tire from the rotor.


    Step 3: (Wheel alignment is necessary after strut replacement.) Marking the position of all the bolts will help

    keep the alignment close to original and save time aligning. Use a colored pencil to mark the old strut on the bolt.


    Step 4: Use penetrating oil (such as WD40) to coat any rusted fasteners, let soak for approximately 1 hour.


    Step 5: (Optional) While waiting for oil to soak, take this time to inspect all other components that may need

    replacement (brake pads, rotors, brake hoses, ball joints, CV boots, tie rod ends, bushings, sway bars, etc).


    Step 6: Remove any brake line or wire attachments from the strut body. Do not disconnect brake lines (if possible)!

    Opening brake lines will require bleeding of the brake system.

    Use extreme caution when removing brake lines from your struts, as any damage to your brake line can result in

    expensive and time consuming repairs.


    Step 7: Remove sway bar attached to the strut assembly or control arm.


    Step 8: Remove the tie rod (only if it attached to the body of the strut, if not leave it attached to the steering knuckle).


    Step 9: Remove the strut to knuckle bolts at the bottom of the strut. On some vehicles, the brake caliper and rotor

    may need to be removed to gain access.


    Step 10: Remove the upper mounting plate bolts located in the engine or trunk compartment. Do not remove the

    center retaining nut! It is not safe to unload the spring from the assembly in this position.


    Step 11: Carefully remove the old strut assembly from the vehicle. Be very cautious not to let the strut "drop" down

    on your brake line, rotor or drum.


    Step 12: Install the new Complete Strut Assembly in the reverse order as above (steps 11-6). Using an anti-seize

    compound on all fasteners is suggested.


    Step 13: Carefully double check your work and make sure everything is tightened to manufacturers torque specifications.


    Step 14: Replace the tire the rotor and tighten to manufacturers torque specifications.


    Step 15: Slowly lower the vehicle down after removing the jack stands. Pay very close attention to any odd sounds

    when the vehicle is lowered onto the new Complete Strut Assemblies.


    Step 16: It is very important that you immediately "road test" your vehicle right away to ensure that installation was done properly.

    Listen and feel for common signs of incorrect installation while driving slowly over speed bumps, rough road or potholes.


    Seller Guarantee:


    • 100% Bran-new and Good Quality
    • Item Located: United State
    • Handling time: 3 working Day
    • 30 Days Money Back + 1 Years Warranty


    Any payment methods accepted by ebay will be acceptale.

    Package will be shipped out within 24 hours (after payment) if there's no problem with the shipping address, or placing wrong order, or we contacted buyer to confirm the compatibilities. 

    It will takes 2-7 days in transit, according to Different address.

    Packages will shipped out by the carriers: 

    * USPS:United States Postal Service 

    * FedEx:FedEx Express

    * UPS:United Parcel Service 

    * DHL:DHL Express

    * Other:Other carriers.

    30-Day Free Return.

    Any problem caused by seller, we will provide a 30 days free return. 

    1.To avoid you buying the wrong parts, please check the Fitment chart above before placing an order.

    2.You could choose a vehicle from the "My Garage" list. Or Enter your vehicle's details with Year / Make / Model / Trim / Engine. OrContact us for double check.

    3. We try to deliver a better online shopping experiencefor our customers. If you have any problem, please feel free to contact us.


    All rights reserved.