|
|


Starting your engine (cont.):
FUEL GUIDE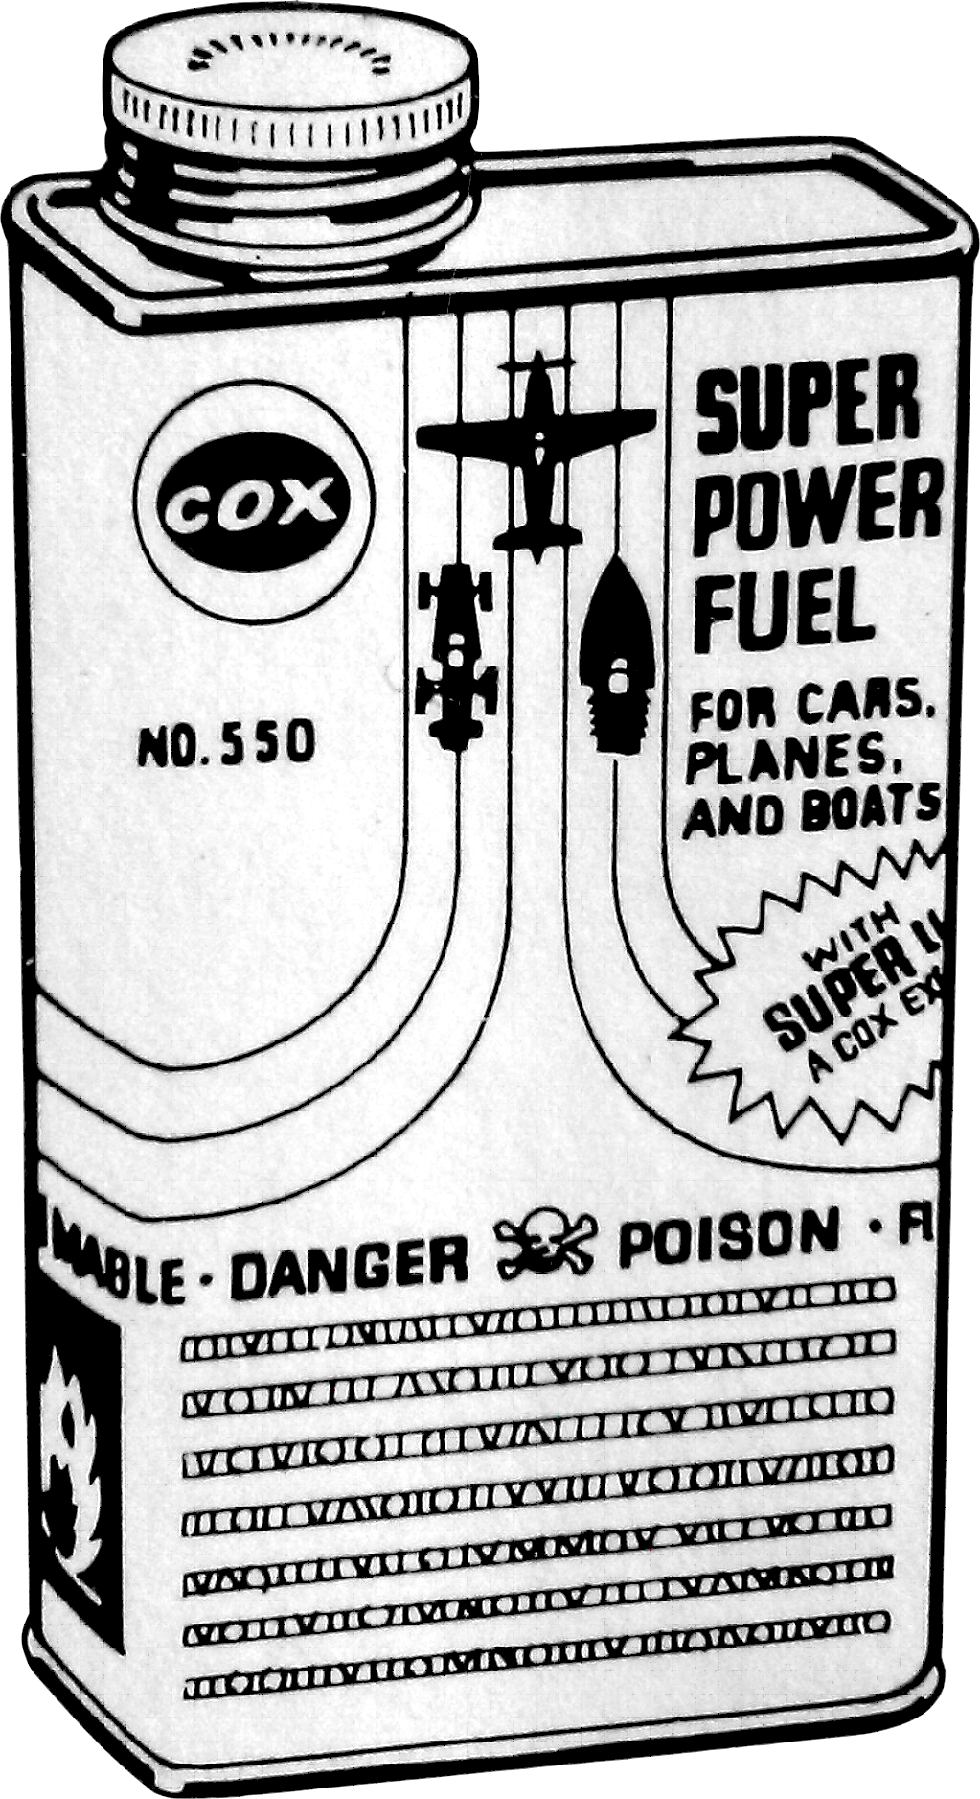 Cox
engines typically run on what is termed "½A fuel", a fuel with high nitro
content and containing some castor oil instead of synthetic oil only.
This fuel mixture is becoming increasingly difficult to obtain. Often, when
referring to "½A" in hobby shops, it will elicit blank stares. ½A fuel in
loose terms is 15-35% nitro (a.k.a. nitromethane), 20% (castor) oil and the
balance methanol (a.k.a. methyl alcohol, carbinol, wood alcohol, wood naphtha
or wood spirits). Cox
engines typically run on what is termed "½A fuel", a fuel with high nitro
content and containing some castor oil instead of synthetic oil only.
This fuel mixture is becoming increasingly difficult to obtain. Often, when
referring to "½A" in hobby shops, it will elicit blank stares. ½A fuel in
loose terms is 15-35% nitro (a.k.a. nitromethane), 20% (castor) oil and the
balance methanol (a.k.a. methyl alcohol, carbinol, wood alcohol, wood naphtha
or wood spirits).
Cox engines will run best on a fuel mix that contains 25% to 35% nitro, whereas the higher nitro content will lead to higher RPM's but also leads to higher heat and a shortened engine life. The Tee Dee series are better suited to higher nitro content, whereas the basic production engines are best run with a lower nitro content. Operating your Cox engine with less than 15% nitro content might make adjusting the needle valve somewhat quirky. The biggest challenge is finding pre-mixed fuel that contains castor oil, as most fuels sold nowadays contains synthetic oil only, which can lead to premature failure of the engine's piston ball and socket. There are some "½A" fuels on the market that contain 100% synthetic oil. DO NOT run your Cox engine on such a mixture. Cox recommends a fuel mix containing 20% castor oil. Under strict racing conditions, as little as 5% castor oil (and the balance synthetic) is required to protect the engine for it's short racing life but is not recommended for recreational flying, where longevity of engine life is desired. To be on the safe side, we recommend at least 10% castor oil and 10% synthetic oil. The upside of using a 50/50 castor/syn mix is that it will help reduce varnishing and leave less oil residue on the model. For Cox engines with diesel conversions, you don't use actual "diesel" or glow fuel. Instead you use a mix consisting of castor oil, ether and kerosene. A good diesel mix would have 25% castor oil, 40% ether and 35% kerosene (paraffin). How do I obtain pre-mixed ½A fuel? The first place you should check would be your local hobby shop. If they sell ½A fuel, ensure it contains an appropriate amount of castor oil. If they do not, ask for fuel that contains castor oil. If you cannot find fuel with castor oil, you can add your own! Simply purchase a good fuel with 25-35% nitro and low oil content. Purchase castor oil separately and add to fuel. It is recommended that you use a fuel chart or do the math to figure out how much castor oil to add to fuel. A Castor Oil Calculator is available from Cox International (must have MS Excel 2003 or later to open / use it). Can I mix my own fuel? Absolutely! Many modelers mix their own fuel. Mixing your own fuel allows you to make a custom mix for your application. Mixing fuel is quite simple and easy although finding some of the ingredients may not be as much fun. A "Google" search is likely a good place to start your search for the proper ingredients.
DIESEL ENGINE BASICS(This diesel engine guide is brought to you by Ian McQueen) A model diesel engine is a "compression ignition" engine, physically the same as a glow two-stroke engine apart from the design of the cylinder head, and we'll get to that part later. One of the facts of physics is that if a gas is compressed quickly, its temperature rises. If the compression ratio is high enough and the compression rapid enough that very little heat is lost from the gas, the temperature achieved is high enough to ignite an air-ether mixture. This ether (di-ethyl ether, once used as an anaesthetic) is a critical component of model diesel fuel because of its low ignition temperature. Typically it makes up 32% or more of the mixture. The main power ingredient is kerosene (or jet fuel, which is more highly refined). It has more energy per unit volume than ether. The ether is required to ignite it. The rest of the fuel is lubricant, usually castor oil. It is much better if there is also 1.5 - 2% of an ignition improver like the amyl/hexyl/octyl/iso-propyl nitrate. This makes starting easier, makes the engine run more smoothly, and reduces loads on internal parts by reducing the compression ratio required to run the engine. Those are the fundamentals, but they don't begin to explain the advantages of a diesel engine. I consider the biggest feature of a diesel to be its great flexibility, its ability to turn a large variety of propellers. Why this is important leads first to a discussion of propellers.
A given engine can drive a propeller of large diameter and low pitch or one of small diameter and high pitch. A large-diameter, low-pitch prop moves a large volume of air at moderate speed and provides high thrust. It is like low gear in a car: lots of pulling power, but not able to move the vehicle very fast. And a small-diameter prop turning at high speed provides a high-speed blast of a relatively small volume of air. It is like high gear: it doesn't have the thrust to get the car moving from a standstill, but can drive it to high speed once the car is moving. On a racing plane, a large, low-pitch prop would scarcely get the model
flying. On a slow-flying model, a small prop turning at very high speed
would generate very little thrust and would have difficulty getting the
model moving. For a slow-flying model, the optimum large prop will be turning at a relatively leisurely pace, say 6,000 - 11,000 rpm, while the smaller prop of a fast model will be going a zillion rpm. Converted from metric, a zillion might be 11,000 up to more than 30,000 for racing. In any case, the pitch must be high enough to move the plane at the intended speed when it is turning at the speed that the engine is able to turn it. Glow engines are usually designed to develop their power at quite high rpm, say 11,000 to 15,000 rpm or more. They are happiest with relatively low loads, in the form of props with relatively small diameters. If loaded down with a large prop, they may overheat due to pre-ignition. Here's a brief description of why. In a glow engine, the fuel will begin to burn at a fixed point on the upstroke
(with some caveats). With a suitable, relatively small, propeller, this
point will be such that the engine fires at just the right time so that
the maximum pressure is reached just at TDC. This is pre-ignition and puts a strain on all moving parts of the engine: the piston crown, piston pin, con rod, and crankpin. It can often be heard as a pinging or cackling, and the effect is that the engine will overheat. It can be seriously damaged. (Note that the fuel in a properly-operating engine "burns" very rapidly, but it is still burning. It does not "explode" or "detonate". Those words describe undesirable pre-ignition.) A diesel, on the other hand, can turn the ordinary props used on glow engines at very respectable speeds, but it can also swing larger props because the ignition timing can be varied so that the fuel begins burning at just the right point on the upstroke, just as the spark is timed precisely in an automotive engine. How is this done? A model diesel has a screw of some kind in the head. (There are a few exceptions, but they're not important.) It pushes against a contra-piston, a movable "plug" inside the top of the cylinder that forms the top of the combustion chamber. Pushing the contra-piston down with the screw decreases the volume and thus increases the CR, so the point on the piston upstroke where the required temperature is produced is lowered. This advances the timing. Conversely, turning the screw out allows the contra-piston to be pushed
farther up the cylinder when the piston rises and the trapped gas presses
against the bottom of the contra-piston. (Sometimes it sticks, but that's
one of the things that make diesels so interesting!) Raising the contra-piston
lowers the CR and retards the timing so that a larger prop can be driven
with no risk to the engine. To show the effectiveness of this control, the people at PAW once put a huge 18-6 prop on a PAW 35 engine and started it. It could turn only 3500 rpm, but it ran for five hours straight with no damage to the engine! The test was stopped just because the people wanted to go home. To vary the ignition point of a glow engine it is necessary to try different glow plugs, install or remove head shims to reduce or raise the compression ratio (in effect, a glow-engine is a glow-assisted diesel!), and play around with the percentage of nitromethane in the fuel. Compare this with merely turning the compression-adjusting screw of the diesel engine.
In addition to the greater flexibility of a diesel engine vis-à-vis glow, a diesel offers the following other advantages:
STARTING AND ADJUSTING FUEL The fuel consists of kerosene for power, ether to ignite the kerosene, lubricant, and an ignition improver. Here are some notes about the ingredients. Lubricant There have been many fuel formulas, with oil content ranging from 12% (for racing in ABC engines) to 33% (old "British" formula). Recently I saw up to 40% for breaking in the MP Jet engine, but that seems really high! In the typical diesel, with an iron (Meehanite) piston and hardened steel
cylinder, the minimum oil content recommended is 23%. It's a characteristic
for proper lubrication of those two materials. A safe bet is 25% oil for
any engine. That way there's lots of lubrication for the connecting rod.
PAW recommends 30% for break-in, and it isn't going to do any harm to run
higher oil (over 25%) all the time, but the surplus is going to go out the
exhaust and may not contribute much to lubrication beyond 25%. There is greater force on the con rod bearings of a diesel than of a glow engine, so the insurance of the castor oil is well worth the added mess from the exhaust spray. Ether Typical ether content is 32%. This assures good atomization, and also gives a safety margin for loss due to evaporation, for the ether will evaporate quickly if the container is left unsealed (especially when the air is hot). Engines will run on lower percentages; apparently 25% is no problem, and probably one can go lower yet. But at some point the fuel will not atomize as finely and power can be expected to drop. There might also be some effect on combustion, and possibly it would be necessary to increase the compression to get the fuel to ignite early enough on the upstroke. This is not a good idea, for it will impose heavier loads on the moving parts. Some fuels are even higher than 32% in ether. They will burn cooler than "standard" fuel and will produce less power, but there may be some times when this is an advantage, as with a Cox International head for a Cox engine; the lower temperature is not as likely to melt the Teflon disc that seals the top of the cylinder. This disc melts when "normal" fuel is used and the engine is tuned for full power. It is my understanding that fuel for the Cox International-converted Cox engines should have about 40% ether. Higher ether content can apparently be used if an ignition improver chemical is not available, but I have no real information on this. Ether used to be easy to obtain when it was still being used as an anaesthetic. But it is not used for that purpose any more, so there is little incentive for drug stores to carry it. And ether is also used in processing some illegal drugs, which has made it difficult for legitimate users to obtain it. Starting spray for full-size engines contains ether. One source is John Deere dealers. One freezes the container and punctures it to release the ether, but I have never done this, and these instructions are not enough to teach you how to do it safely! Ignition improver The ignition improver, like Ethyl's DII(3) (octyl nitrate), causes the ether to ignite at a lower compression ratio, and also smoothes the combustion process. Without it, a diesel has a cackly, rattly sound, and compression has to be set higher, which puts more load on the moving parts. With it, a diesel runs smoothly and purrs like a tiger. A typical formulation
is 2% for engines up to about .19 and 1.5% for larger engines.? Kerosene Kerosene or jet fuel makes up the balance. Kerosene has higher energy per volume than ether, so a higher percentage of kerosene is desirable. But this is limited by considerations of ignition and lubrication. Commercial fuel The simplest way for most modellers to obtain diesel fuel is to obtain it from one of the commercial manufacturers/suppliers. Companies that I know of that sell diesel fuel in the USA are:
The following instructions begin with starting a diesel engine, then branch to adjusting it for full power output (for a broken-in engine) and for break-in (for a new engine).
Probably the most difficult part of running a diesel engine is getting it to fire the first time. This may not seem like a particularly profound statement, but they do have to be set within a small range of adjustments to fire properly. One would think that it is only necessary to crank the compression high and it should fire. But it doesn't work that way. The engine can be just as reluctant to start if the compression is too high as it is if the compression is too low, maybe even more so. The following method of starting a diesel is my own, which I immodestly call the "McQueen Method" since I have never seen the key part described anywhere else. The key part? Whereas other starting instructions always seem to include
the words "Fill the tank" at the beginning, I emphatically say "Do not fill
the tank!!" Determine the correct starting settings by running the engine
only on a prime. Then fill the tank, get the engine to run continuously,
and adjust it for full power.? Why this way? The reason is because a diesel is easy to flood, and a flooded diesel is very difficult to start. The idea is to put a controlled amount of fuel into the engine and to start the engine on that. But if there is fuel in the tank, it is very likely to dribble into the engine and interfere with your efforts to put in that right amount of fuel.
Mounting the engine Mount the engine on a strong mount (or in a model). It is convenient if the engine can be removed from a mount without too much difficulty in case it is necessary to invert it and drain out excess fuel, though this will not be a problem if you are careful and don't flood it. And excess fuel can be cleared if you just flip the prop long enough. (Reduce the compression initially to reduce load on the innards.) Do not mount the engine inverted. Fuel system The fuel tank should be positioned as with any model engine, as close as possible to the engine and with the center line of the tank no higher than the spraybar. (Some sources say to put the top of the tank level with the spraybar. Partly this depends on the ability of the engine to draw fuel.) And, as touched on above, keep the spraybar higher than the tank (or the supply line pinched off) when the engine is not running, to keep fuel from dribbling into the engine. For flexible fuel line, use only neoprene. Silicone tubing should not be
used because it swells up in contact with diesel fuel, though you should
get by using it for a day if you are prepared to replace the tubing. Ordinary
PVC (vinyl) tubing can be used where flexibility is not needed. It will
become stiff after prolonged contact with fuel. Propeller Select a prop of suitable size from the engine manufacturer's instructions. For break-in, a "suitable size" is one of greater length and lower pitch within the mid-range of sizes suggested in the instructions (so that it will not place a heavy load on the engine). And, the heavier the prop - such as nylon, the better for greater flywheel action. Mount the prop so that the piston comes up against compression at the "ten past eight" position
The screw in the head, and thus the position of the contra-piston, are usually in the right ballpark when the manufacturer packages the engine. You did resist the temptation to turn that little screw, didn't you? PAW test runs every engine to make sure that it will start. Other manufacturers might, also. If it has been moved from the initial position, try to remember where the screw was and return it to that position. Grasp the prop and try turning the engine over. The engine should turn over freely, though compression should be good. If it feels difficult to turn over TDC, compression may be too high. Back the compression screw out at least a quarter turn (it can be more if "little fingers" have been playing with the comp screw) and flip the prop. This should push the contra-piston up, and the resistance due to compression should be reduced. If the engine turns over freely, it should be in the ballpark. If the engine turns over very easily, it is possible that the compression has been set too low. It is just as well to do nothing at this point, but keep in mind that it may be necessary to increase the compression later. As noted earlier, starting is not easier when compression is too high. It seems to make the engine actually harder to start. Often the engine may be under-compressed but a really hard flip will get it to fire anyway. It won't run properly, but it will still show some life. These uncertainties are what make diesels so much fun! Throttle setting Set the carb wide open. Priming Obtain a small squeeze bottle that you can fill with fuel and then use to measure out fuel drop-by-drop. This ability to measure drops accurately is very important to avoid flooding. I always prime an engine through the venturi or carburetor, not into the cylinder. Some modellers are successful with prime against the side of the raised piston. But if there's a muffler this becomes impossible anyway. Note that putting even a small amount of fuel into the cylinder decreases the volume, thereby raising the compression ratio. If the CR is just right with the prime, what happens when the fuel burns? The volume decreases, so does the CR, and the engine will likely stop. Or, if the CR is just right for running, the extra volume of fuel may be enough to raise the CR beyond the point where the engine will fire. A prime into the intake allows the fuel to be vaporized and carried into the cylinder in the same way as when the engine is running normally. A correct prime is literally only a couple of drops. Literally! For small engines, .06 and smaller, it should be a single drop, or even a partial drop into the venturi. (Make a drip on the end of the tube and then touch it to the venturi to make it drop into the intake.) For one over, say, .19, it could be two drops and maybe three for a big engine. But don't go over two drops at first. That should be enough to get the engine to fire and run briefly. Putting the right, small, amount of fuel into the engine is the single most important part of getting your engine running!
Prime the engine as just described. Hold the prop in your hand and turn the engine over slowly. This is to ensure that the engine is turning freely and that the dreaded hydraulic lock has not occurred. Bring the prop up against compression and then flip it as hard and as quickly as you can. A sharp snap is the key to good starting. If you are really lucky, the engine will start and run for about a second
with a good burst of power. This is the optimum response and your target
with this exercise. My engines usually do not fire until the second or third flip, so don't be discouraged if you are not successful on the first flip. Repeat the hard flip, several times if necessary. The following responses are possible:
Repeat these actions until the engine fires and runs reliably with a good burst of power; then proceed to "RUNNING AND ADJUSTING THE ENGINE". Flooding If the engine does not start after several tries of these instructions, it may be flooded. Full instructions for clearing a flooded engine are given at the end. Clearing a flooded engine is a general pain, and the fiddling necessary to clear it can get aggravating. Try to avoid flooding it. RUNNING AND ADJUSTING THE ENGINE At this point the engine has run out the prime with a good burst of power.
Make a note of the position of the comp screw. (I make a scratch on the
head to match a mark or feature on the screw.) That position is your starting
point (unavoidable pun) in future for a prop of that size. In colder weather, you may have to turn the screw in slightly from that point; likewise, if you later fit a prop of less diameter and/or pitch (reduced load). And you may have to back the screw out slightly in hot weather or if you fit a prop of larger diameter and/or pitch (increased load). At this point you are ready to run the engine. Needle valve and throttle positions Needle valve: The instructions with the engine should give an indication of a suitable starting position for the needle valve. For an unfamiliar engine being run for the first time, especially for break-in, I usually open the needle valve three to five turns from fully closed. An alternative method used by diesel expert David Larkin is to start with the needle valve open only about half a turn and to open it a quarter turn with each unsuccessful attempt to keep the engine running, but the engine might then run at quite high speed when it catches, and this can be undesirable for an un-run engine.) Throttle: The throttle should be wide open. (With experience you can start at reduced settings; for engines converted from glow with a Cox International head, set the throttle about half-open.) Filling the tank Fill the tank. Be sure that your fuel is fresh. If too much ether has evaporated from the fuel, you will be wasting your time! While filling the tank, clamp off or disconnect the fuel line to the engine so that no fuel can leak into the engine. And, when starting the engine, either pinch off the fuel line with a finger or hold the nose of the model high (if it's a small-enough model) so that gravity will keep fuel from leaking into the engine. When the engine fires, release the line or return the nose to horizontal. The engine should run long enough on the prime to draw in fuel and keep running. Usually there is no need to draw fuel up to the spraybar beforehand. Fuel
will usually be drawn to the engine when it starts. Starting the engine With the fuel line pinched against the engine or model with a finger (or the nose held high), prime the engine and flip it the same way that you did successfully above. As soon as the engine fires, remove your finger from the fuel line (or bring the nose to or below the horizontal). Fuel will usually be drawn to the engine and the engine will keep running. If the engine doesn't keep running, immediately clamp the fuel line (or lift the nose), open the needle valve 1/4 to 1/2 turn and repeat. When you get the engine to keep running, congratulations! You are well on the way now! And if you are using the method of opening the needle valve in steps from closed and if the engine doesn't keep running after the prop has been flipped several times, immediately clamp the fuel line (or lift the nose), open the needle valve 1/4 to 1/2 turn, prime, and flip again. Repeat as necessary. Adjusting the engine At this point the engine is running and needs to be adjusted. Instructions are given first for starting and setting an engine that has already been broken in. Instructions for a new engine are given later. The compression screw and needle valve settings interact with each other. The main adjustment is the compression screw. But when the CR has been set properly, the next step may be to lean the fuel mixture more. That will make the engine run hotter, which advances the ignition point, and that in turn may require reducing the CR to retard timing slightly. The following should enable you to adjust the right one at the right time and get the engine adjusted correctly. This may seem daunting the first time, but it becomes instinctive quickly when you understand why you are making an adjustment. I'd like to be able to post a flowchart at this point, for it simplifies the rest of the instructions. But I can't, so just follow the words. Let the engine run for half a minute to warm up, then go through the following questions and actions. Is it running softly, misfiring, skipping, loping, etc? If so, CR is too
low. Turn the comp screw in 1/8 turn.? Alternatively: Is it running harshly, sounding laboured, rattly, cackly? If so, turn the comp screw out 1/8 turn. Repeat these evaluations and adjustments until the engine is running smoothly then continue to adjusting the needle valve. Note: We got to this point by gradually adjusting the needle valve until the engine would keep running, so it should be in the ballpark of the correct setting. Is the engine exhaust very oily? Is the engine four-stroking? If so, it is running too rich. Close the needle valve 1/8 to 1/4 turn, allow a few seconds for the change to take effect, and check again. Repeat this check until the engine is "singing" at a good speed. When the engine is tuned for nearly full power, it will heat up and this advances the ignition. Has the engine sound become laboured, harsh, rattly, or cackly? If so, reduce the CR 1/8 to 1/4 turn and check the sound again. Continue to close the needle valve in small steps. If the engine speeds up, you are going in the right direction. Repeat the procedure. If it begins to misfire, it is probably too lean. Open the needle valve enough to restore smooth operation. If misfiring occurs, the compression may be set too low. Turn the comp screw in 1/8 to 1/4 turn. If the engine speeds up, you are going in the right direction. If the engine sound becomes laboured and harsh, back the comp screw out to the former setting or even beyond. This procedure will have you close to the full power output. If the engine is in a model, try flying it.
Once the model is released and it accelerates, it is possible that the engine will start to misfire, especially if the engine is fitted with a large, high-load prop. Do not try to fly if it is misfiring. It may not be developing enough power. The needle valve may be too lean, and probably the CR is a little bit too low. (As the plane moves forward, the load on the prop is reduced and the engine can turn faster, needing more fuel. And the ignition point may need to be advanced a little.) Turn the comp screw in about 1/16 turn and open the needle valve a little. Try again. Repeat the adjustments as required. In general it will probably be necessary to richen the mixture slightly
and increase the compression slightly from the initial settings to develop
maximum power in the air. Miscellaneous notes You do not have to worry about a lean setting damaging a diesel the way it would a glow engine. If a diesel is set too lean it will misfire or simply stop. Once you have become familiar with your engine, particularly if it is .19 or larger, you may be able to prime the engine by choking the inlet and turning the prop enough to draw fuel to the inlet. But this can be tricky, for there is the risk of flooding, especially for small engines. Diesels run cool and the exhaust is much cooler than glow-engine exhaust. Except when the engine is running very rich, the exhaust has a color. With a light load, the exhaust will be a light tan. But the more heavily it is loaded with a large prop, the more the exhaust will tend toward black. Hence the usefulness of the tubing to keep exhaust oil off the model. (Minimize the amount of this exhaust that gets onto your clothes, for it has a distinctive aroma that not everyone appreciates! Especially wives.) BREAK-IN The instructions with your engine will probably cover this, but here are a few tips anyway. Iron-steel engine: The procedure is to run the engine for a couple of minutes, stop it and let it cool, then run it again. The engine is initially run in a very rich four-stroke, with just enough compression to keep it running smoothly. I build up about 20 minutes at the richest setting, then close the needle valve 1/4 turn for each successive run until the engine is beginning to break into two-stroking. I give it short bursts of moderate-speed two-stroking, again with just enough compression for smooth running, followed by richening it again to keep the engine from running hot too soon. This two-stroking is gradually increased in duration and maximum speed. When the engine (any engine) is manufactured, the surfaces of the piston
and cylinder are like microscopic mountains facing each other. The slow
break-in allows removing the tips of the peaks an atom or two at a time
instead of gouging out chunks of metal. The finished product is a pair of
smoothly polished surfaces to run against each other. The reason for slow
running and not letting the engine run hot at first is to prevent metal
expansion that would push the peaks into hard contact with each other so
they break. ABC engine: The procedure is completely different for ABC engines. The principle here is to get the engine reasonably hot as quickly as possible, for the fit between cylinder and piston is usually very tight at TDC and one wants to expand the top of the cylinder enough to provide the normal running clearance. One should use a relatively small propeller so the engine can turn freely and quickly find optimal CR and needle valve settings to run relatively rich at high speed. (K&B, in their instructions for breaking in a glow 6.5RIRE ABC pylon engine recommended a prop cut down so the engine would four-stroke at.....20,000 rpm! Use this information for guidance.) TROUBLESHOOTING Clearing flooding You will flood an engine at some time. Here are some tips on clearing it. They are based on an engine in a model so it can be inverted easily. If the engine is in a test stand, there are ways to clear flooding, but removing the engine for draining remains an option. Block the fuel line. Invert the engine and drain fuel out of the intake and the exhaust. Rock the prop back and forth several times to ensure that the ports open. Turn the engine upright, back off the comp screw 1/2 to 1 full turn. Hold the prop with your hand and turn it over against compression. If it turns easily, continue. However, if there is resistance, keep backing off the screw until it will turn freely. Begin flipping the prop. The engine may start at some time. This will either clear out all the fuel and the engine will run and then come to a soft stop. Or it could draw up a slug of liquid fuel if the engine was really badly flooded. In this case the engine could stop abruptly. If this happens, drain out any fuel possible, reduce the compression more, and flip again. Eventually the excess fuel will be cleared out, compression will again feel soft, and you will need to increase the compression a little at a time. When the engine is somewhere around the normal starting setting, follow the starting procedure from the beginning. This business of clearing a flooded engine is a general pain, and the fiddling
necessary to clear it can get aggravating. If you are careful not to flood
the engine you should be able to avoid this monkey-foolery completely. But
some time your engine is going to get flooded and you have to know how to
clear the problem. Poor compression The engine must have good compression if it is to start easily. There are ways around poor compression, and I have had to use them with several engines converted to diesel operation. This is not a reflection on the heads, but on the engines. My problems came with one O.S. 25FSR and all three of my 10FSR engines. All of the 10FSRs had poor compression from new, as did a replacement piston-sleeve set that I put into a 25 engine worn by fine dust at our flying field. I don't know if O.S. was making them so loose that users could not seize them up with lean runs as glow engines, but the 10s were so loose that they were very difficult to start even as glow engines. If your engine has poor compression, it is better to repair it (new internal parts). However, there are ways around the problem. If you have an electric starter, you can try using it, but very carefully. If the CR is too high, or if hydraulic lock occurs, you can quickly bend a con rod. Be sure that the CR is a little on the low side, and be sure that there is no fuel in the engine (not flooded). Set the throttle to the maximum and the needle valve out enough turns for running. Then apply the starter to the prop, as lightly as possible so the rubber cone can slip if the engine resists turning over. If the engine does not turn over easily, stop immediately and reduce the CR. Also check for excessive fuel inside the engine. I could always start the 10FSRs quickly with a starter. If you don't have a starter, set the CR and needle valve to approximately the running settings. But this time you have to get just enough liquid fuel into the crankcase that you can invert the engine and have liquid drain around the piston and seal it. Then turn it right-side-up and immediately begin flipping. (Don't use a starter this time!) With luck the fuel will give enough compression seal to get it going. Sometimes I have had to do the flipping inverted and then right the model when the engine fired, but this was with small models that I could hold in one hand. If you have a new engine you should never need to use these emergency methods. ENGINE TROUBLESHOOTING CHART
CARE & MAINTENANCE GUIDE
Before starting:If you are starting a brand new engine that has never been used before, make sure you have read through the original engine manual or the generic Engine Operation Guide available from Cox International, if you do not have the original engine manual. From Cox International is also available a Fuel Guide as well as a Troubleshooting Chart. If the engine has been boxed up and unused for a decade or longer, there is a good chance the oil applied at the factory has dried or gummed up. Just place a few drops of fresh fuel in the exhaust port and flip the engine over several times. Make sure you mount the engine on your model, wood board or other secure test stand. Never hold the engine in your hand or in a vise. Install a propeller of appropriate size; a prop ranging in the size of 5x3 to 6x4 should work fine for a .049 engine, for instance. Although some Cox engine manuals state that no break in is necessary, we strongly recommend you do so. Follow regular starting procedures according to your manual or the generic Engine Operation Guide but run the engine one full tank on a rich mixture. Let the engine cool off and repeat with a slightly leaner mixture. Repeat once more at almost full RPM and your engine is set and ready to be used! If you are starting a used engine that was not originally yours such as
one purchased somewhere or given to you someone else, you won't exactly
know how that engine was cared for. Just because the engine is in cosmetically
good condition, doesn't mean it is in perfect operating condition. That
could be the other way around as well; an engine that looks beat up may
run like it's new. Remember, the engine may have been sold by someone who
did not know what they had, so expect it to not be exactly as described.
Chances are, you didn't get the original engine manual for your engine.
You can either use a manual created for your engine or the Engine Operation
Guide from Cox International, where you will also find a link to download
most original Cox engine manuals. If you are starting an engine that has been stored improperly, such as in the bottom of a dirty toolbox, make sure you carefully disassemble the engine completely and soak it in isopropyl alcohol or fresh fuel for a few hours or overnight. Once you remove it from the solution you soaked it in, use paper towels to wipe all the parts clean. You should not see any specks of dirt on any part of the engine (especially internal parts). Please make note that there is a chance the engine could have some corrosion; corrosion does not wipe off like dirt. A small amount of outer surface corrosion usually doesn't affect the performance of the engine, but if the engine is heavily corroded or corrosion has formed on the inside of the engine, parts may need to be replaced. If the cylinder appears to have a dark brown deposit or "varnish" on the inside, you will need to use a very fine (000 grade) steel wool to scour the deposit away. Once the engine is clean, reassemble it and you are ready to go. Please make note that you may need to replace the crankcase and venturi gaskets as they may have been damaged while you were taking the engine apart. If the engine is seized or stuck, do not forcefully turn it over! Forcing anything on these engines could cause serious damage to a point where parts will need to be replaced. To free an engine up, try soaking the entire engine in isopropyl alcohol or fresh fuel for a few hours or overnight. If it is still seized, you may have to heat the cylinder and crankcase with a hairdryer. Once hot, you should be able to slowly turn the engine over. If the engine is then still seized and gummed, there are other issues besides dried oil and more action will be needed to free it up. After running your engine After you are done with your engine, steps need to be taken to ensure quick and easy starting the next time you use it. Make sure you run all the fuel out of the tank or empty the tank before storing. After the last run, oil the engine with "CoxLube", available from Cox International, or other high-end oil. If the engine is removed from the model or test stand, after oiling, wrap the engine in a cloth or paper towel and place it in a plastic Ziploc bag. If the engine is still on the model, wipe the engine down, oil it, wrap it in a cloth or paper towel and then place a plastic Ziploc bag over the engine. If you have had a hard landing where the engine may have gotten dirt in it, remove the engine, take it apart and soak it in isopropyl alcohol or fresh fuel. After a few hours, wipe the engine down and carefully reassemble it. Remember, running a dirty engine could destroy it in just 2-3 minutes! If the engine has made contact with water, take it apart, soak it in isopropyl alcohol or fresh fuel, reassemble and then oil the engine. This is very important especially if the engine has made contact with salt water. Salt water will rust and corrode your engine in a very short amount of time.
|


 You
will need:
You
will need: