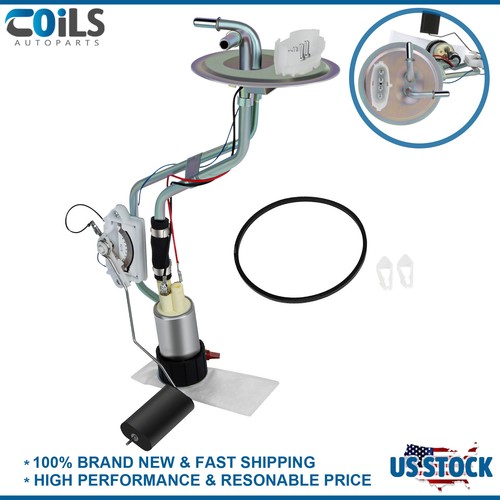
Product Description
Seamless replacement - this headlight assembly was specifically designed to look and function like the original headlight on specific vehicles
Excellent value - original equipment quality at a lower price
Durable materials - rigid plastic protects against weather and road conditions
Easy installation - built to match the exact original dimensions for proper fit
Description:
1.100% Brand New
2.Fitment Type:Direct Replacement
3.Professional Installation is Highly Recommended.
4.Installation Instruction is NOT Included.
5.100% Brand new in box!
6.Made by an approved and certified manufacturer to ensure quality and fitment.
7.Bulbs are not included. Please apply stock bulbs for installation. Direct replacement
Before you begin to adjust the light, make sure check the alignment of your lights first. Park the vehicle about 10 to 25 feet from the wall with the lights aimed at the wall. The centerlines of the headlights should not be any higher than 3.5 feet above the ground.
1.Undo the screws, clips, or retainer springs that hold the headlight in place.
2.Disconnect the wiring from the assembly.
3.Detach the headlight from the vehicle to replace it with a new one.
4.Fit in the new headlight assembly.
5.Fix the new headlight into place and make sure that the screws, clips, or retainer springs are sealed.
6.Reconnect the wiring that was unplugged from the assembly.
7.Put back the grille and other components that you removed. Seal them back into place.
8.Test the new assembly.
Tips
Condensation DOES NOT Mean A Product Problem
It's normal that the condensation appears inside the headlights because of temperature differences, air pressure, etc, thus it does not mean headlight malfunction.
How to Remove Temporary Condensation
Way 1. Check if the vents are blocked and switch on the low beam light for about 20 mins
Way 2. Take the headlight bulb out and drive out moistur
Way 3. Put a silica gel packet in the housing to soak up moisture