Features:
- Super fast handling time.
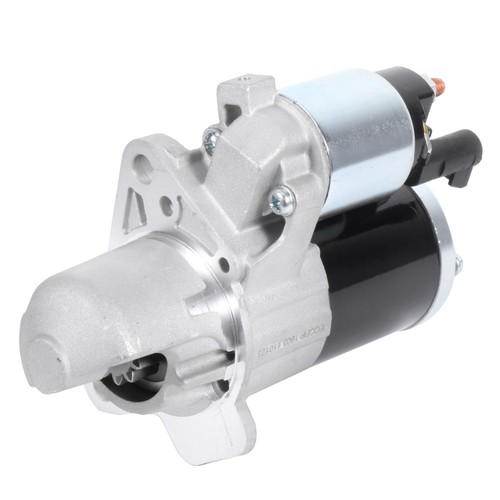
- Check the connection in the pictures.
- Built to strict quality control standards.
- 100% tested for reliability and performance.
- Fast & Free USPS Shipping.
- Top performance for long service life.
- Fit and Quality Guaranteed.
- Ensures product service, quality, and long-lasting durability.
- Brand New Manufactured with New Premium Quality Components.
- Heavy duty.
- Maximum reliability.
Notice:
* Professional installation is recommended (No Instruction Included)
* For any needs please contact us
Item Details:
- Connector Gender:Female
- Terminal Gender:Male
- Terminal Type:Blade
- Connector Shape:Rectangular
- Connector Quantity:1
- Fitment Type:Direct Replacement
- Waranty:1 year
- Interchange Part Number:CKP2032 56028136AC 56028136AB 56028136, 282810290 56028666AA 56028666AB 5602866AA 5S1730
Fit For:
(For reference only, it may fit a lot of more models, please check your part number beFore purchasing.)
- Chrysler Aspen 2007-2009 4.7L 285Cu. In. V8 FLEX SOHC Naturally Aspirated
- Chrysler Aspen 2007-2008 4.7L 285Cu. In. V8 GAS SOHC Naturally Aspirated
- Dodge Durango 2000-2001 4.7L 287Cu. In. V8 GAS SOHC Naturally Aspirated
- Dodge Dakota 2000-2001 4.7L 287Cu. In. V8 GAS SOHC Naturally Aspirated
- Dodge Durango 2001-2008 4.7L 285Cu. In. V8 GAS SOHC Naturally Aspirated
- Dodge Ram 1500 2002-2004 4.7L 287Cu. In. V8 GAS SOHC Naturally Aspirated
- Dodge Dakota 2002-2008 4.7L 285Cu. In. V8 GAS SOHC Naturally Aspirated
- Dodge Ram 1500 2003-2009 4.7L 285Cu. In. V8 GAS SOHC Naturally Aspirated
- Dodge Ram 1500 2004 4.7L 287Cu. In. V8 FLEX SOHC Naturally Aspirated
- Dodge Ram 1500 2005-2010 4.7L 285Cu. In. V8 FLEX SOHC Naturally Aspirated
- Dodge Durango 2006-2009 4.7L 285Cu. In. V8 FLEX SOHC Naturally Aspirated
- Dodge Dakota 2007-2010 4.7L 285Cu. In. V8 FLEX SOHC Naturally Aspirated
- Jeep Grand Cherokee 1999-2002 4.7L 4701CC 287Cu. In. V8 GAS SOHC Naturally Aspirated
- Jeep Grand Cherokee 1999-2001 4.7L 287Cu. In. V8 GAS SOHC Naturally Aspirated
- Jeep Grand Cherokee 2002-2008 4.7L 285Cu. In. V8 GAS SOHC Naturally Aspirated
- Jeep Commander 2006-2009 4.7L 285Cu. In. V8 GAS SOHC Naturally Aspirated
- Jeep Commander 2007-2009 4.7L 285Cu. In. V8 FLEX SOHC Naturally Aspirated
- Jeep Grand Cherokee 2007 4.7L 4701CC 287Cu. In. V8 GAS OHV Naturally Aspirated
- Jeep Grand Cherokee 2007-2009 4.7L 285Cu. In. V8 FLEX SOHC Naturally Aspirated
- Mitsubishi Raider 2006-2007 4.7L 285Cu. In. V8 GAS SOHC Naturally Aspirated
- Ram 1500 2011-2013 4.7L 285Cu. In. V8 FLEX SOHC Naturally Aspirated
- Ram Dakota 2011 4.7L 285Cu. In. V8 FLEX SOHC Naturally Aspirated
?
Package Included:
- 4 x Crankshaft Position Sensor

How to Replace Crankshaft Position Sensor
1. Disconnect the Battery
Anytime you are working with the inner workings of the engine its a good idea to disconnect the battery to avoid a short circuit to the car's electrical system. For hybrid vehicles also remove the disarm plug for the main battery pack. Check your owner's manual for the location.
2. Clear Access to the Sensor
This particular crank sensor is behind the starter motor which must be removed to gain access to the sensor.
3. Inspect the Sensor Location
This sensor is a little tough to see because of the transmission cooling lines but is it in the side of the block with the electrical connector attached. If the crankshaft angle sensor is oily now is a good time to use a small amount of carburetor cleaner to remove the oil to get a clean start on the job.
4. Release the Electrical Connector
An electrical connector will be held to the sensor using a plastic clip which you much push down or pull outward to release. Once this is done gentle wiggle the connector loose from the sensor. Sometimes this connector can be a little stuck due to the weather pack seal which helps keep water out which will cause corrosion at the sensor terminals. Once the connector is removed check it for rust and clean or replace the pigtail if needed. This problem alone will cause the engine to stall.
5. Remove the Sensor Mount Bolt
Most crankshaft sensors will have just one mount bolt which will typically be a 10mm bolt. Use a small wrench or socket to remove the bolt by turning it counterclockwise and place to the side for safe keeping.
6. Remove the Sensor
Removing the crank sensor can be a little difficult because they have a long stem and can get stuck in the block. Use a small pick or standard screwdriver to wedge under the sensor mounting tab to pry it loose. Be careful not to apply to much pressure because these sensors have been known to break leaving a part of the sensor inside the block. When this happens sometimes you will have the option of pushing the broken piece inward so it falls into the oil pan where it will stay or you can remove the oil pan to remove the broken piece.Once the sensor is loose firmly grasp it and with a twisting motion pull it from the engine block. There will be a sealing O ring on the sensor with will need to be replaced with the new sensor. Most new sensors come with a new O ring.
7. Match the New Crankshaft Sensor
Wipe off any oil the old sensor has on it so you can clearly see any design changes the new sensor might have. Slight design changes are common when installing new sensors such as mounting tabs. One thing that can be different is the length of the sensor stem because if the stem is too long it will contact the crankshaft and if it is too short it will not read correctly.
8. Installing the New Crank Position Sensor
Before installing the new sensor use a shop towel to clean the position sensor port hole to ensure a proper seal to the new sensor O ring. Motor oil will be present at this port so do not spray carburetor cleaner inside the port. You can spray cleaner on the shop towel to aid the cleaning process.
Position the new crank sensor squarely into the sensor port hole and firmly push it into place while aligning the mounting plate hole to the threaded bolt hole in the block. Then insert the mounting bolt and thread it in by hand by turning it clockwise to avoid cross threading. Use a small amount of clean engine oil or WD40 to lubricate the O ring seal to avoid damage to the seal which will cause an oil leak. After the sensor has been installed thread the mounting bolt into place and tighten to about 2-3 foot pounds.
Push the electrical connector into place while listening for a click telling you the connector is successfully installed and ready for operation.
9. Reconnect the Battery
Remove the car off of the jack stands and reconnect negative battery cable.