

Features:
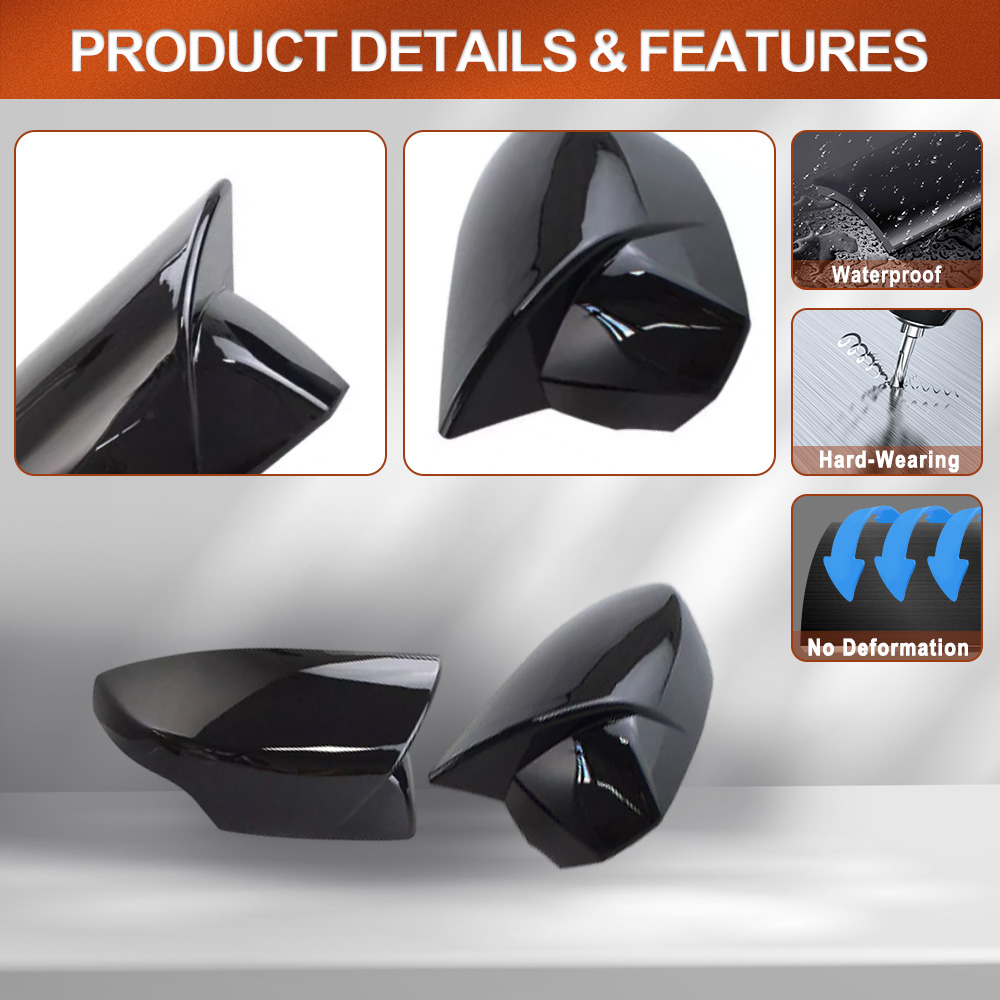
Streamlined Mirror Safeguard: Designed to fit seamlessly over the factory rearview mirror, this mirror cover enhances your vehicle's exterior while shielding the pristine mirror casing from light impacts and environmental elements
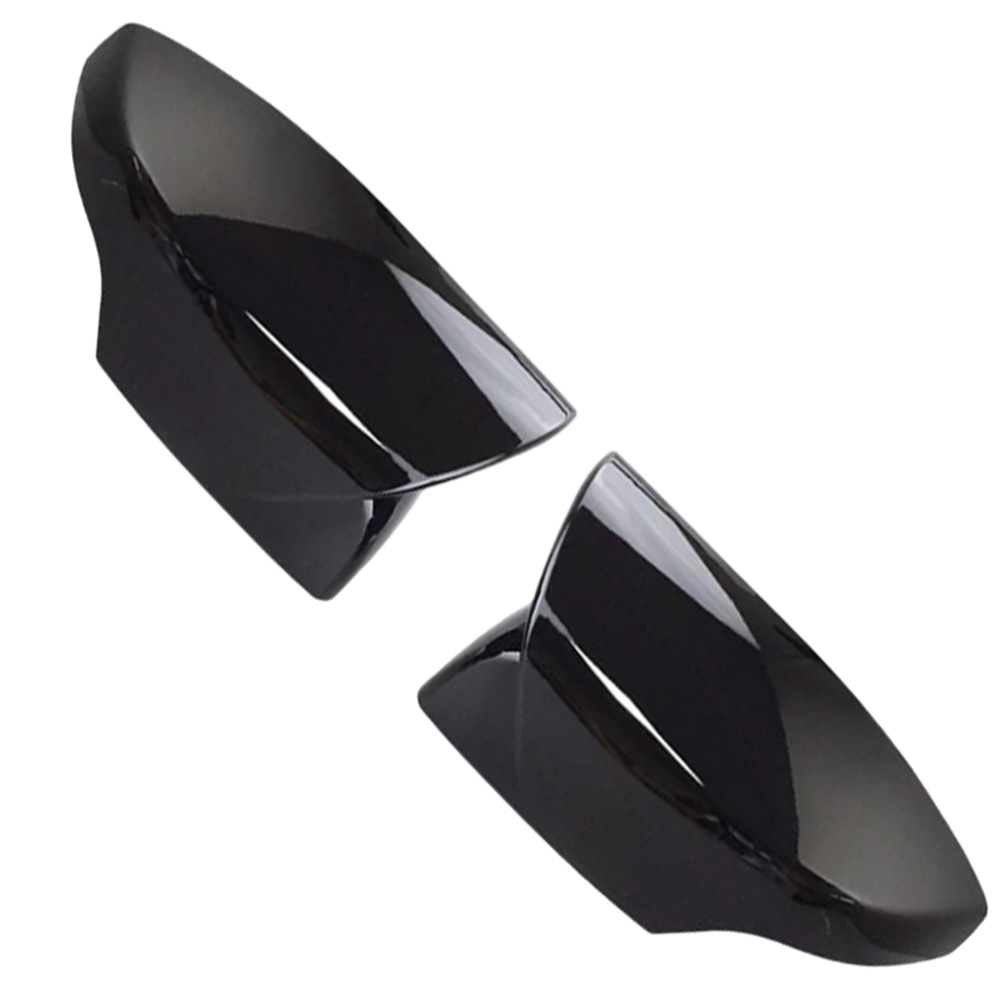
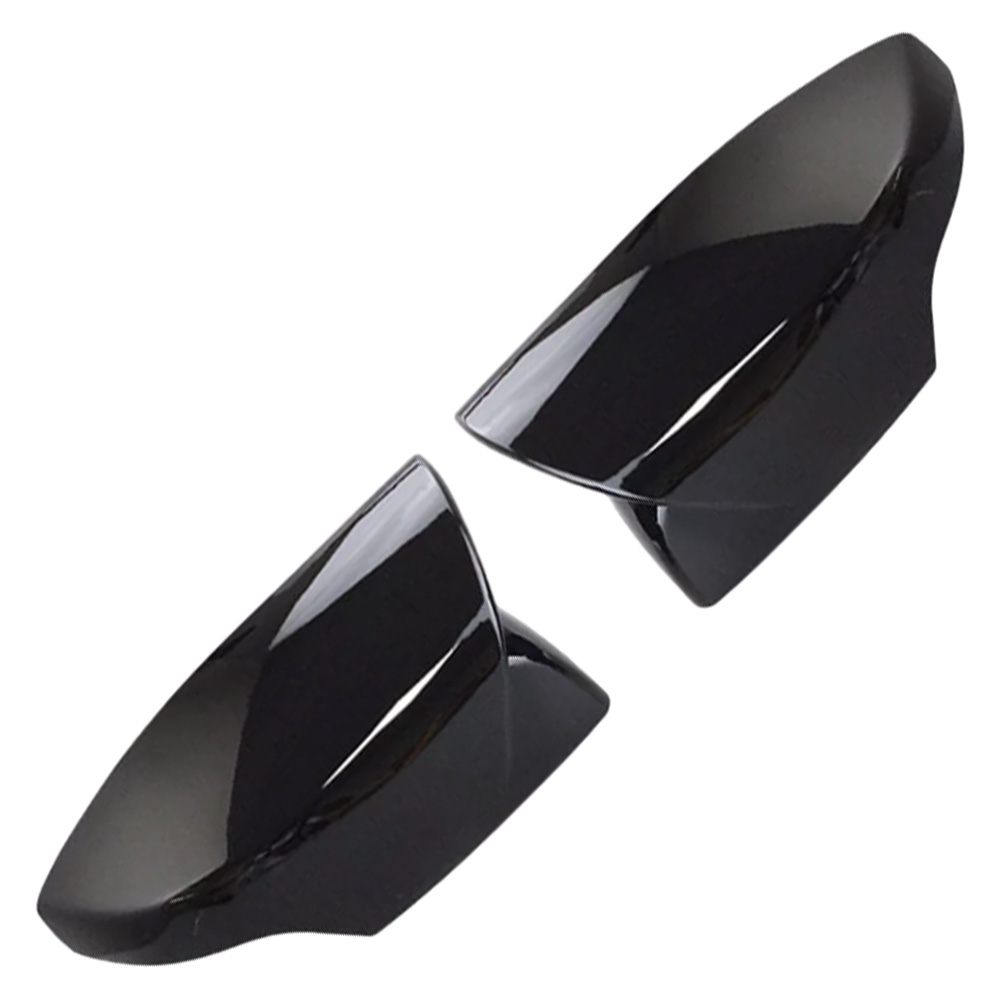
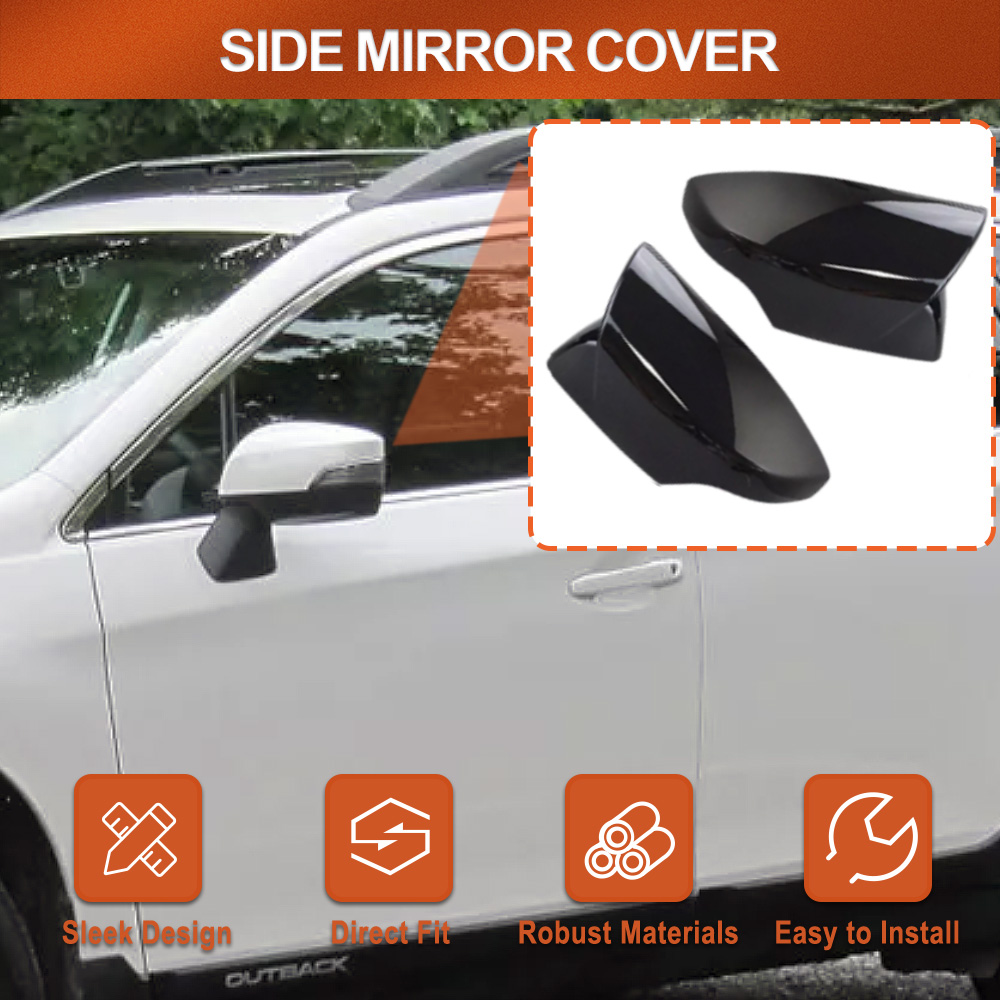
Design for a Sporty Look: The rearview mirror cover is designed with an ox horn shape, this unique contour enhances the sporty character of your car, while features a sporty glossy black , both options enhance your vehicle's exterior
Tough ABS Construction: Made from quality ABS material, this mirror cap offers long-term performance against exposure to heat, sunlight, and minor abrasions. The sturdy construction ensures that it retains its shape and finish over time
Effortless Installation with Adhesive Backing: No drilling or modifications are required for installation. Equipped with a self-adhesive backing, this mirror cover securely attaches in place, providing a snug and stable fit
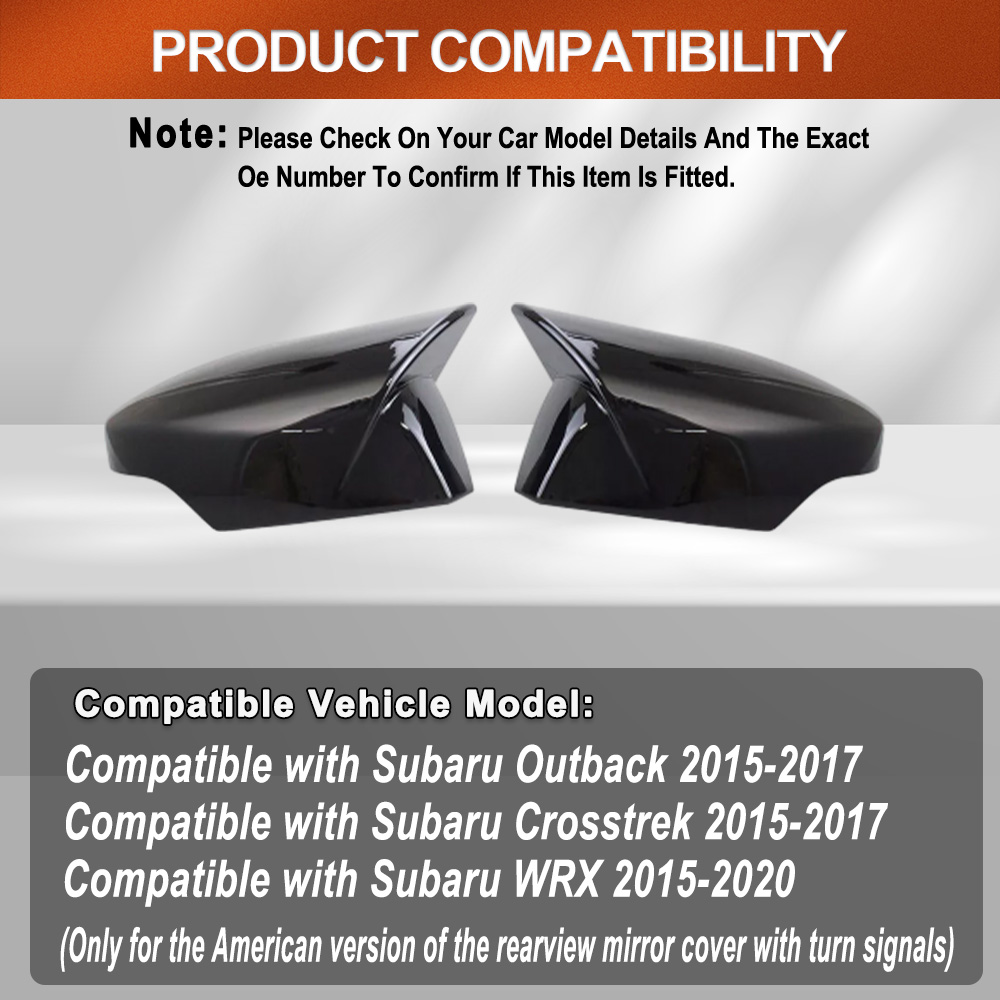
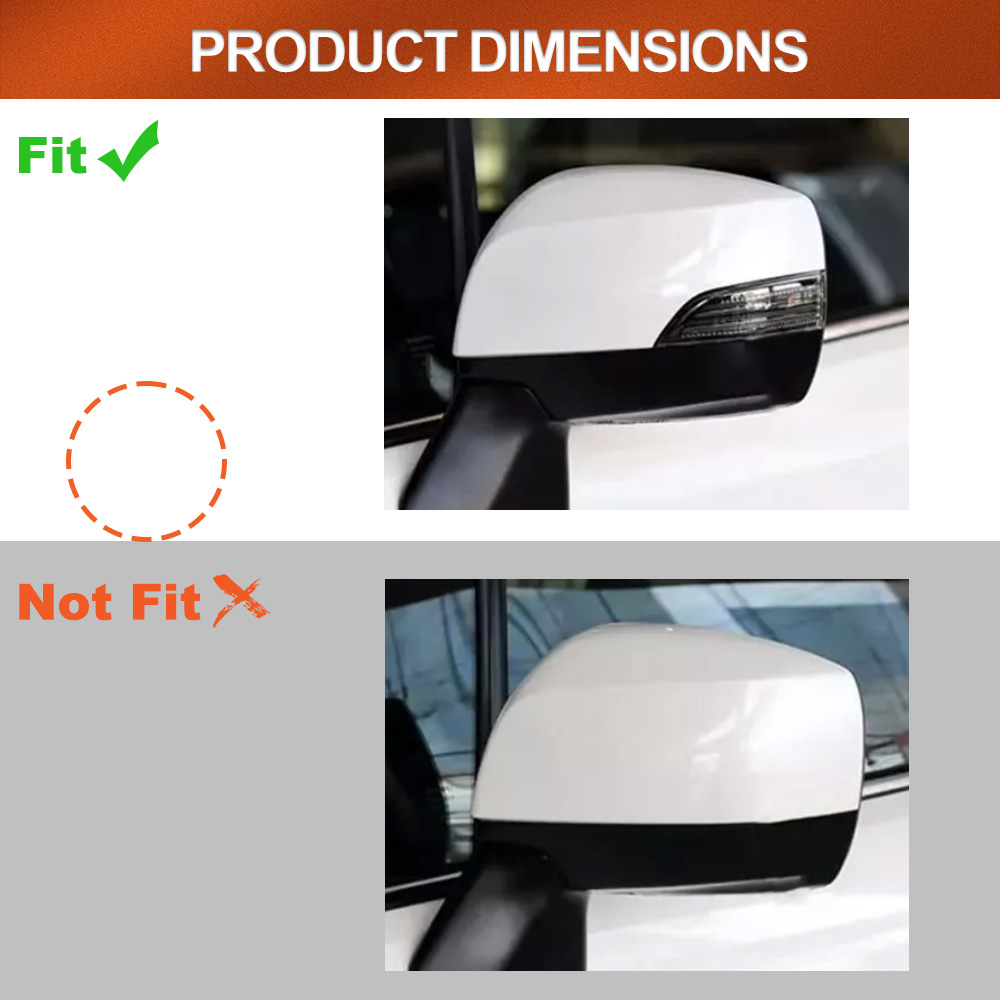
Compatibility: This mirror cover is engineered for models equipped with turn signal indicators, ensuring a tailored fit for compatible with Subaru Outback 2015-2017, compatible with Subaru Crosstrek 2015-2017, and compatible with Subaru WRX 2015-2020 (Note: Only fit for prestine mirror cover with turn signal US version, Left Hand Drive Models only. Please check on your car model details to confirm if this item is fitted)
Specifications:
Product Name: Rearview Mirror Cover Trim
Material: ABS
Placement on Vehicle: Left / Right
Color: Glossy Black (Actual pattern may be different from the pictures due to the different shooting equipment)
Fitment:(American Version, Left Hand Drive Models Only)
Compatible with Subaru Outback 2015-2017
Compatible with Subaru Crosstrek 2015-2017
Compatible with Subaru WRX 2015-2020
(Note: Only fit for prestine mirror cover with turn signal US version. Please check on your car model details to confirm if this item is fitted)
Package Included:
2 x Rearview Mirror Covers(1 x Left and 1 x Right)
Installation Instruction:
Step1: With some rubbing alcohol (or cleaning essentials) on cloth, rub along the allocated surface to get it as dry and clean as possible
Step2: To start with, peel off the first half of the adhesive tape protective film on back so you can still adjust it when needed
Step3: Locate the proper spot, slowly and steadily place the item on top, and when the position is confirmed correct, tear off the second half of the protective film and finish sticking
Step4: Press hard with clean cloth continuously for about 1 minute until it is firmly fixed. In low temperature condition, to press for about 2 minutes is recommended
Note: NO contact with water(car washing) within 48 hours after assembly to ensure sufficient time gap for it to glue in place
