RGraphics.co.uk presents one of our cut-to-fit rear quarter window designs. This item has been modelled, perfected and machine cut to fit your vehicle taking away the hard work!
Customising your decal
To avoid disappointment, please add as much information to your order using the customisation box above the buy it now button or send a message after purchase.
Please specify: Finish / Colour / Customisation / Customisation colour e.g. Matte / Black / Logo or text. If no or partial customisation is recieved you will recieve the default decal*.
* Default decal consists of:
- Default finish is matte.
- Default colour is black.
- Default customisation is no logo or text.
Available colours
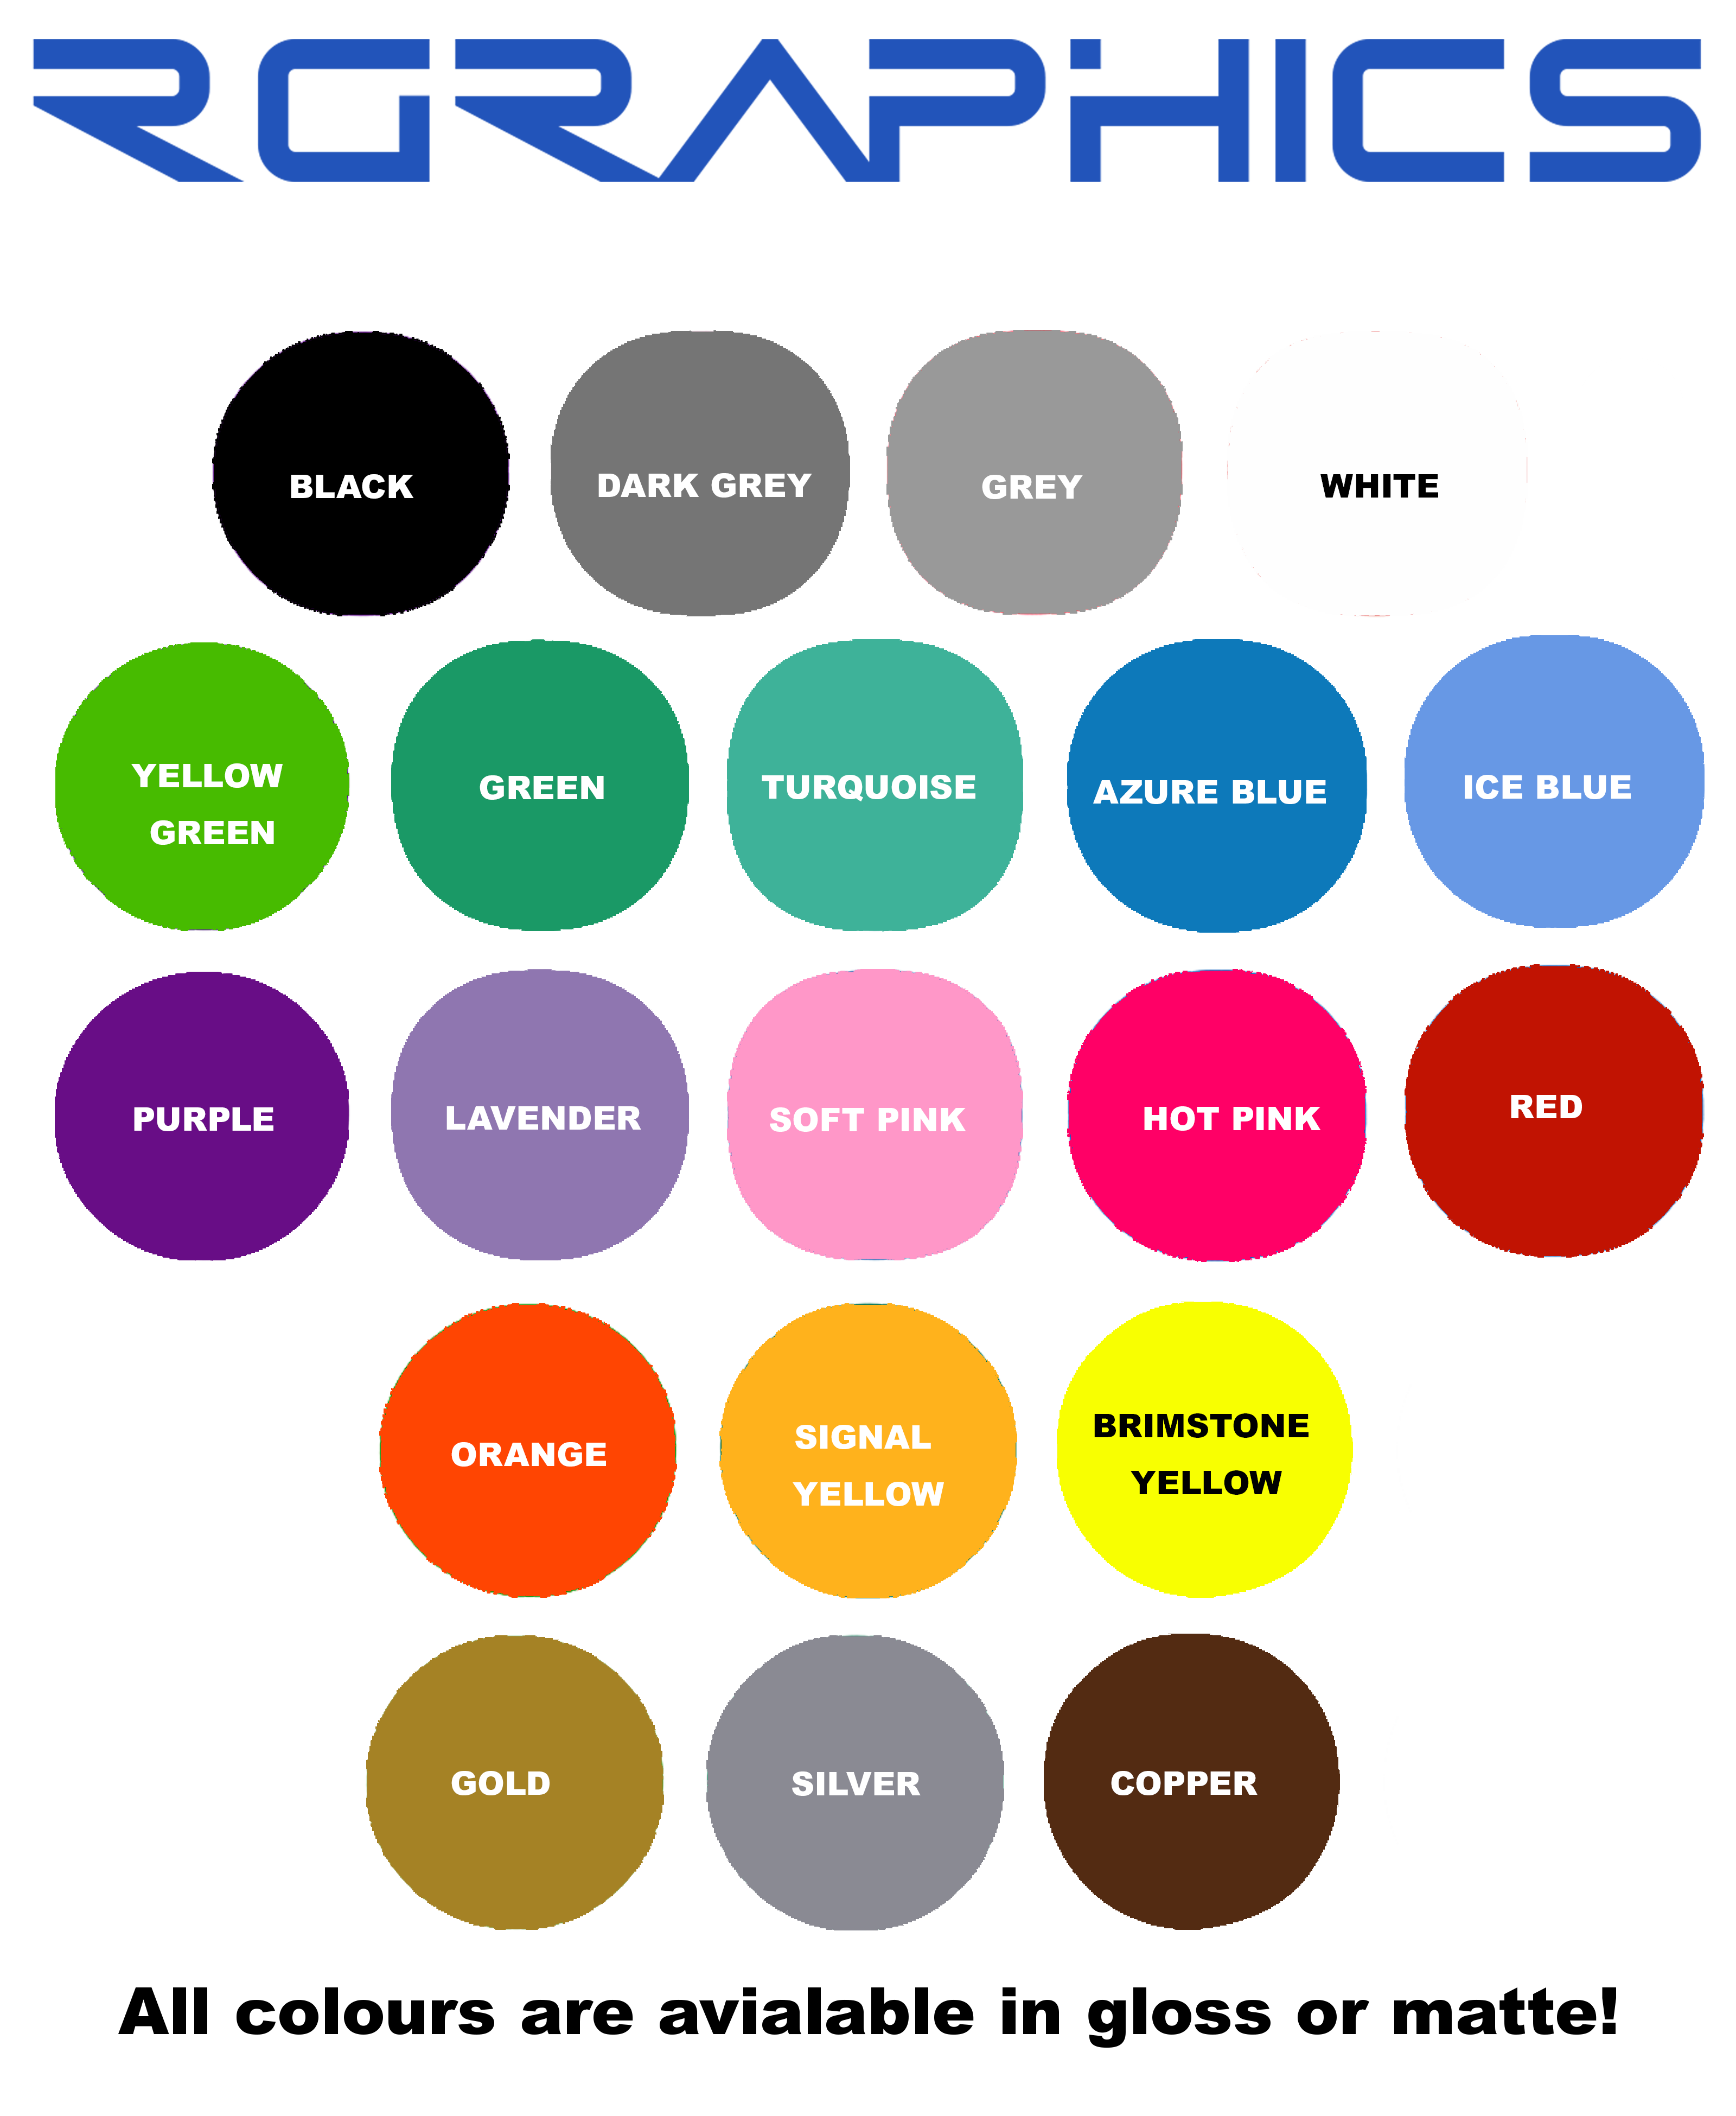
Please note that bronze is only available for customisations, not the large section.
Features:
- Customisable to your needs
- Available in a gloss or matte finish in a wide variety of colours
- Price includes a decal for each side of your vehicle.
Additional notes:
- May require trimming depending on how it is fitted
- All images within the listing are of the product for sale
- The decal in the image is matte black.
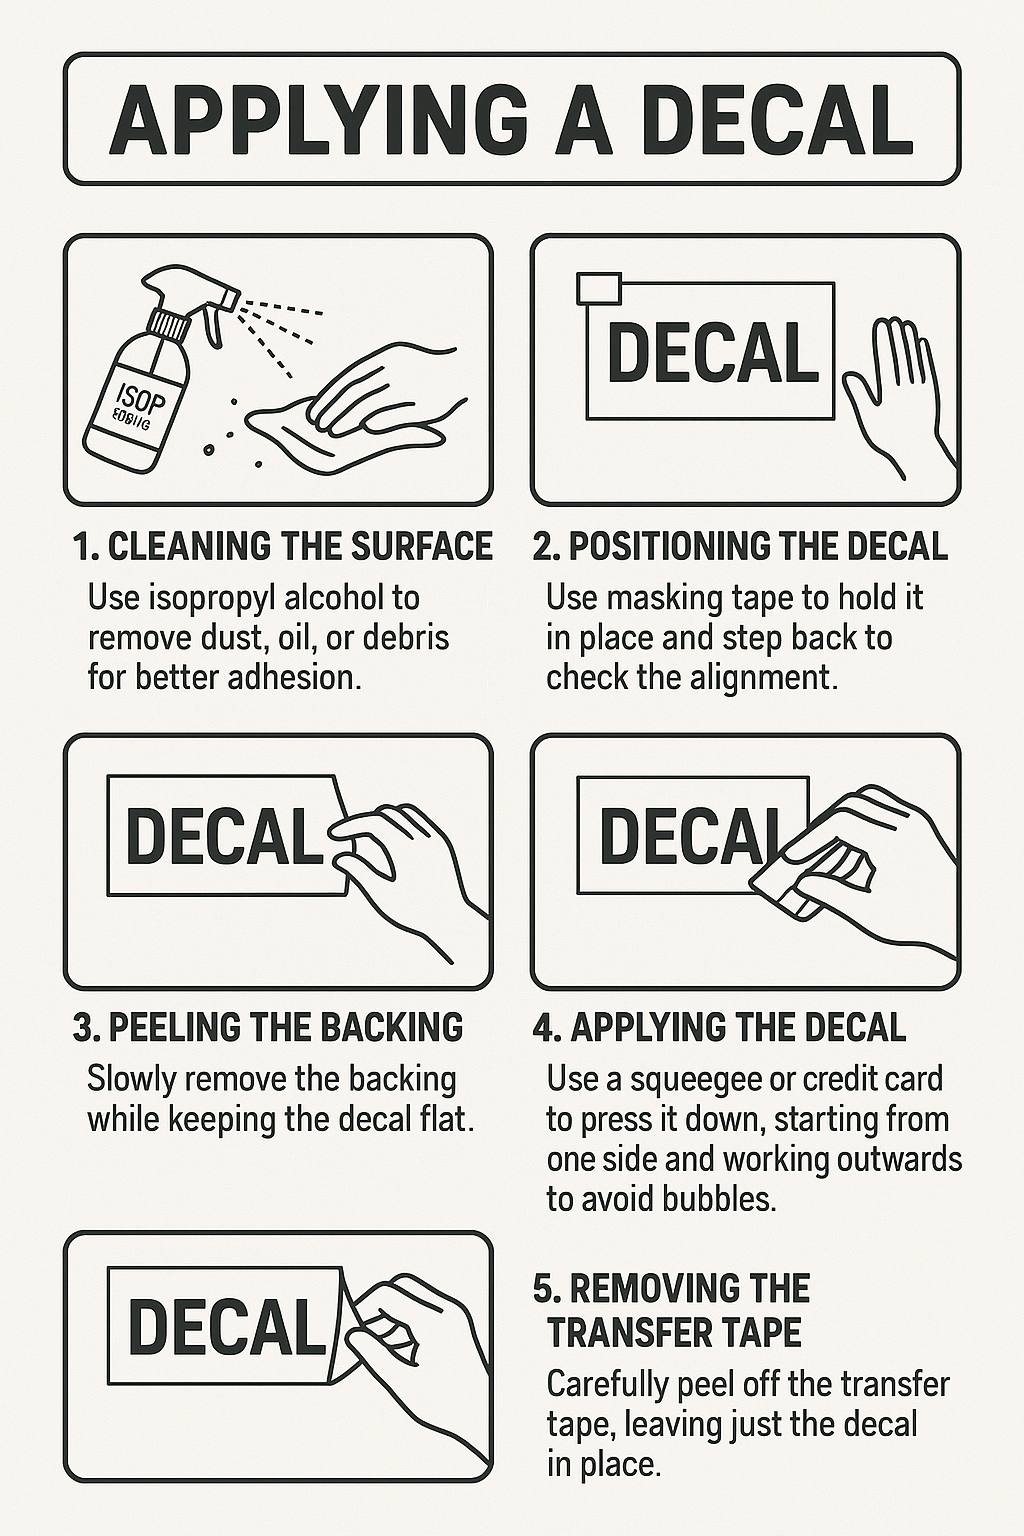
Application Instructions
Please avoid applying this product in extreme weather conditions, including very hot, cold, or windy environments. Do not apply it in direct, hot sunlight. Like all vinyl materials, high temperatures can cause the product to become overly soft, making it prone to tearing or stretching. Conversely, low temperatures can reduce the effectiveness of the adhesive, preventing proper bonding to the surface.
Required Materials
- Trimming tool
- Squeegee
Surface Preparation
Before application, thoroughly clean the surface to remove any dirt, grit, or grease. Use an appropriate cleaning product?ideally an alcohol-based surface cleaner as some cleaners may leave behind a residue that can hinder adhesion. Alcohol-based products evaporate cleanly and are generally most effective.
Prepare the Decal
Use a squeegee to firmly rub across the decal while it is still on the backing paper. This helps eliminate any air bubbles and ensures the decal adheres well to the transfer tape.
Separate Backing Paper from Transfer Tape
Carefully peel back the transfer tape from the backing paper. The decal should lift cleanly with the tape. If parts of the decal remain stuck to the backing paper, lay the tape back down and rub firmly again with the squeegee.
Position the Decal
Align the decal carefully to its final position. Once satisfied with the placement, apply the decal to the surface.
Apply and Secure
Firmly press down over the entire decal using your squeegee to ensure full adhesion.
Remove the Transfer Tape
Slowly peel the transfer tape back at a sharp angle. If the decal begins to lift with the tape, lay it back down and press firmly again before retrying.
Trim as Needed
Use a precision blade to trim the decal to fit, if required.
Additional Notes
For challenging surfaces such as textured plastics, you may need to assist adhesion manually. Hold the revealed portion of the decal in place with your thumb while gently peeling off the application tape. I
f air bubbles form beneath the decal, work them out gently using your thumb or the soft edge of the squeegee. A small pin can also be used to release trapped air.
If you used soapy water to aid installation, allow the decal to dry completely before using the vehicle. Ideally, wait at least 24 hours. In colder or wetter conditions, additional drying time may be required.
Shipping & Returns
Items are shipped Monday to Friday via Royal Mail Tracked 48.
Sunstrips are shipped in a flat box which is designed to fit through your letterbox; there is a chance that during shipping the box can get squashed which may cause folds in the vinyl. This shouldn't cause you any issues - please lay the item out on a flat surface overnight and any creases or folds should disperse, anything else can be worked out during application. The option to upgrade postage to a tube is available by selecting the paid for postage option.
Decals are shipped in a hard backed envelope. Please note that due to temperature changes this may result in some bubbling on the transfer tape - to resolve this, gently rub the decal with a squeegee and it should flatter back down.
Returns will be accepted if:
- The product is returned in the same condition it was sent (Brand New & Unused)
- Not customised - if you have requested the product to be customised* I am unable to accept a return on this item.
- The buyer is responsible for the cost of returning the item.
* Customised: Has had a logo or text added to the item, or is a colour other than the default stated in the listing.