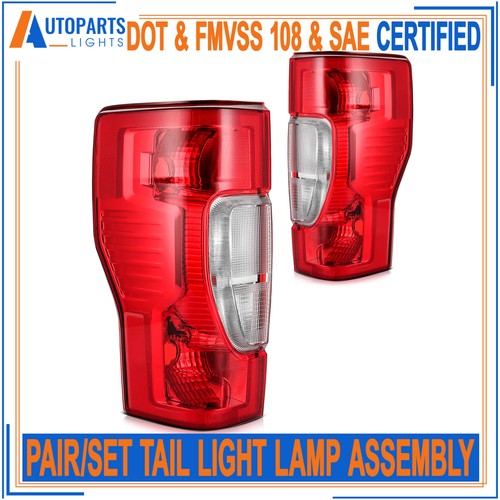
6. PRODUCT DESCRIPTION
- Direct Bolt-On OE/OEM Fitment And Replacement For Original Part; Easy For Installation Without Any Drilling Or Modification
- OE/OEM-Style Light Emitting Diode [LED] Rear Tail Light Lamp Assembly Replacement; Perfect For Consumers Looking For OE/OEM Rear Tail Light Lamp Assembly Replacement
- High-Quality Internal/External Load Error-Free Resistors Prevent Error-Codes Or Hyperflashing; High-Intensity Light Emitting Diode [LED] Units Provide Bright Illumination Over Original Units
- All Our Rear Tail light Lamp Assembly Have Passed All National Safety Standards [DOT And SAE And FMVSS 108 And NHTSA And AMECA Certified] And Meet Or Exceed The OE/OEM Quality Standards
- Manufactured By Factory Manufacturers Certified By ISO And IATF Using Materials That Meet Strict OE/OEM Requirements
- Polycarbonate [PC] Lens Offer Superior Ultraviolet [UV] Protection And A High Impact Resistance
- Our Rear Tail Light Lamp Assembly Use The Highest Quality Butyl Sealant To Prevent Any Imperfections To Enter The Housing
- Brings A Different Appearance To Vehicle That Great For Show Use Or To Replace Old And Worn Rear Tail Light Lamp Assembly
- OE/OEM Part Number: 84365930, 23409443, 23420453, 84018670, 84039199, 84071502, 84233587, 84365931, 23409444, 23420454, 84018671, 84039200, 84071503, 84233588
- Interchange Part Number: GM2800295C, GM2800295, 166-02775L, GM2801295C, GM2801295, 166-02774R
7. IMPORTANT QUALITY AND LEGAL AND REGULATORY STANDARDS
Q: What are OE-Certified and OEM-Certified and Factory-Certified parts ?
A: OE-Certified, OEM-Certified, and Factory-Certified are essentially the same thing, all referring to the use of parts made by the original equipment manufacturer [OEM] or under the direction of the vehicle manufacturer to ensure the highest quality, performance, and safety for a vehicle repair. These terms emphasize that the parts were used in the original manufacturing process and are identical to the factory-installed components, providing the best possible fit, reliability, and long-term value for the vehicle.
Q: What are DOT-Certified and FMVSS 108-Certified and NHTSA-Certified parts ?
A: "DOT-Certified," "FMVSS 108-Certified," and "NHTSA-Certified" all refer to parts and equipment that meet the safety performance standards set by the National Highway Traffic Safety Administration (NHTSA), the agency within the Department of Transportation (DOT) responsible for vehicle safety. These terms are often used interchangeably because the DOT doesn't certify parts directly; instead, vehicle and equipment manufacturers self-certify that their products comply with the relevant Federal Motor Vehicle Safety Standards (FMVSS), such as FMVSS 108 for lighting. Therefore, a product marked with "DOT" is a manufacturer's statement that it meets the applicable FMVSS, including FMVSS 108 for lighting components.
Q: What are SAE-Certified and ISO-Certified and IATF-Certified And AMECA-Certified parts ?
A: SAE-certified parts meet standards set by the Society of Automotive Engineers, ISO-certified refers to adherence to International Organization for Standardization Quality Management System standards, IATF-certified signifies a company meets the automotive-specific IATF 16949 quality management standard, and AMECA-certified parts have been tested and approved by the Automotive Manufacturers Equipment Compliance Agency for specific safety categories like glazing or lighting.
8. INSTALLATION INSTRUCTIONS [FOR REFERENCE ONLY]
Professional installation is recommended, though if you're an experienced do-it-yourselfer, you would probably manage. Never forget about proper safety measures while installing this product and do not try to perform the task without necessary tools and factory service manual. As for the vehicle, it must be in a fixed and stable position before the installation process begins.
TOOLS NECESSARY FOR INSTALL:
1. PHILLIPS SCREWDRIVER AND SOCKET WRENCH SET
2. PAINTERS TAPE TO AVOID SCRATCHES
3. TORQUE WRENCHES AND RATCHET
4. SAFETY GLASSES AND GLOVES
5. TRIM REMOVAL TOOLS
6. NEW REAR TAIL LIGHT LAMP ASSEMBLY
7. REPLACEMENT BULBS AND SOCKETS [IF NOT INCLUDED IN THE ASSEMBLY]
There are many reasons why you may need to replace your rear tail light lamp assembly. Occasionally, it's due to plain old destruction—perhaps someone hit your vehicle, or you bent something using the back end of your vehicle. Water and cracks within the housing will generate electrical problems or burn out the bulb prematurely.
In other instances, only the lights will not work at all. This may be caused by a bad bulb, corroded wiring, or even a bad socket. These can be replaced one at a time, but if your rear tail light lamp assembly housing is cracked or no longer watertight, it's usually best (and easiest) to replace the entire rear tail light lamp assembly.
And then there is the upgrade factor. If your vehicle is older or the original rear tail light lamp assembly simply isn't performing as well as they used to, upgrading to an aftermarket rear tail light lamp assembly can provide you with a fresh new appearance and improved performance.
How To Remove Rear Tail Light Lamp Assembly:
1. Put on your safety glasses and gloves.
2. Disconnect the negative battery cable.
3. If necessary, remove the rear bumper cover or interior trim panel per the factory repair information. On some vehicles, this must be done to access the rear tail light lamp assembly retaining fasteners. The process generally involves removing a collection of screws and/or clips to free the bumper or trim panel.
4. Once you have direct access to the rear tail light lamp assembly, remove the bolts or screws holding it in place.
5. Pull the rear tail light lamp assembly out and away from the vehicle. Keep in mind: there may still be retainer clips holding the rear tail light lamp assembly in place. You’ll need to carefully dislodge the rear tail light lamp assembly from the clips as you pull it toward you.
6. Disconnect the electrical connectors from the back of the rear tail light lamp assembly.
7.Some new rear tail light lamp assemblies will come with new bulbs and sockets. If yours does not, you will need to remove the old bulbs and sockets so they can be reused. Typically, this involves turning the bulb socket counterclockwise to remove it from the rear tail light lamp assembly.
How To Install Rear Tail Light Lamp Assembly:
1. Compare the new rear tail light lamp assembly to the old one to be sure that both are the same design.
2. Reinstall the bulbs and sockets in the rear tail light lamp assembly as needed.
3. Reconnect the electrical connectors.
4. Mount the rear tail light lamp assembly in place. Be sure that it slides into any retainer clips affixed to the rear of the vehicle.
5. Reinstall the rear tail light lamp assembly mounting bolts or nuts and carefully tighten them down until they’re snug. Do not overtighten. If needed, you can consult the factory repair information and use a torque wrench to tighten the fasteners to the manufacturer’s specification.
6. Reinstall the rear bumper or interior trim panel as needed.
7. Reconnect the negative battery cable.
Rear tail light lamp assembly and their retaining clips (if applicable) are made of fragile plastic. So, be gentle and take your time when performing the replacement.
9. REGULAR MAINTENANCE FOR AUTOMOTIVE REAR TAIL LIGHT LAMP ASSEMBLY
1. Ensuring the regular maintenance of your automotive rear tail lights lamps assembly is crucial for safety on the road. A well-maintained rear tail light lamp assembly not only enhances the aesthetic appeal of your vehicle but also plays a pivotal role in communicating your intentions to other drivers.
2. Regular check-ups can help identify issues like burnt-out lights, cloudy lenses, or malfunctioning brake or stop lights. When inspecting your rear tail lights lamps assembly, ensure all rear tail lights lamps assembly function correctly. Any irregularities should prompt you to replace these parts immediately to avoid potential road hazards. Proper maintenance involves cleaning the rear tail lights lamps assembly lenses to keep them clear of dirt and grime that may obscure the light.
3. When it comes to regular maintenance, consider the type of rear tail light lamp assembly used in your vehicle. Conventional lights, Light Emitting Diode [LED], and halogen rear tail lights lamps assembly all have different requirements and lifespans. Regularly inspecting and cleaning the rear tail light lamp assembly ensures the parts remain in top-notch condition.
4. Furthermore, always consult your vehicle’s manual for specific guidelines regarding your automotive’s rear tail lights lamps assembly. Another essential aspect is ensuring the electrical connections of your tail lights and brake lights are secure.
5. Loose connections can lead to intermittent or complete failure of your vehicle’s lighting. For vehicle owners, particularly those with older models, periodic checks are vital.
6. A functional and well-maintained rear tail light lamp assembly will illuminate the road better, ensuring both you and other drivers stay informed and safe. In summary, dedication to regular maintenance can extend the life of your rear tail light lamp assembly. It ensures that your rear tail lights lamps assembly is always optimal, providing safety and reliability for your vehicle’s journeys.