• CV Axle Installation Guide (Generic Steps)
  •  
  • ?? Important Safety Notice:
  •  
    • Professional Recommendation:? CV axle replacement involves heavy components and precise torque specifications. We strongly recommend this job be performed by a qualified mechanic with proper tools (jack stands, torque wrench, etc.).
     
    • Check Fitment:? Verify this axle matches your vehicle’s Make, Model, Year, and Drivetrain (FWD/RWD/AWD) before starting.
     
    • Refer to your vehicle’s service manual for exact steps and torque values.
    ?
  • ?
  •  
  • Tools Needed:
  •  
    • Floor jack & Jack stands
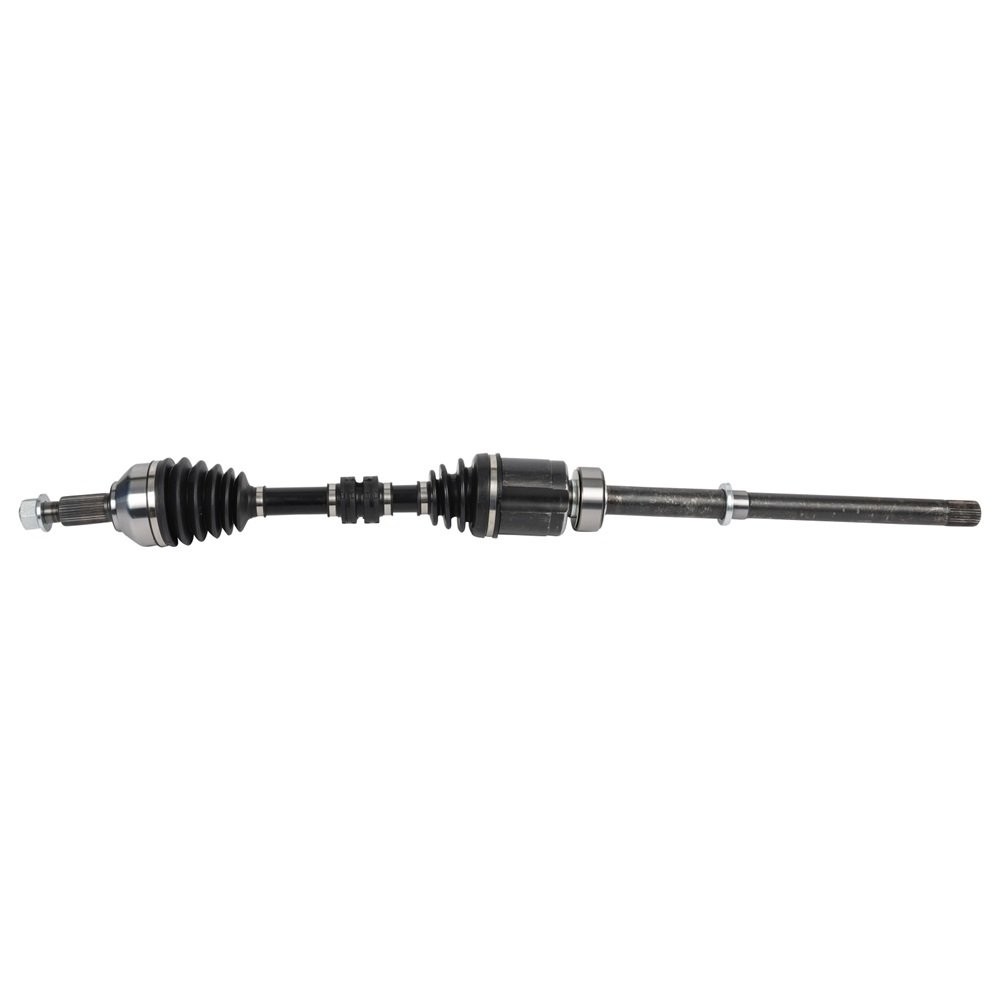
  • CV Axle Assembly AWD For Nissan Murano 2015-2019 V6 3.5L Front Right Side 1pc

    CV Axle Installation Guide (Generic Steps)


    ?? Important Safety Notice:


    • Professional Recommendation:? CV axle replacement involves heavy components and precise torque specifications. We strongly recommend this job be performed by a qualified mechanic with proper tools (jack stands, torque wrench, etc.).


    • Check Fitment:? Verify this axle matches your vehicle’s Make, Model, Year, and Drivetrain (FWD/RWD/AWD) before starting.


    • Refer to your vehicle’s service manual for exact steps and torque values.

    ?

    ?


    Tools Needed:


    • Floor jack & Jack stands

    • Wheel chocks

    • Socket set & Breaker bar

    • Torque wrench

    • Pry bar

    • (Optional) Ball joint separator


    Installation Steps:


    1. Preparation & Removal

    • Park on a level surface, engage parking brake, and chock the rear wheels.

    • Loosen the lug nuts and front axle nut (while the vehicle is on the ground).

    • Lift the vehicle securely with a jack and support it with jack stands. Remove the wheel.

    ?

    2. Disassemble Suspension

    • Disconnect the tie rod end from the steering knuckle.

    • Disconnect the lower ball joint or control arm to allow the knuckle to swing free.

    • Remove the old axle nut and any retaining clips.

    ?

    3. Remove Old Axle

    • Carefully pry the outer CV joint out of the wheel hub.

    • Place a drain pan under the transmission. Use a pry bar to gently pop the inner joint from the transmission/differential. Avoid damaging the transmission seal.

    ?

    4. Compare & Install New Axle

    • Critical:? Compare the new axle with the old one to ensure identical length and spline count.

    • Inner Joint:? Align the splines and push the new axle into the transmission until you hear/feel the circlip snap into place. Gently tug to confirm it is locked.

    • Outer Joint:? Slide the axle through the hub assembly.

    ?

    5. Reassembly

    • Reconnect the ball joint and tie rod to the knuckle. Tighten fasteners to manufacturer spec.

    • Install a new axle nut? and hand-tighten (do not fully torque yet).

    • Reinstall the wheel and lower the vehicle to the ground.

    ?

    6. Final Torque

    • With the vehicle’s weight on the ground, use a torque wrench to tighten the axle nut to the factory-specified torque.

    • Re-torque the lug nuts in a star pattern.

    ?

    7. Post-Installation Check

    • Check transmission fluid level and top off if necessary.

    • Perform a short test drive. Listen for clicks on turns (indicating improper seating) and check for vibration.


    Item Specifics
    Brand AM-Mortors2020
    Manufacturer Part Number AM182434CN
    Interchange Part Number NCV53105
    OE/OEM Part Number 391005AA1A,391005AA5B
    Superseded Part Number NI-8628
    Manufacturer Warranty 1 Year
    Fitment Type Direct Replacement
    Compatible Makes Nissan
    Model Murano
    Year 2015-2019
    Engine V6 3.5L
    Placement on Vehicle Front Right
    Note It fits AWD(All Wheel Drive) Only.
    Note-2 not fit FWD(Front Wheel Drive) OR 4WD(Four Wheel Drive).
    Driver Type AWD
    CV Shaft Assembly Working Principle Connecting the wheels, axles to the transmission CV joints transfer torque to the wheels up and down movement of the suspension system at a controlled speed.
    Compressed Length (IN) 40.71
    Inboard Spline Quantity 29
    Inboard Joint Type Male
    Outboard Spline Quantity 32
    Outboard Joint Type Conventional
    Materiall Rubber, Steet
    Axle Boot Material Neoprene
    Surface Finish Heat treatment
    Axle Boot Colors As the picture shows
    Cotter Pin Included No
    ABS Ring Included No
    Spindle Nut Included No
    Grease Type Molybdenum Disulfide Lithium Grease
    CV Axle Shaft Assembly Style Factory
    Performance Part Yes
    Universal Fitment No
    Vintage Part Yes
    Package Included Front Passenger Side, CV Axle Shaft Assembly
    Axle Nut Locking Type Self Lock
    Features OE-Certified,?DOT-Certified Factory?CV?Axle?Shaft?Assembly,?SAE-Certified
    OE Spec or Performance/Custom Performance/Custom
    Hardware Included No
    Hazardous Material No
    Inboard Clip Included Snap Ring
    Fitment(Notes) Verify this part fits your vehicle using the compatibility chart
    California Proposition 65 Warning: Cancer and Reproductive Harm - www.P65Warnings.ca.gov

    Shipping

    1. Package handling takes about 1 business days at our warehouse, so please make sure entering correct payment and shipping information before checking out. Once your payment is completed, we are not going to accept any more changes to your order.

    2.We use USPS First Class Package service.
    3.International Buyers Please Note:
    a. Import duties, taxes and charges are not included in the item price or shipping charges. These charges are the buyers responsibility.
    b. Please check with your country customs office to determine what these additional costs will be prior to bidding/buying.

    Payment

    Payment by eBay approved method


    Returns
    • We offer a 30 day 100% money back guarantee.
    •  
    Feedback

    1. We will leave positive feedback once we get your payment. 
    2. If you are dissatisfied for any reason, please do not be quick to leave negative/neutral feedback. We will work hard to make sure EVERY CUSTOMER 100% SATISFIED and resolve any problem for you and always leave positive feedback to all our customers.
    3. If you are satisfied with the product you received, please leave us positive feedback and 5 scores DSR

    Contact Us

    Any question, please contact us.

    CV Axle Assembly AWD For Nissan Murano 2015-2019 V6 3.5L Front Right Side 1pc

    CV Axle Installation Guide (Generic Steps)


    ?? Important Safety Notice:


    • Professional Recommendation:? CV axle replacement involves heavy components and precise torque specifications. We strongly recommend this job be performed by a qualified mechanic with proper tools (jack stands, torque wrench, etc.).


    • Check Fitment:? Verify this axle matches your vehicle’s Make, Model, Year, and Drivetrain (FWD/RWD/AWD) before starting.


    • Refer to your vehicle’s service manual for exact steps and torque values.

    ?

    ?


    Tools Needed:


    • Floor jack & Jack stands

    • Wheel chocks

    • Socket set & Breaker bar

    • Torque wrench

    • Pry bar

    • (Optional) Ball joint separator


    Installation Steps:


    1. Preparation & Removal

    • Park on a level surface, engage parking brake, and chock the rear wheels.

    • Loosen the lug nuts and front axle nut (while the vehicle is on the ground).

    • Lift the vehicle securely with a jack and support it with jack stands. Remove the wheel.

    ?

    2. Disassemble Suspension

    • Disconnect the tie rod end from the steering knuckle.

    • Disconnect the lower ball joint or control arm to allow the knuckle to swing free.

    • Remove the old axle nut and any retaining clips.

    ?

    3. Remove Old Axle

    • Carefully pry the outer CV joint out of the wheel hub.

    • Place a drain pan under the transmission. Use a pry bar to gently pop the inner joint from the transmission/differential. Avoid damaging the transmission seal.

    ?

    4. Compare & Install New Axle

    • Critical:? Compare the new axle with the old one to ensure identical length and spline count.

    • Inner Joint:? Align the splines and push the new axle into the transmission until you hear/feel the circlip snap into place. Gently tug to confirm it is locked.

    • Outer Joint:? Slide the axle through the hub assembly.

    ?

    5. Reassembly

    • Reconnect the ball joint and tie rod to the knuckle. Tighten fasteners to manufacturer spec.

    • Install a new axle nut? and hand-tighten (do not fully torque yet).

    • Reinstall the wheel and lower the vehicle to the ground.

    ?

    6. Final Torque

    • With the vehicle’s weight on the ground, use a torque wrench to tighten the axle nut to the factory-specified torque.

    • Re-torque the lug nuts in a star pattern.

    ?

    7. Post-Installation Check

    • Check transmission fluid level and top off if necessary.

    • Perform a short test drive. Listen for clicks on turns (indicating improper seating) and check for vibration.


    1. Package handling takes about 1 business days at our warehouse, so please make sure entering correct payment and shipping information before checking out. Once your payment is completed, we are not going to accept any more changes to your order.

    2.We use USPS First Class Package service.
    3.International Buyers Please Note:
    a. Import duties, taxes and charges are not included in the item price or shipping charges. These charges are the buyers responsibility.
    b. Please check with your country customs office to determine what these additional costs will be prior to bidding/buying.

    Payment by eBay approved method


    • We offer a 30 day 100% money back guarantee.
    •  

    1. We will leave positive feedback once we get your payment. 
    2. If you are dissatisfied for any reason, please do not be quick to leave negative/neutral feedback. We will work hard to make sure EVERY CUSTOMER 100% SATISFIED and resolve any problem for you and always leave positive feedback to all our customers.
    3. If you are satisfied with the product you received, please leave us positive feedback and 5 scores DSR

    Any question, please contact us.


    Copyright of am-motors2020. All rights reserved.