
220V LD100 Valve Grinding Machine - Precision Valve Grinder for Automotive Repair, Small Batch Processing |
|
TECHTONGDA® |
 |
ITEM DESCRIPTION |
|
|
|
|
|
|
|
|
|
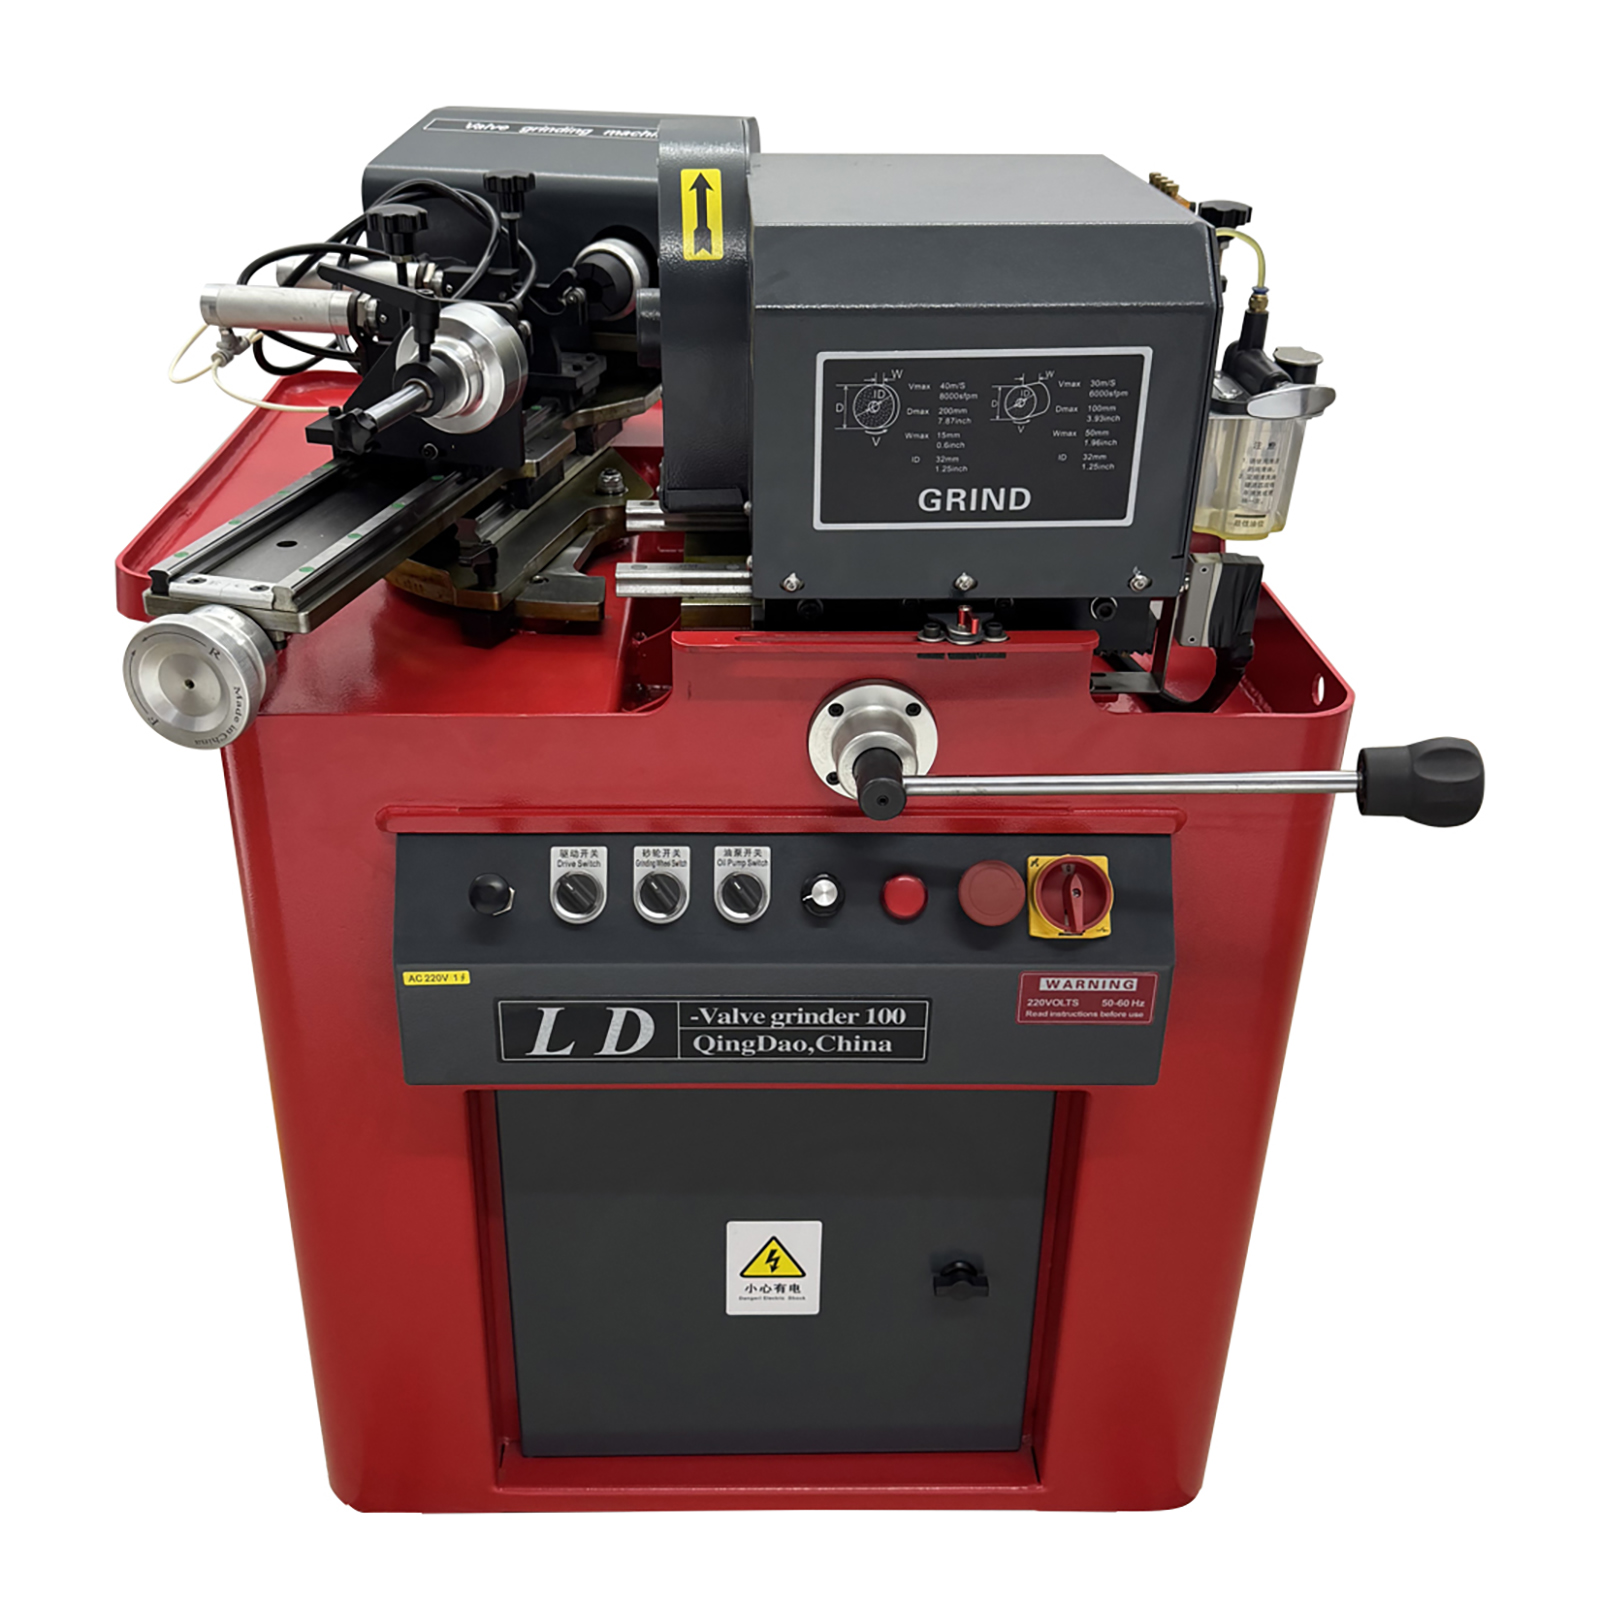
| The LD100 Valve Grinding Machine is a versatile and robust solution for precision valve refurbishment across a wide range of engines. Ideal for automotive repair shops, motorcycle mechanics, and agricultural machinery maintenance, it expertly handles everything from passenger cars and trucks to tractors and large generator sets. Engineered for reliability in both one-off repairs and small-batch operations, the LD100 ensures consistent, professional-grade results. Its user-friendly design features making complex valve resurfacing tasks straightforward and efficient. Whether you're a professional technician seeking to enhance your workshop's capabilities or an experienced DIY enthusiast tackling engine overhauls, the LD100 is built to deliver the accuracy and durability you demand. |
|
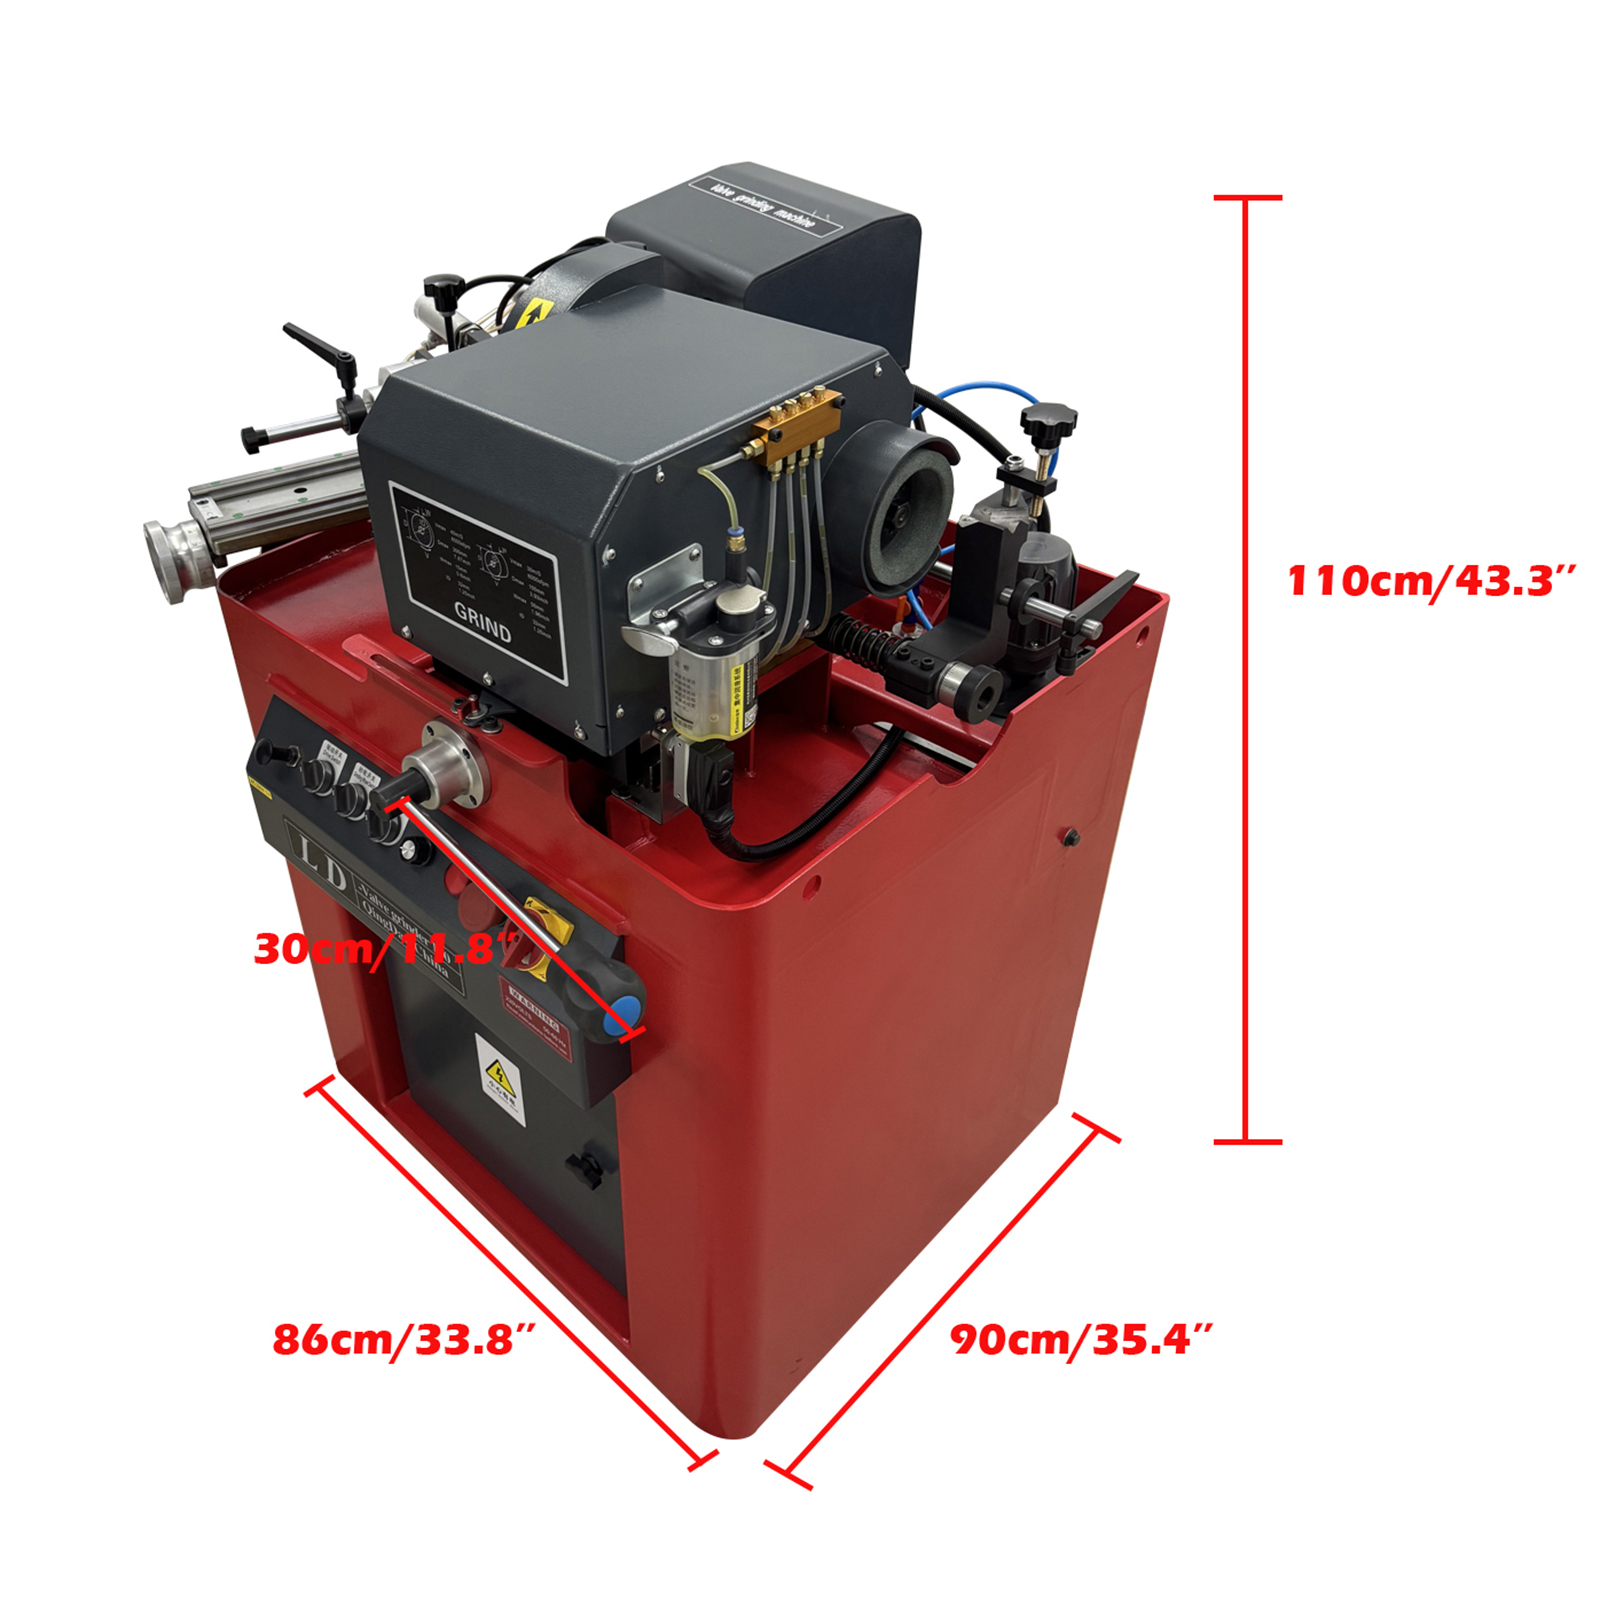
ITEM PARAMETERS
|
|
|||||||||||||||||||||||||||||||||||||||||||
| ITEM PRECAUTIONS | ||||||||||||||||||
| Warning: Always prioritize safety and proper operation to prevent personal injury and damage to the equipment. 1. Safety First (1) Eye Protection is Mandatory: Always wear certified safety goggles or a face shield during operation. Grinding produces high-speed particles that can cause serious eye injury. (2) Secure Loose Items: Do not wear gloves, ties, loose clothing, or jewelry that could become entangled in the moving parts of the machine. (3) Hand Safety: Keep hands away from the grinding wheel while the machine is in operation. Always ensure the wheel has completely stopped before making adjustments or changing parts. (4) Work in a Well-Ventilated Area: The grinding process may generate fine dust. It is advisable to use the machine with adequate ventilation or a dust extraction system. 2. Installation & Setup (1) Power Supply Verification: Before connecting to power, ensure your local voltage and frequency match the machine's requirements. Using an incorrect power supply will damage the motor. (2) Secure Mounting: Mount the machine on a sturdy, stable, and level workbench to prevent vibration and movement during operation. (3) Air Supply Requirements: If the machine is equipped with pneumatic components, ensure your air compressor provides clean, dry air at the correct pressure (0.6 MPa) as specified in the manual. 3. Operation & Usage (1) Inspect Before Use: Always inspect the grinding wheel for cracks or damage before installation. Never use a damaged or cracked wheel., as it can break apart at high speed. (2) Proper Wheel Dressing: Regularly dress the grinding wheel using the diamond dresser to maintain its cutting efficiency and prevent glazing. A poorly dressed wheel can cause overheating and damage the valve surface. (3) Correct Workpiece Clamping: Always ensure the valve is securely and correctly clamped in the drive mechanism before starting the grinding process. A loose valve can be thrown from the machine. (4) Avoid Overloading: Do not force the valve into the grinding wheel with excessive pressure. Allow the grinder to remove material at its own pace. Overloading can stall the motor, damage the wheel, and produce poor surface finishes. (5) Use Coolant: Always use the recommended coolant during grinding. This prevents the valve from overheating (which can anneal and weaken the steel), improves surface finish, and extends the life of the grinding wheel. 4. Maintenance & Servicing (1) Power Disconnection: Always disconnect the machine from the power source before performing any maintenance, cleaning, or wheel changes. (2) Regular Cleaning: Keep the machine clean. Wipe down surfaces after use and regularly clean the coolant tank to prevent chip buildup and corrosion. (3) Lubrication: Periodically lubricate all moving parts (e.g., guide rails, screws) as instructed in the manual to ensure smooth operation and accuracy. (4) Professional Repair: This machine contains precision components. Do not attempt to disassemble or repair the main motor or spindle yourself. Contact a qualified technician for service. |
||||||||||||||||||
| ITEM DETAILS | ||||||||||||||||||
|


| ITEM OPERATING INSTRUCTIONS | |||
| 1. Adjusting the Machine's Grinding Angle: ◆After determining the valve's angle, loosen the machine's angle lock handle. ◆Then, adjust the scale to match the valve's angle. 2. Adjusting the Valve Positioning Device: ◆Select the drive rubber block according to the diameter of the valve head. ◆Install the block into the drive holder. ◆Turn on the V-block cylinder switch. ◆Adjust the moving bracket cartridge and cylinder top post based on the valve stem's length. ◆Adjust the drive center handwheel to align the drive rubber block coaxially with the valve. ◆Turn off the cylinder switch. The valve is now securely installed. 3. Grinding the Valve Working Ring: ◆Left hand: Hold the table travel handwheel and rotate it to move the table. ◆Right hand: Hold the grinding wheel feed handle and move it leftward to bring the wheel within 2-3 mm of the valve's working surface. ◆Start the grinding wheel, drive mechanism, and oil pump switches. ◆Use both hands to make fine adjustments until the valve gently contacts the grinding wheel to begin grinding. ◆Continue until the entire grinding ring becomes bright and polished. ◆Left hand: Rotate the handwheel counterclockwise 360 degrees for a final pass. ◆Right hand: Move the grinding wheel rightward until it triggers the limit switch and stops. ◆Press the cylinder switch to release and remove the valve. ◆Repeat the above steps to process the next valve. 4. Grinding the Valve Tip: ◆First, move the grinding wheel closest to the limit switch. Ensure the wheel remains spinning when the switch is engaged. ◆Tighten the grinding wheel platform limit lock bolt to secure its position. ◆Secure the valve in the V-groove of the double V-block fixture. ◆Start the grinding wheel motor. ◆Adjust the scale adjustment handwheel to begin grinding the valve tip. 5. Chamfering the Valve Tip: ◆Slide the valve stem fixing sleeve onto the valve stem and adjust it to the correct position. ◆Then, secure the valve into the V-groove fixing bracket. ◆Adjust the distance between the bracket and the grinding wheel. ◆Start the grinding wheel. ◆Right hand: Rotate the valve steadily. ◆Left hand: Adjust the scale handwheel to control the feed for chamfering. |
|||
 |
 |
||
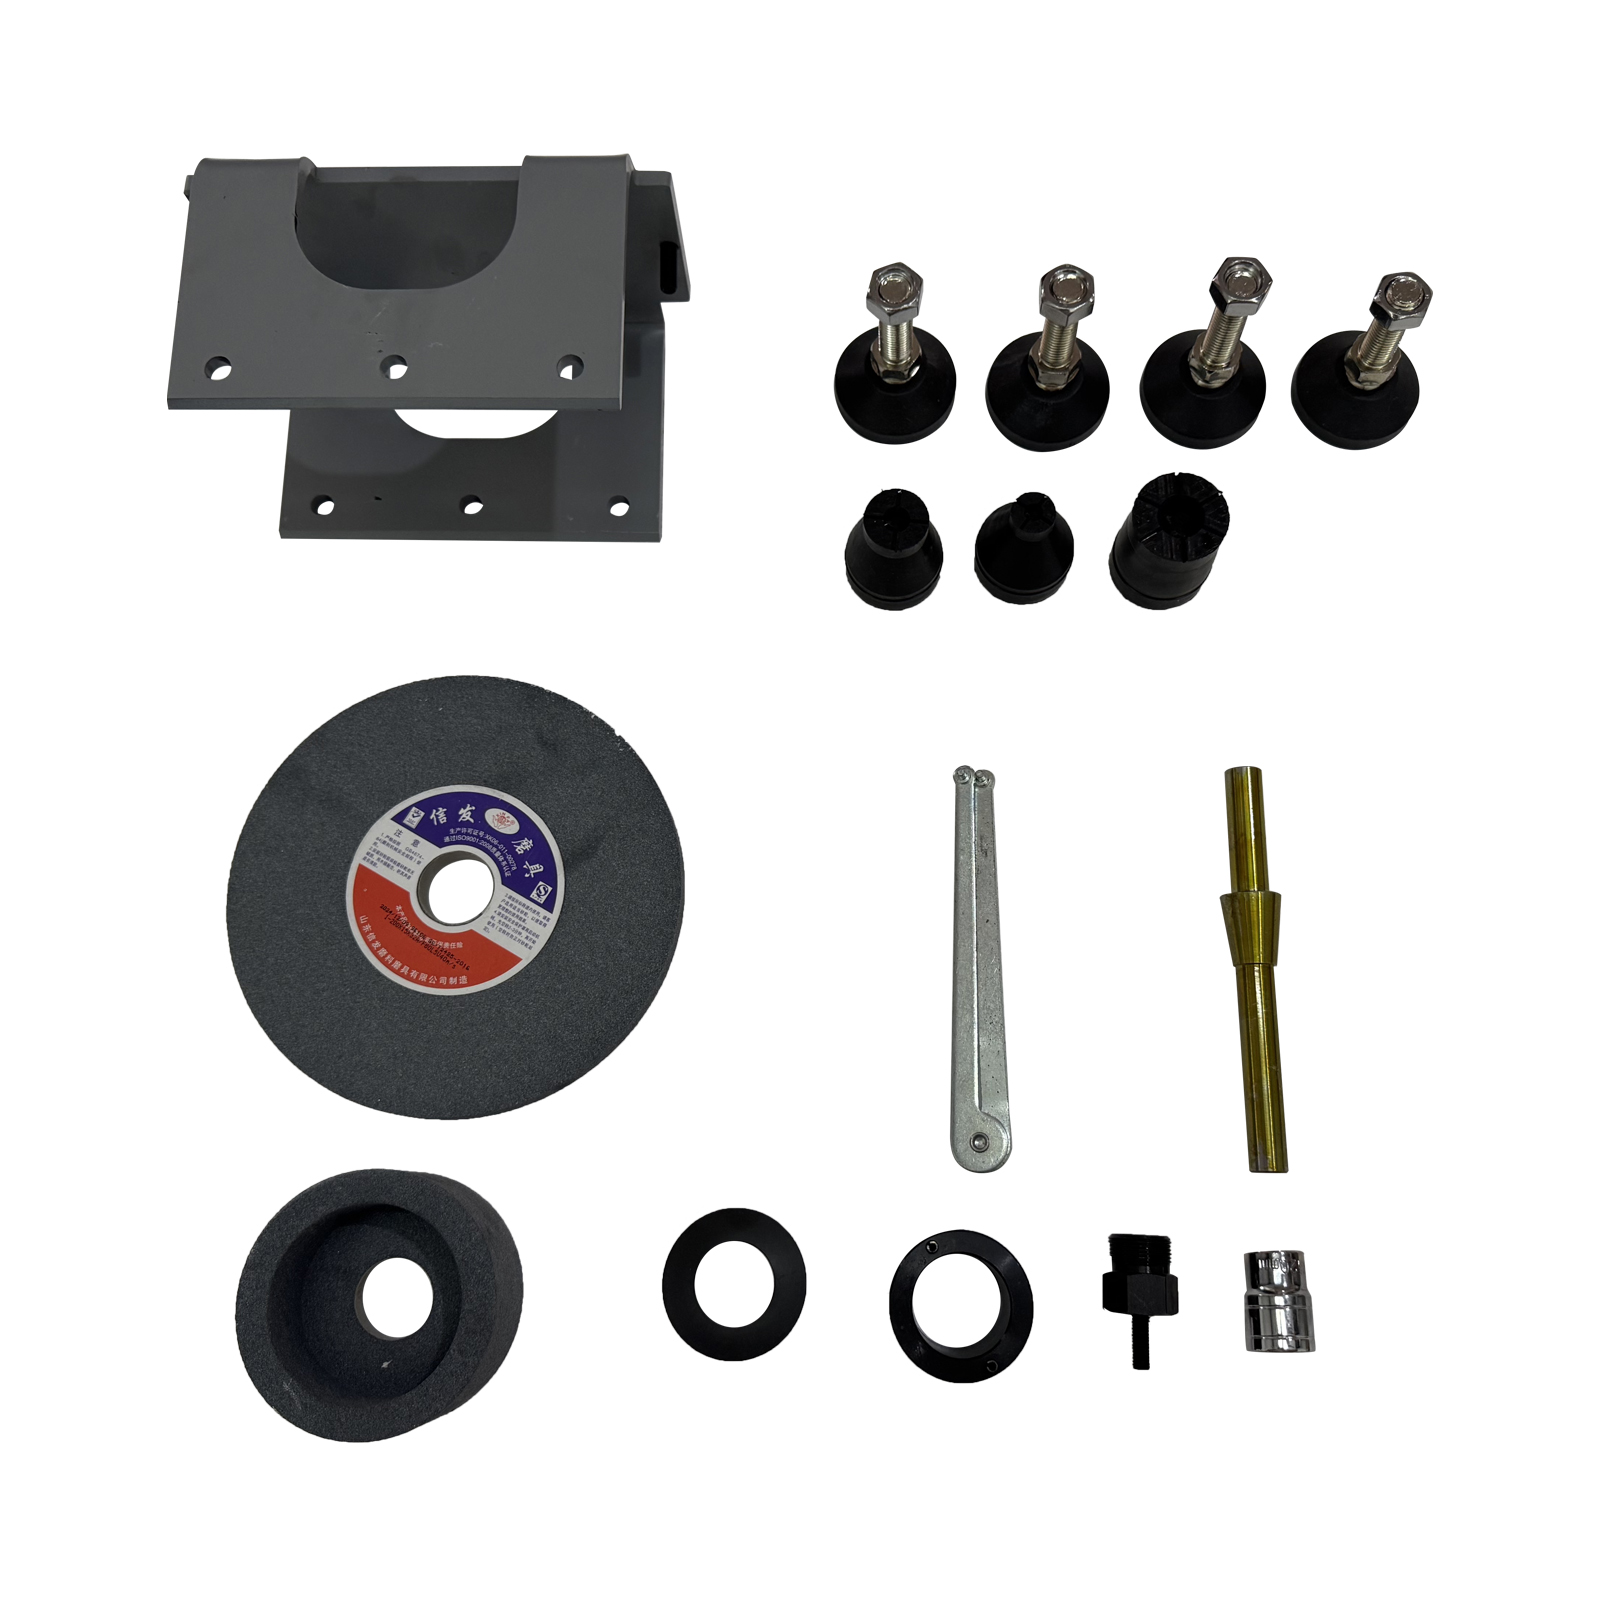
| ITEM INCLUDED(057218) | |||
|
|||
|
You can make order with no worry.
Any concern just feel free to let us know, we'll reply in 24 hours in normal condition. Handling Time: Shipping is usually made in 1-3 business days after payments cleared. Orders are processed from Monday-Friday; Not on the weekends & public holidays. Warranty: 6 months' warranty for the machines, not for the consumables. We stand behind our products all the item, so even if your warranty period has expired, you can still seek for service or technical support from us with low cost. |
|||
| SHIPPING & HANDING DETAILS |
|
Default Shipping Cost or Free Shipping Information: Handling Time: Shipping is usually made in 1-3 business days after payments cleared. Orders are processed from Monday-Friday; Not on the weekends & public holidays. Sales tax / Customs duties: Any sales taxes or Customs duties are not included. If came out, they must be undertaken by the buyer. Damage In Shipping: Email or call us First! We will work with you to get the case resolved in the fastest method. |
|
RETURN & REFUND
|
|
If you are not 100% happy with your purchase, please contact Us. Please don't directly opened a request or case without informing us, or else, we will do some discounts on the warranty and other sales-services later on. Hope for your understanding. Returns & Exchanges ▲ All returns must be made within 14 days of delivery date. Items must be in new, unused condition, with all original materials included with the shipment. A partial refund may be applied for opened or damaged items, depending on the condition. Defective & Damaged Products |
|
PAYMENT
|
|
eCheck Issues: Payments via eCheck do not clear immediately. Usually you will wait 5-7 days after checkout for it to clear. Then we will arrange shipments for you.
|
|
WARRANTY & FEEDBACK
|
|
▲ 6 months' warranty for the machines, not for the consumables. We stand behind our products all the item, so even if your warranty period has expired, you can still seek for service or technical support from us with low cost.
▲ Any warranty shipping cost to us is responsible by buyer. ▲ Any shipping cost to buyer is responsible by the seller. ▲ We committee to the customer satisfaction and want to bring you the best purchase experience. If there is any problems, please contact us ASAP. If not, please leave us a positive feedback as it's very important for us. Thanks very much. |
On Oct 9, 2025 at 00:42:23 PDT, seller added the following information: