
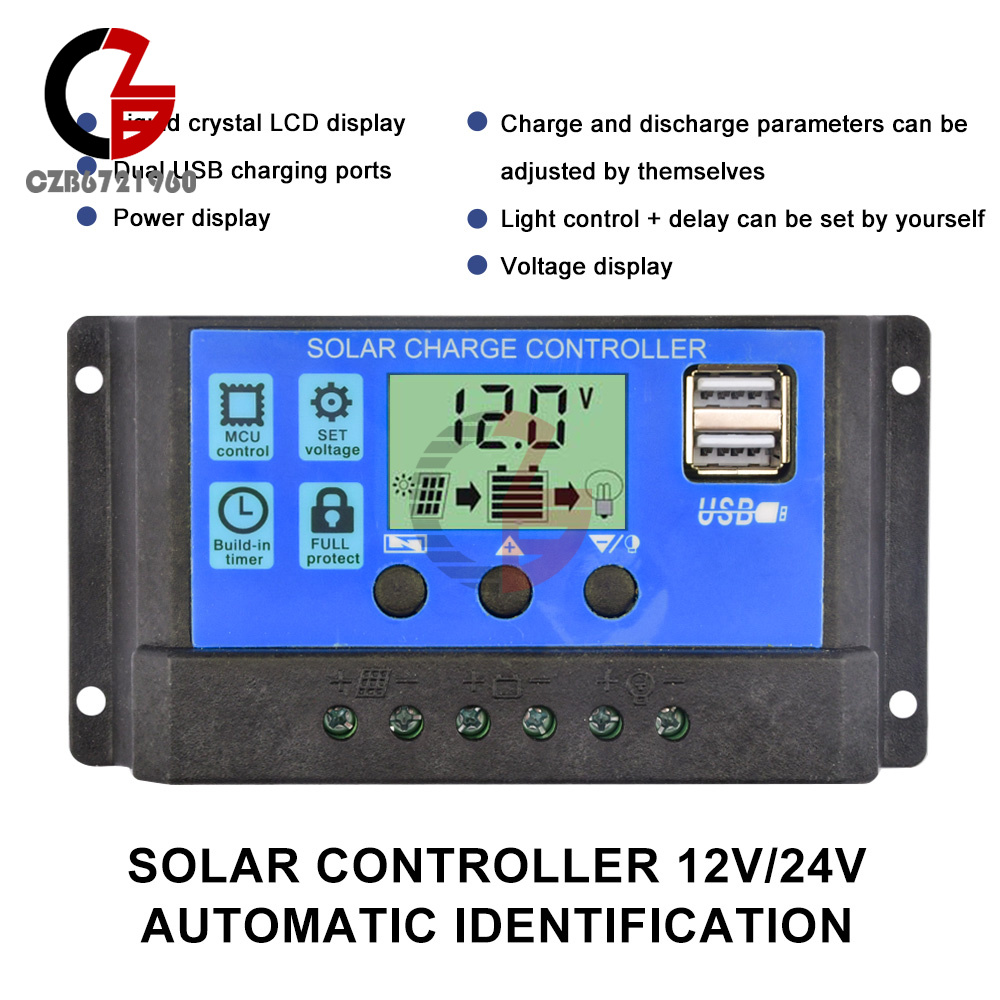
10A/30A/60A PWM Solar Charge Controller 12/24V Auto Dual USB Solar Panel Charger
Popular

Product Introduction
Features:
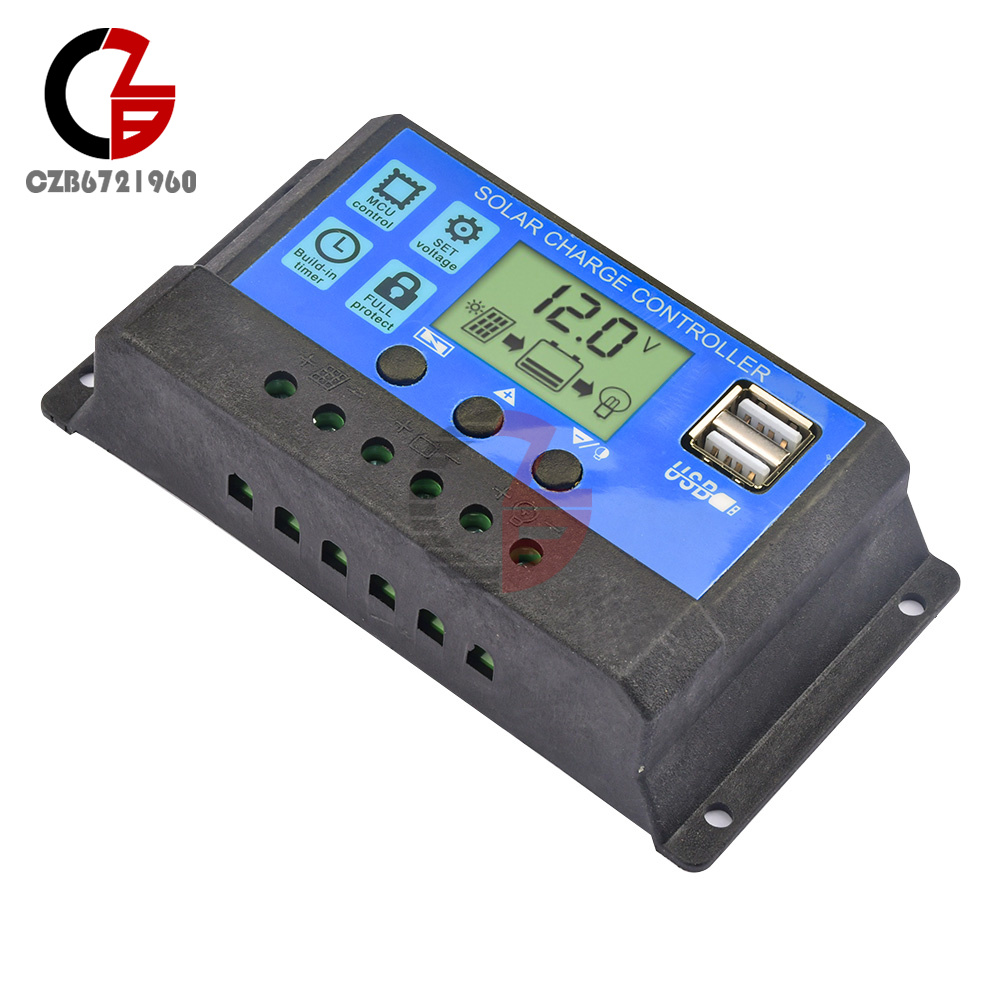
1. Adopting industrial-grade main control chip
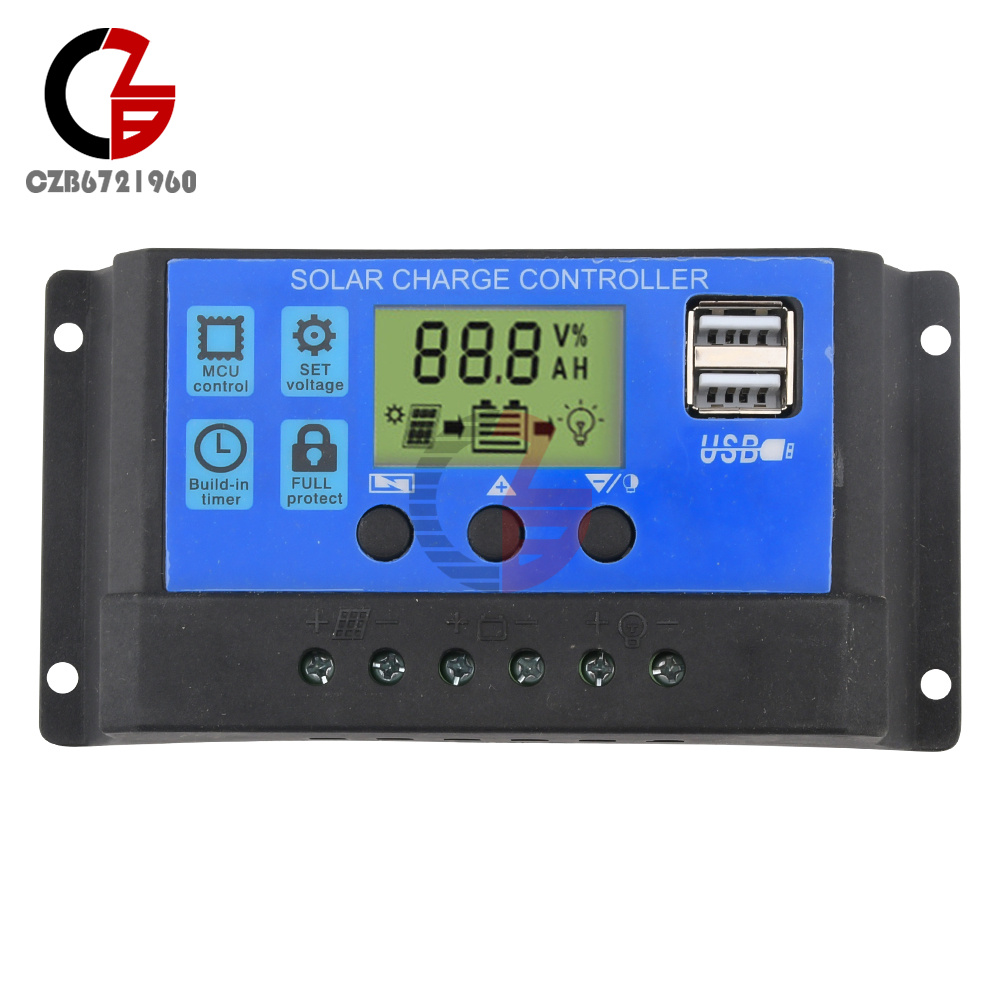
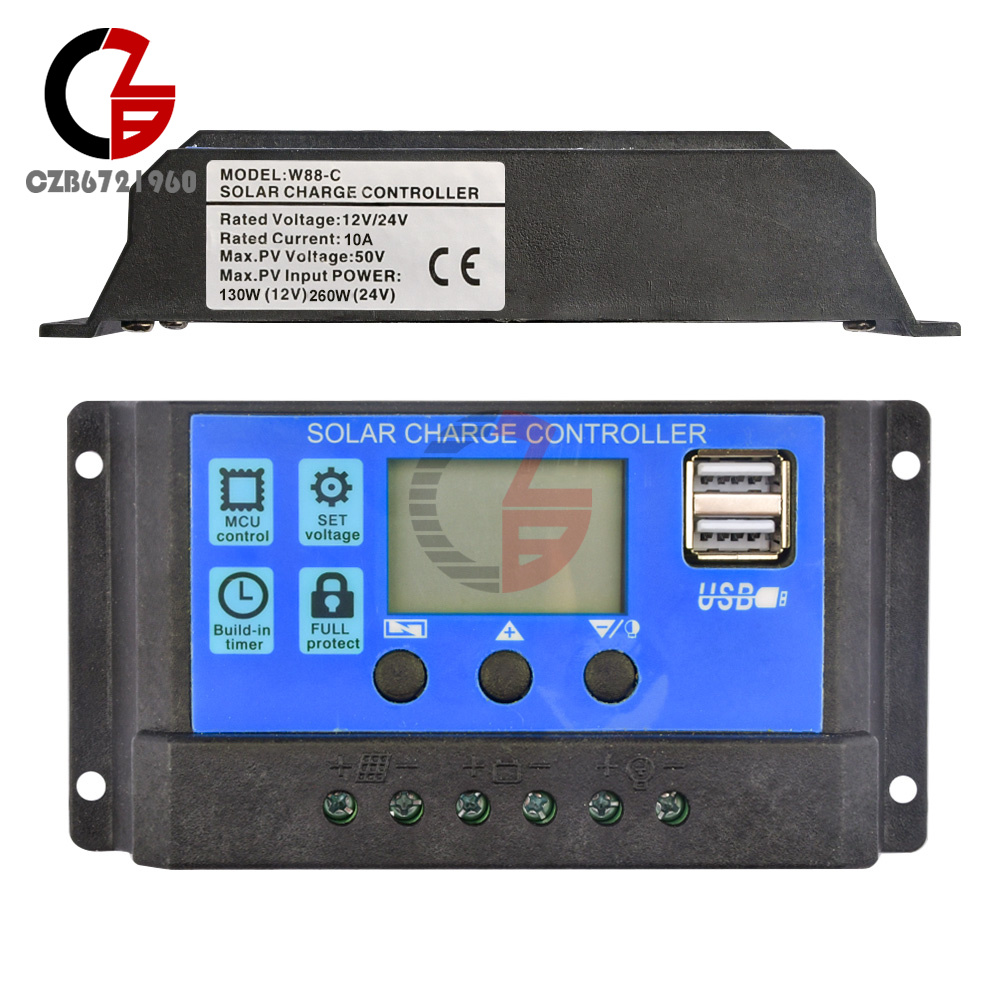
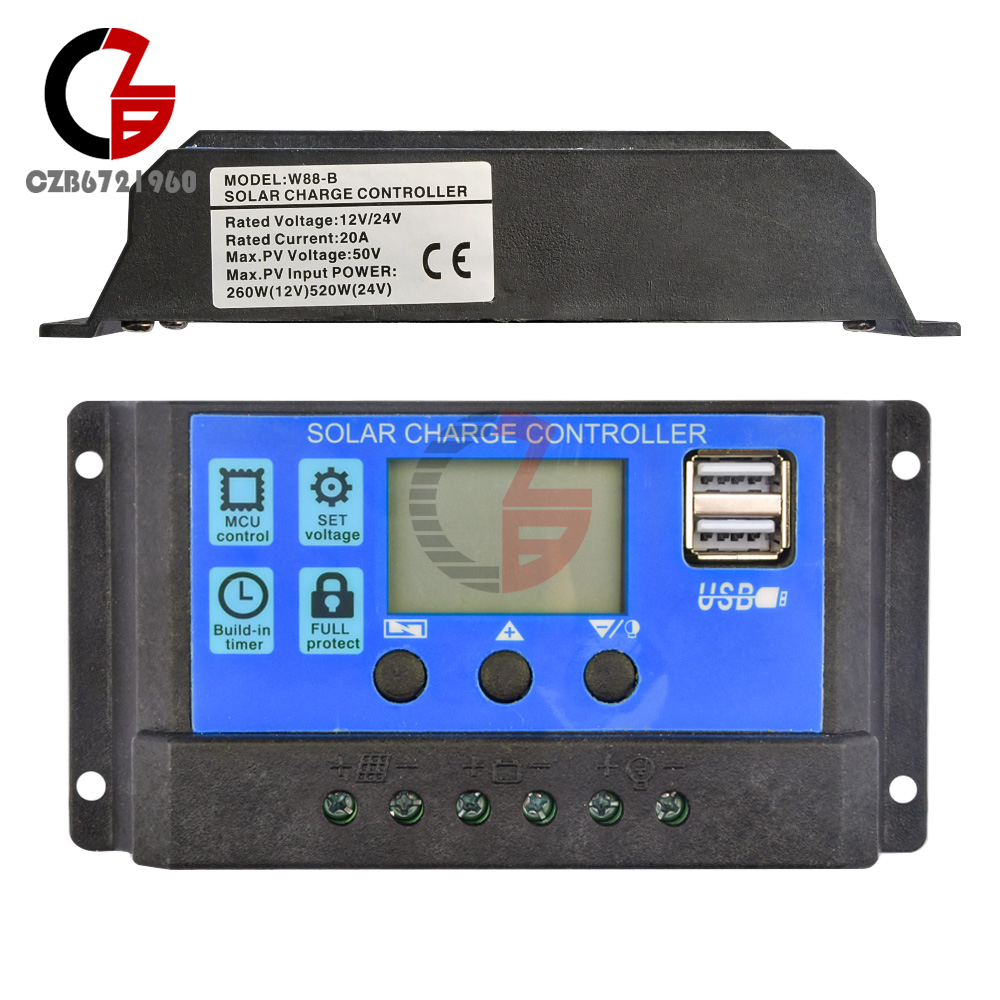
2. Large LCD display, adjustable charging and discharging parameters
3. Complete 3-stage PWM charging management
4. Built-in overcurrent/short circuit protection, open circuit protection, reverse connection protection, are self-recovery type, do not damage the controller
5. Dual MOS anti-backup circuit, ultra-low heat generation.
1. Adopting industrial-grade main control chip
2. Large LCD display, adjustable charging and discharging parameters
3. Complete 3-stage PWM charging management
4. Built-in overcurrent/short circuit protection, open circuit protection, reverse connection protection, are self-recovery type, do not damage the controller
5. Dual MOS anti-backup circuit, ultra-low heat generation.
Product parameters
Rated voltage: 10A-30A Current: 10A
Rated current: 40A-60A Current: 30A
Maximum photovoltaic voltage: Maximum 23V for 12V battery; Maximum 46V for 24V battery.
Full cut-off voltage: 14.4V (default, adjustable)
Discharge cut-off voltage: 10.7V (default value, adjustable)
Discharge recovery voltage: 12.6V (default value, adjustable)
Charge recovery voltage: 13.2V .
Light-control turn-on threshold: 8V for PV panel (light-control turn-on with delay)
Light-control shut-off valve: light-control shut-off valve
USB output: 2-channel USB output, 5V/2.5A (max)
Standby current: <10mA
Operating temperature: -35~ +60C
Size/Weight: 133.5* 70* 35mm 1 1 65g
Instruction manual
1.This controller is 12V/24V auto adaptive, when installing for the first time, please make sure the battery has enough voltage so that the controller can recognize it as the correct battery type.
Pake the controller to be installed as close as possible to the battery, in order to avoid voltage drop caused by long wires, which will affect the normal voltage judgment.
3. This controller is only applicable to all kinds of lead-acid batteries (including open, sealed, gel, etc.), please do not use in other batteries (including lithium batteries, nickel-metal hydride batteries, etc.)
4. This controller can only use photovoltaic panels as a charging source, please do not use DC or other power sources as a charging source.
6. The controller will be hot when running, please pay attention to install the controller on a flat, well-ventilated surface.
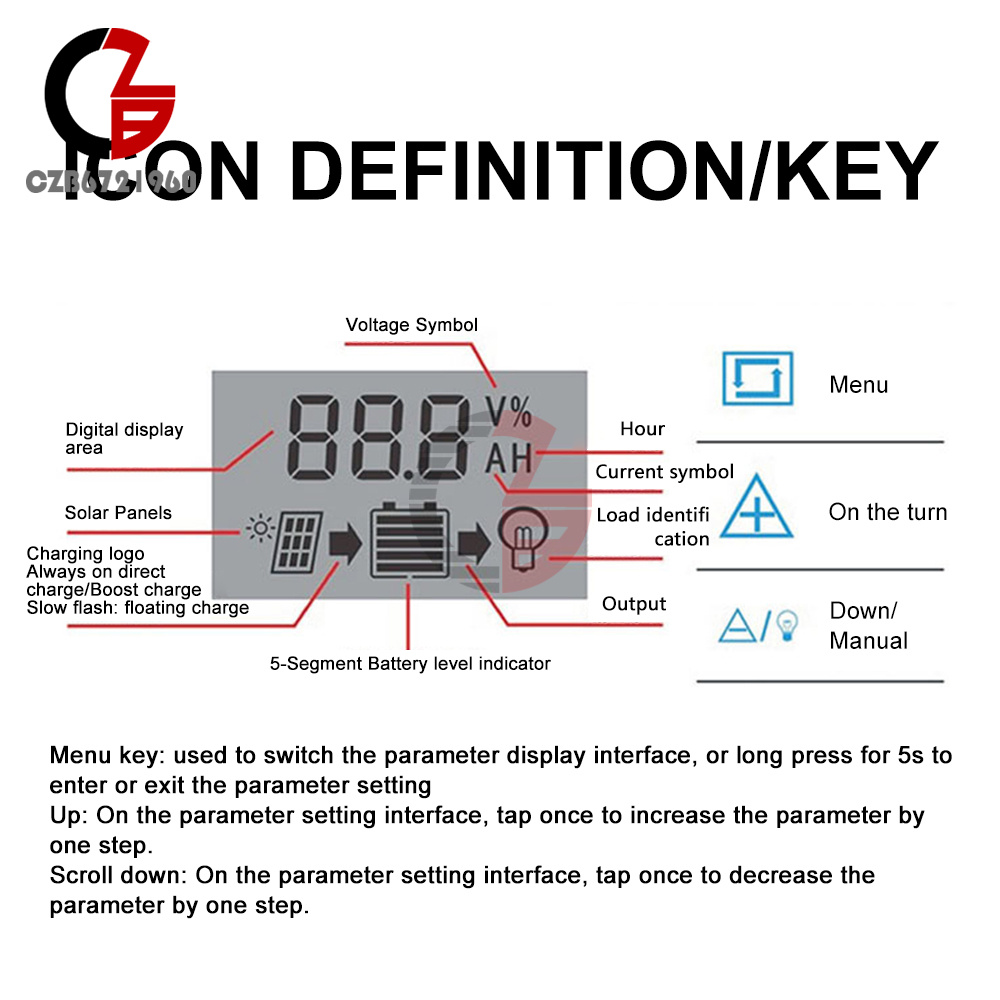
Menu key: used to switch the parameter interface, or long press for 5 seconds to enter or exit the parameter setting.
Up: In the parameter setting interface, press lightly once to make the parameter up. Up: In the parameter setting interface, press once lightly to make the parameter up one grade.
Down: In the parameter setting interface, press once to make the parameter go up or down one step.
1.This controller is 12V/24V auto adaptive, when installing for the first time, please make sure the battery has enough voltage so that the controller can recognize it as the correct battery type.
Pake the controller to be installed as close as possible to the battery, in order to avoid voltage drop caused by long wires, which will affect the normal voltage judgment.
3. This controller is only applicable to all kinds of lead-acid batteries (including open, sealed, gel, etc.), please do not use in other batteries (including lithium batteries, nickel-metal hydride batteries, etc.)
4. This controller can only use photovoltaic panels as a charging source, please do not use DC or other power sources as a charging source.
6. The controller will be hot when running, please pay attention to install the controller on a flat, well-ventilated surface.
Menu key: used to switch the parameter interface, or long press for 5 seconds to enter or exit the parameter setting.
Up: In the parameter setting interface, press lightly once to make the parameter up. Up: In the parameter setting interface, press once lightly to make the parameter up one grade.
Down: In the parameter setting interface, press once to make the parameter go up or down one step.
Connection of the System:
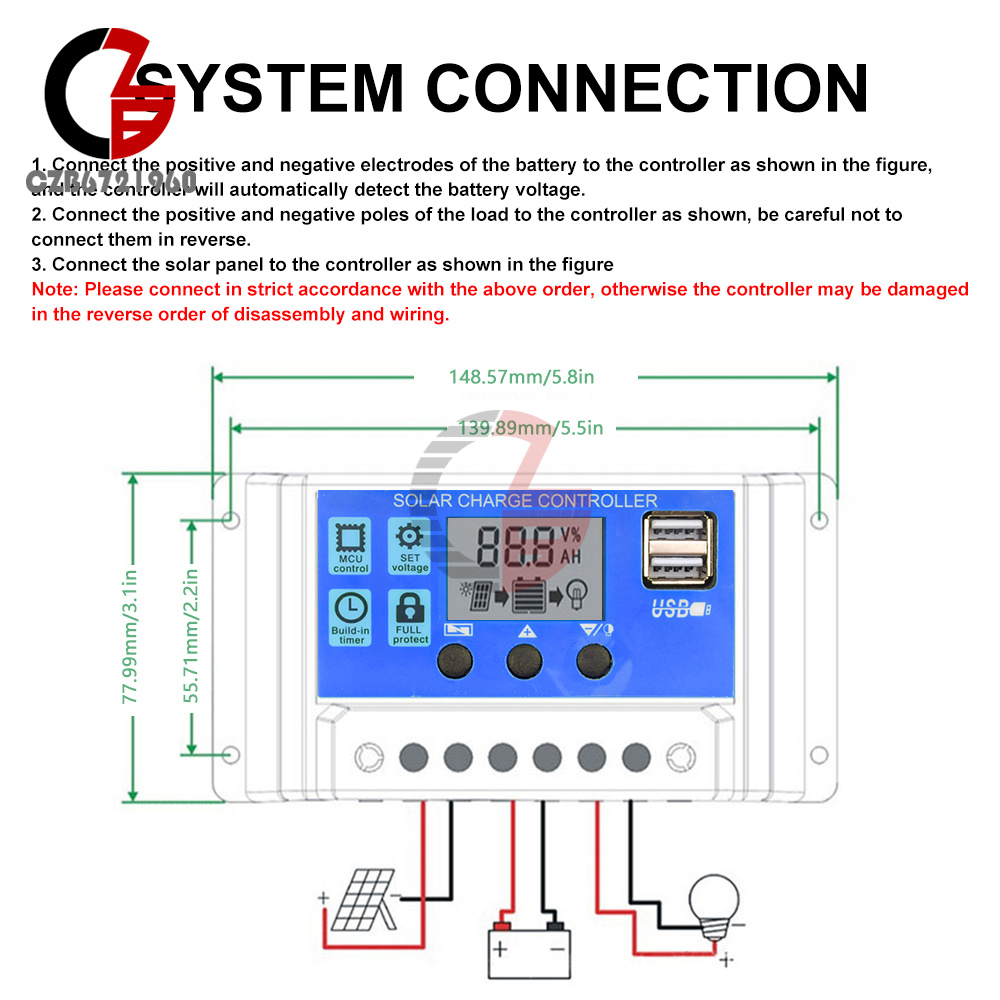
1. Connect the positive and negative terminals of the battery to the controller as shown in the diagram, and the controller will automatically detect the battery voltage.
2. Connect the positive and negative terminals of the load to the controller as shown in the diagram, and be careful not to connect them in reverse.
3.Connect the solar panel to the controller as shown in the picture.
Note: 12V battery with 1 8V solar panel, 24V battery with 36V solar panel.
List:
Solar controller X1
Solar controller X1
- We accept PayPal only. But we only Accept your Ebay Address,Please Make sure it's 100% right.
- Payment must be received in 5 business days of auction closing.
- Please leave note for your special request (e.g. Colors or Size) in PayPal when you pay the order.
- Any special request cannot be accepted after 24 hours of payment, because most of orders will be processed instantly and same day dispatched.
- We maintain high standards of excellence and strive for 100% customer satisfaction! Feedback is very important to us. We request that you contact us immediately BEFORE you give us neutral or negative feedback, so that we can satisfactorily address your concerns.
- All package need to wait 30 days(US only need 7-10 days),Please take care it.Less than 30 days,we can't take a refund.
- If the item is defect when you receive it or you are not satisfied with it, please return it within 14 days for a replacement or money back. But the items must be back in factory condition. Please contact us and double check the return address before you return it.
- If is item is defective in 12 months, you can return it to us. We will send you a new replacement after receiving the defective item.
10A/30A/60A PWM Solar Charge Controller 12/24V Auto Dual USB Solar Panel Charger
Product Introduction
Features:
1. Adopting industrial-grade main control chip
2. Large LCD display, adjustable charging and discharging parameters
3. Complete 3-stage PWM charging management
4. Built-in overcurrent/short circuit protection, open circuit protection, reverse connection protection, are self-recovery type, do not damage the controller
5. Dual MOS anti-backup circuit, ultra-low heat generation.
Product parameters
Rated voltage: 10A-30A Current: 10A
Rated current: 40A-60A Current: 30A
Maximum photovoltaic voltage: Maximum 23V for 12V battery; Maximum 46V for 24V battery.
Full cut-off voltage: 14.4V (default, adjustable)
Discharge cut-off voltage: 10.7V (default value, adjustable)
Discharge recovery voltage: 12.6V (default value, adjustable)
Charge recovery voltage: 13.2V .
Light-control turn-on threshold: 8V for PV panel (light-control turn-on with delay)
Light-control shut-off valve: light-control shut-off valve
USB output: 2-channel USB output, 5V/2.5A (max)
Standby current: <10mA
Operating temperature: -35~ +60C
Size/Weight: 133.5* 70* 35mm 1 1 65g
Rated voltage: 10A-30A Current: 10A
Rated current: 40A-60A Current: 30A
Maximum photovoltaic voltage: Maximum 23V for 12V battery; Maximum 46V for 24V battery.
Full cut-off voltage: 14.4V (default, adjustable)
Discharge cut-off voltage: 10.7V (default value, adjustable)
Discharge recovery voltage: 12.6V (default value, adjustable)
Charge recovery voltage: 13.2V .
Light-control turn-on threshold: 8V for PV panel (light-control turn-on with delay)
Light-control shut-off valve: light-control shut-off valve
USB output: 2-channel USB output, 5V/2.5A (max)
Standby current: <10mA
Operating temperature: -35~ +60C
Size/Weight: 133.5* 70* 35mm 1 1 65g
Instruction manual
1.This controller is 12V/24V auto adaptive, when installing for the first time, please make sure the battery has enough voltage so that the controller can recognize it as the correct battery type.
Pake the controller to be installed as close as possible to the battery, in order to avoid voltage drop caused by long wires, which will affect the normal voltage judgment.
3. This controller is only applicable to all kinds of lead-acid batteries (including open, sealed, gel, etc.), please do not use in other batteries (including lithium batteries, nickel-metal hydride batteries, etc.)
4. This controller can only use photovoltaic panels as a charging source, please do not use DC or other power sources as a charging source.
6. The controller will be hot when running, please pay attention to install the controller on a flat, well-ventilated surface.
Menu key: used to switch the parameter interface, or long press for 5 seconds to enter or exit the parameter setting.
Up: In the parameter setting interface, press lightly once to make the parameter up. Up: In the parameter setting interface, press once lightly to make the parameter up one grade.
Down: In the parameter setting interface, press once to make the parameter go up or down one step.
Connection of the System:
1. Connect the positive and negative terminals of the battery to the controller as shown in the diagram, and the controller will automatically detect the battery voltage.
2. Connect the positive and negative terminals of the load to the controller as shown in the diagram, and be careful not to connect them in reverse.
3.Connect the solar panel to the controller as shown in the picture.
Note: 12V battery with 1 8V solar panel, 24V battery with 36V solar panel.
List:
Solar controller X1
Solar controller X1
- We accept PayPal only. But we only Accept your Ebay Address,Please Make sure it's 100% right.
- Payment must be received in 5 business days of auction closing.
- Please leave note for your special request (e.g. Colors or Size) in PayPal when you pay the order.
- Any special request cannot be accepted after 24 hours of payment, because most of orders will be processed instantly and same day dispatched.
- We maintain high standards of excellence and strive for 100% customer satisfaction! Feedback is very important to us. We request that you contact us immediately BEFORE you give us neutral or negative feedback, so that we can satisfactorily address your concerns.
- All package need to wait 30 days(US only need 7-10 days),Please take care it.Less than 30 days,we can't take a refund.
- If the item is defect when you receive it or you are not satisfied with it, please return it within 14 days for a replacement or money back. But the items must be back in factory condition. Please contact us and double check the return address before you return it.
- If is item is defective in 12 months, you can return it to us. We will send you a new replacement after receiving the defective item.