For Yaesu FT-857/D Radio transceiver LCD Display Screen
Package Included:
1 x LCD Display Screen
Note: Transceiver and others are not included.
Tips:
The colors may have different as the difference display, please understand.
Troubleshooting common issues:
If only the word "YAESU" appears in the upper left corner with no other display, there is a disconnection in the soldered data lines.
If the screen fails to display "YAESU" at startup and then shows garbled characters, the issue is a broken connection between the screen or the MCU and the screen.
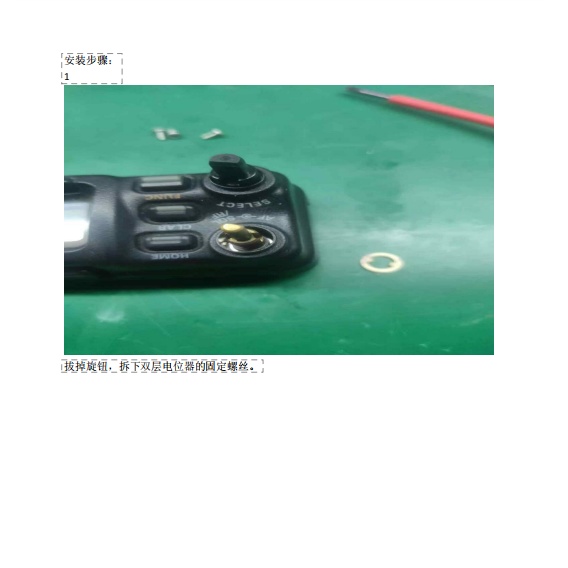
1:Pull out the knob and remove the fixing screws of the dual-layer potentiometer.
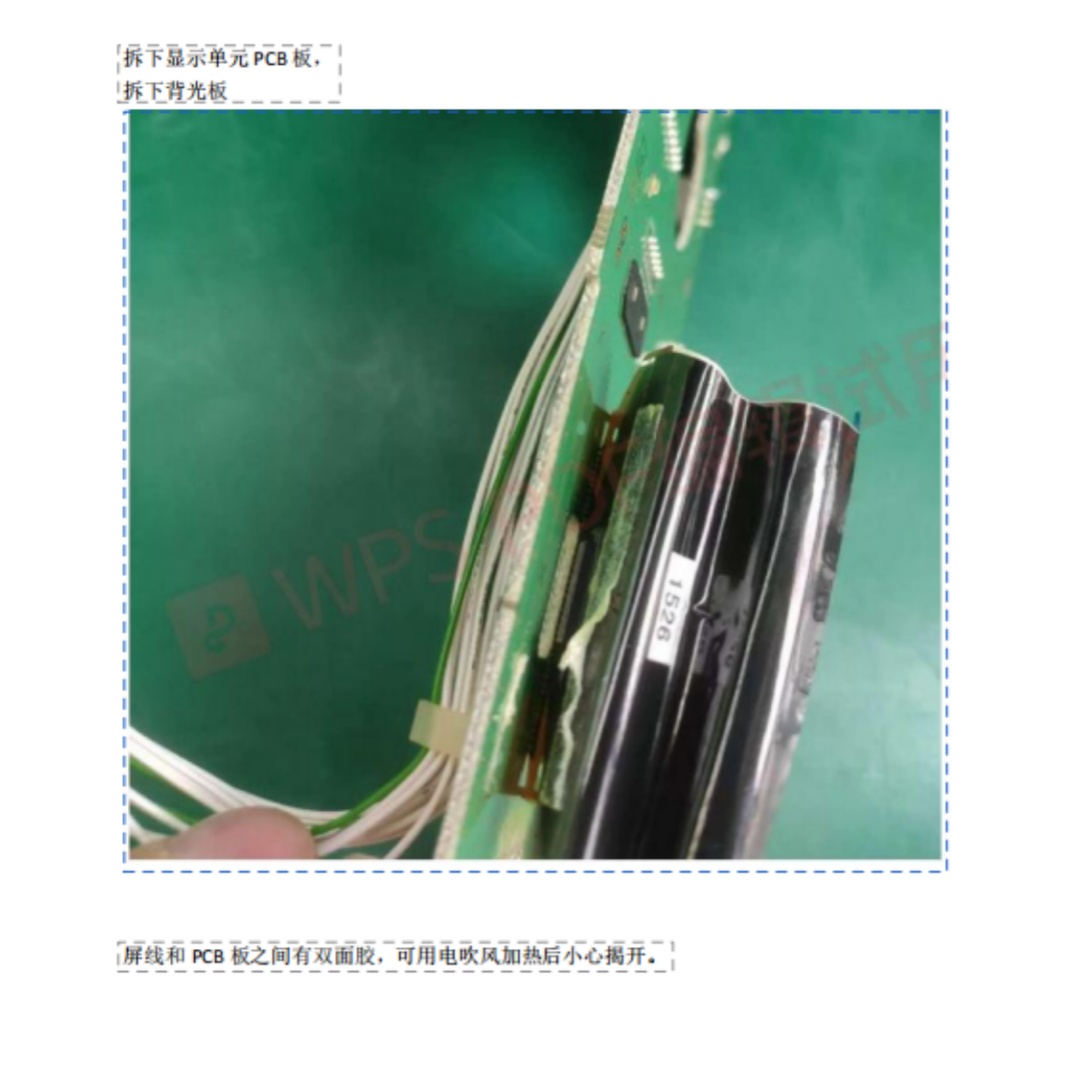
2:Remove the display unit PCB board and then take off the backlight board.
There is double-sided tape between the screen cable and the PCB board. You can heat the area with a hair dryer before carefully peeling them apart.
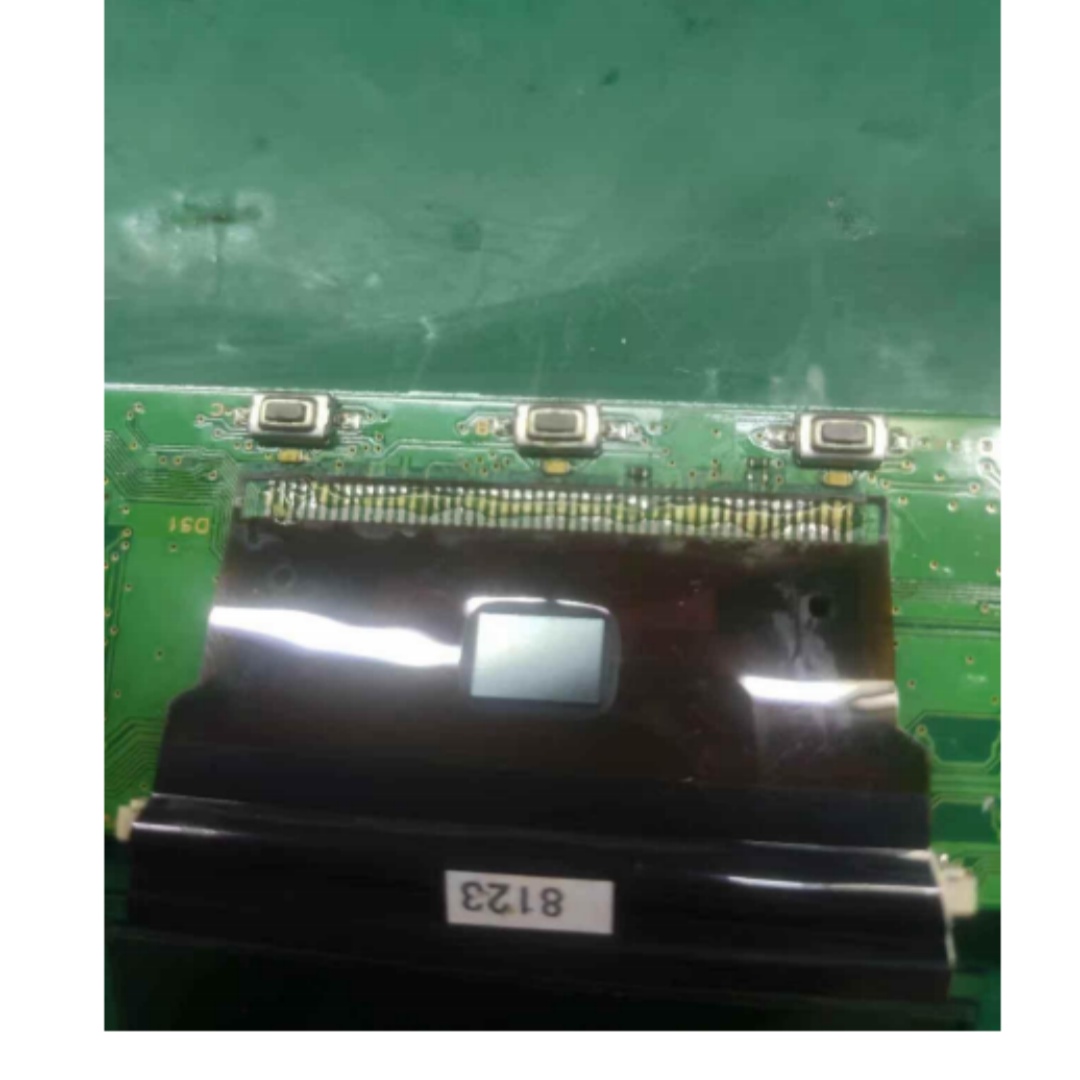
3:Screen removal is a critical step that determines the success or failure of the entire process. First, apply soldering flux (preferred) or rosin to the solder joints.
Add some solder and drag it back and forth to ensure all joints are evenly tinned. Then, start from one end of the screen cable—heat the solder joints while gently and carefully peeling the cable off.: Do not apply excessive force to avoid damaging the solder pads.
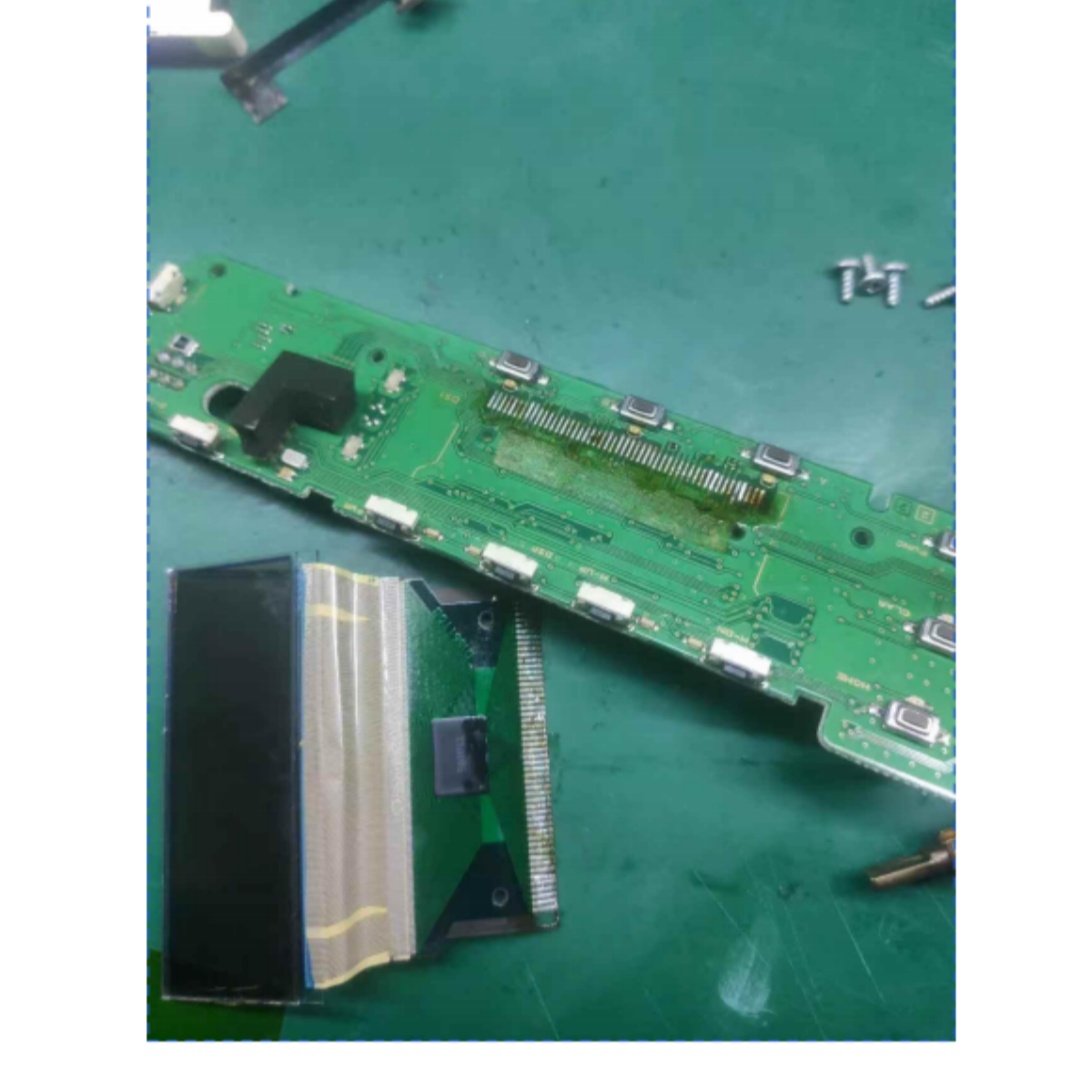
4:Remove the residual double-sided tape and clean the solder joints.
Do not panic if some pads come off accidentally. In practice, we only need 11 valid data pins and 5 power supply pins.
The 5 solder joints on each side (left and right) are only for positioning and alignment—they have no actual internal connections. The 11 data lines are the most crucial components.
5:Before soldering, peel off the protective film from the double-sided tape on the reverse side of the display driver board to expose the black adhesive layer.
Do not remove the amber high-temperature insulating tape under any circumstances.
Tin the solder joints on the front main board and apply soldering flux; use a desoldering braid to flatten any unused pins. These two steps are particularly important.
For positioning, expose half of the solder joints on the front display PCB board along the length direction to facilitate soldering, and align it horizontally with the small display driver adapter board.
Press the two PCB boards tightly together, apply soldering flux or solder paste to the welding seam, and then either drag the soldering iron back and forth directly for soldering or use a hot air gun for reflow soldering.
When using a hot air gun, cover small adjacent components (e.g., indicator lights, buttons) with high-temperature tape for protection.
Control the temperature of the soldering iron strictly—soldering flux is recommended over rosin.
After soldering, use a multimeter to check for short circuits between the power supply and 0V, as well as between the 11 valid signal lines.
Ensure that the upper and lower boards are fully connected and that there are no short circuits between adjacent data pins. If any soldering joints fail, directly bridge the corresponding pins on the two boards with wires.
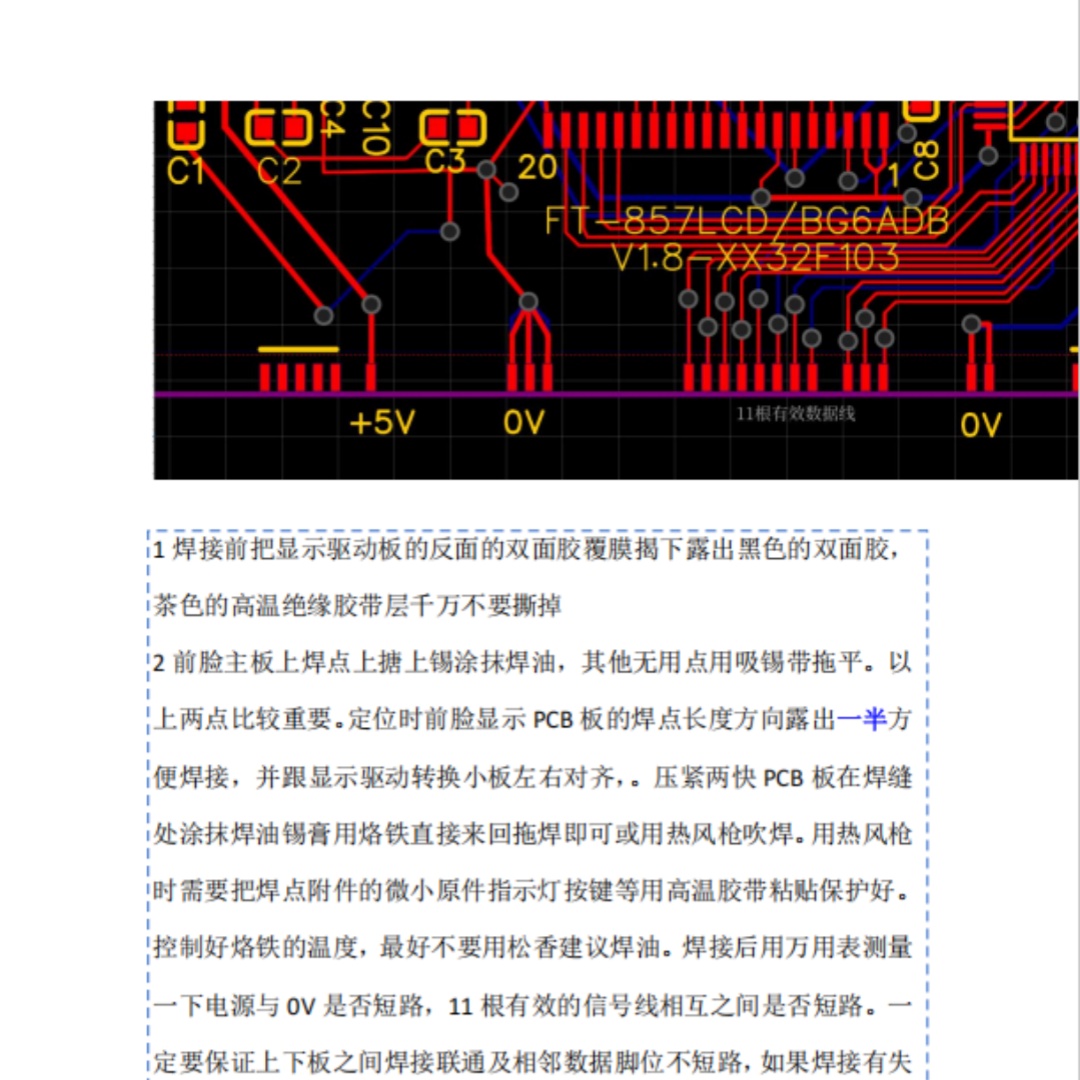
6:You can now power on the device for a test run. If the display works properly, proceed to modify the screen frame.
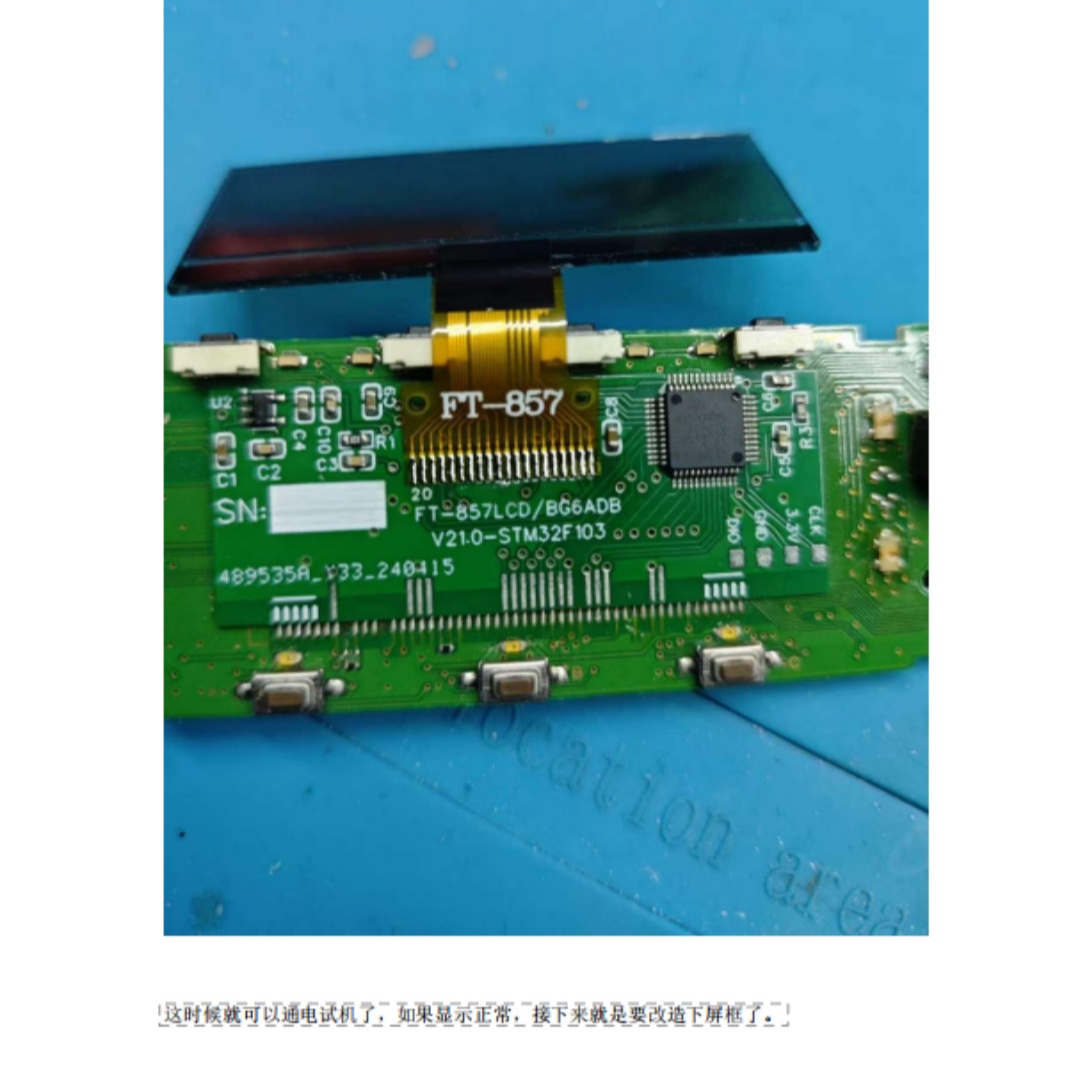
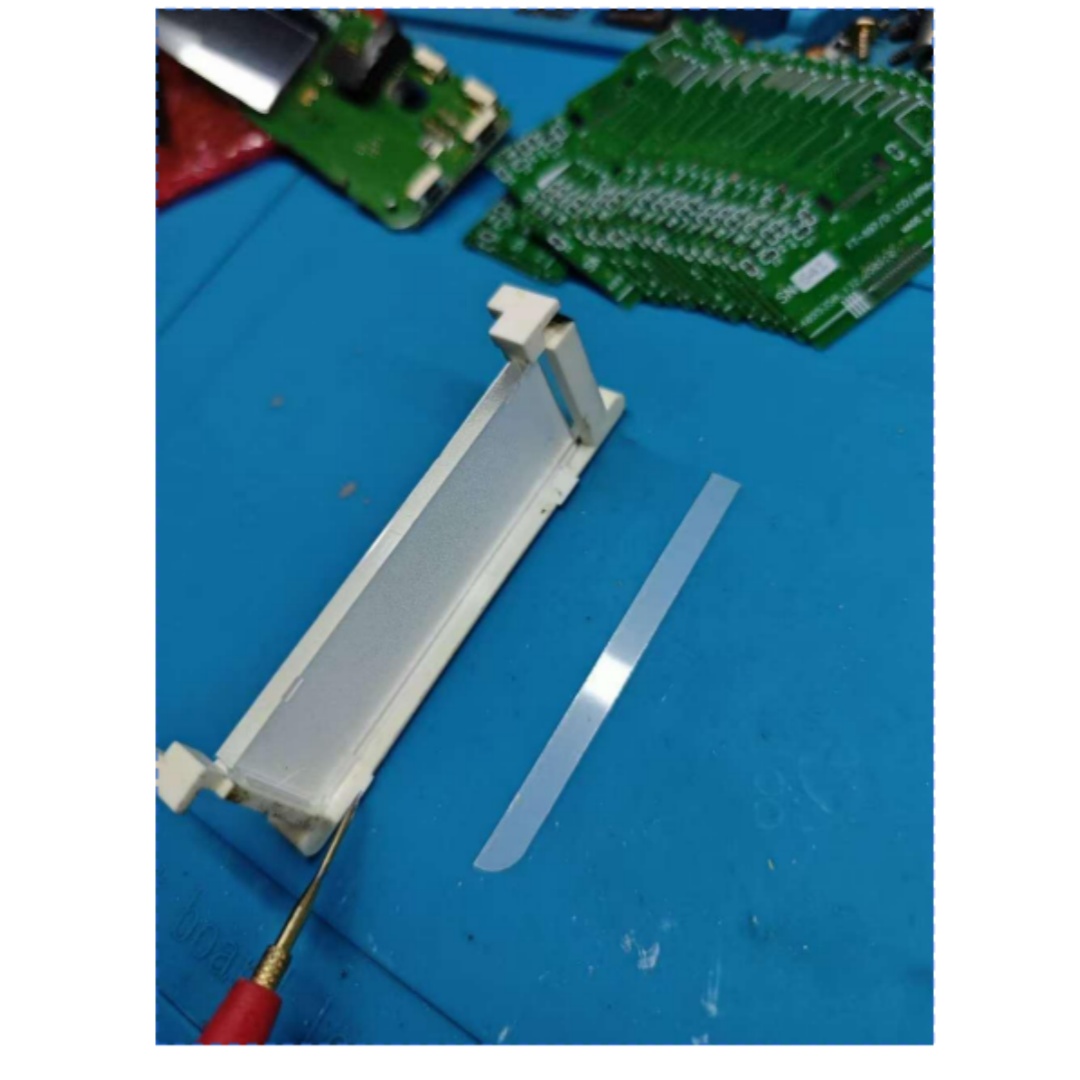
7:There are buckles at the positions indicated by the arrows in the diagram—carefully remove the light guide plate.
If the screen frame is severely yellowed or aged, handle it with extreme caution to prevent cracking.
If the light guide plate cannot be removed easily, heat the back of the frame with a soldering iron to melt the adhesive (operate on the back side only) and take care not to damage the light guide plate.
In all the devices I have repaired, the screen frames were severely yellowed and brittle—they would crack upon slight impact. Caution is essential!
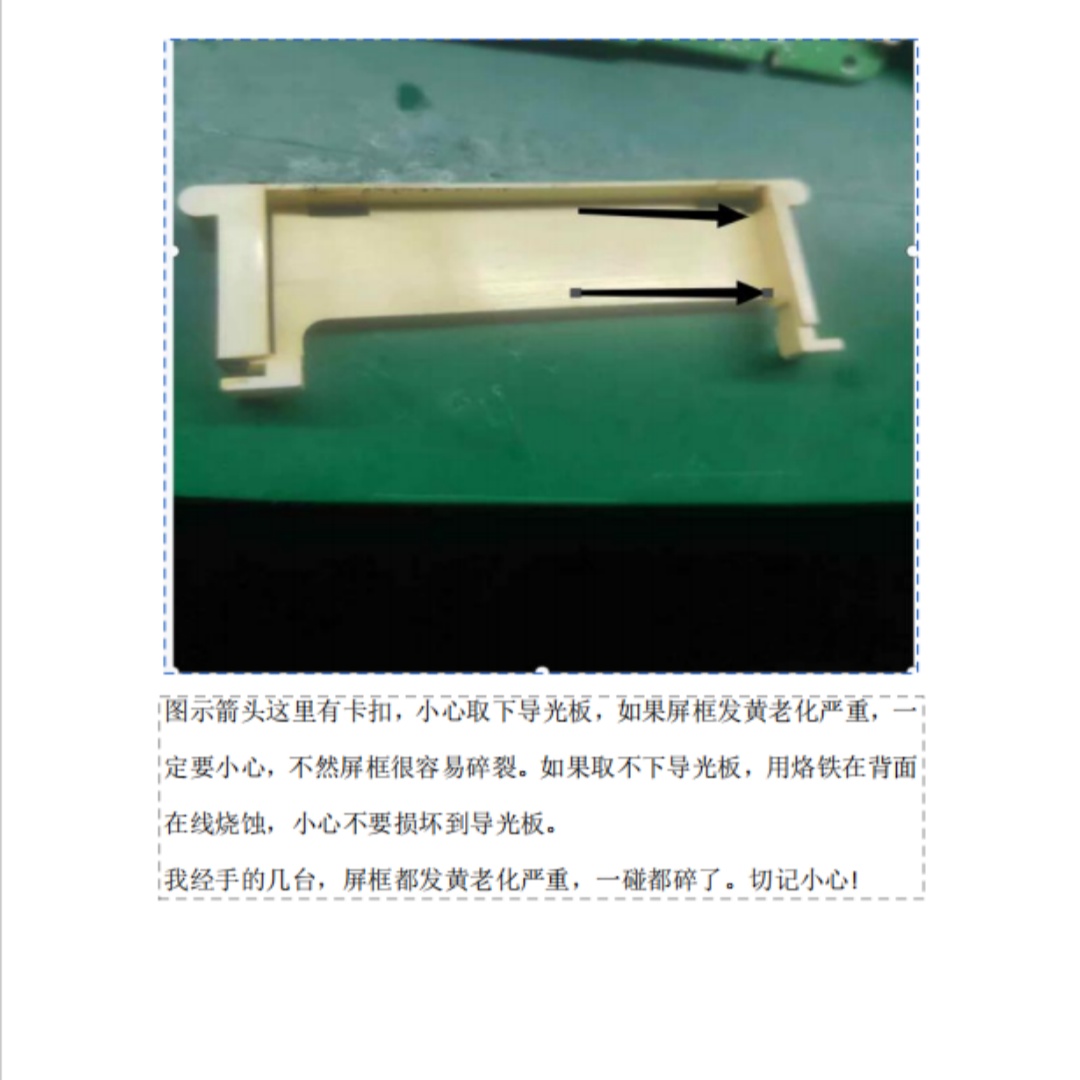
8:After removing the light guide plate, use a soldering iron to cut off the area of the frame that interferes with the chip. The diagram above shows the modified screen frame.
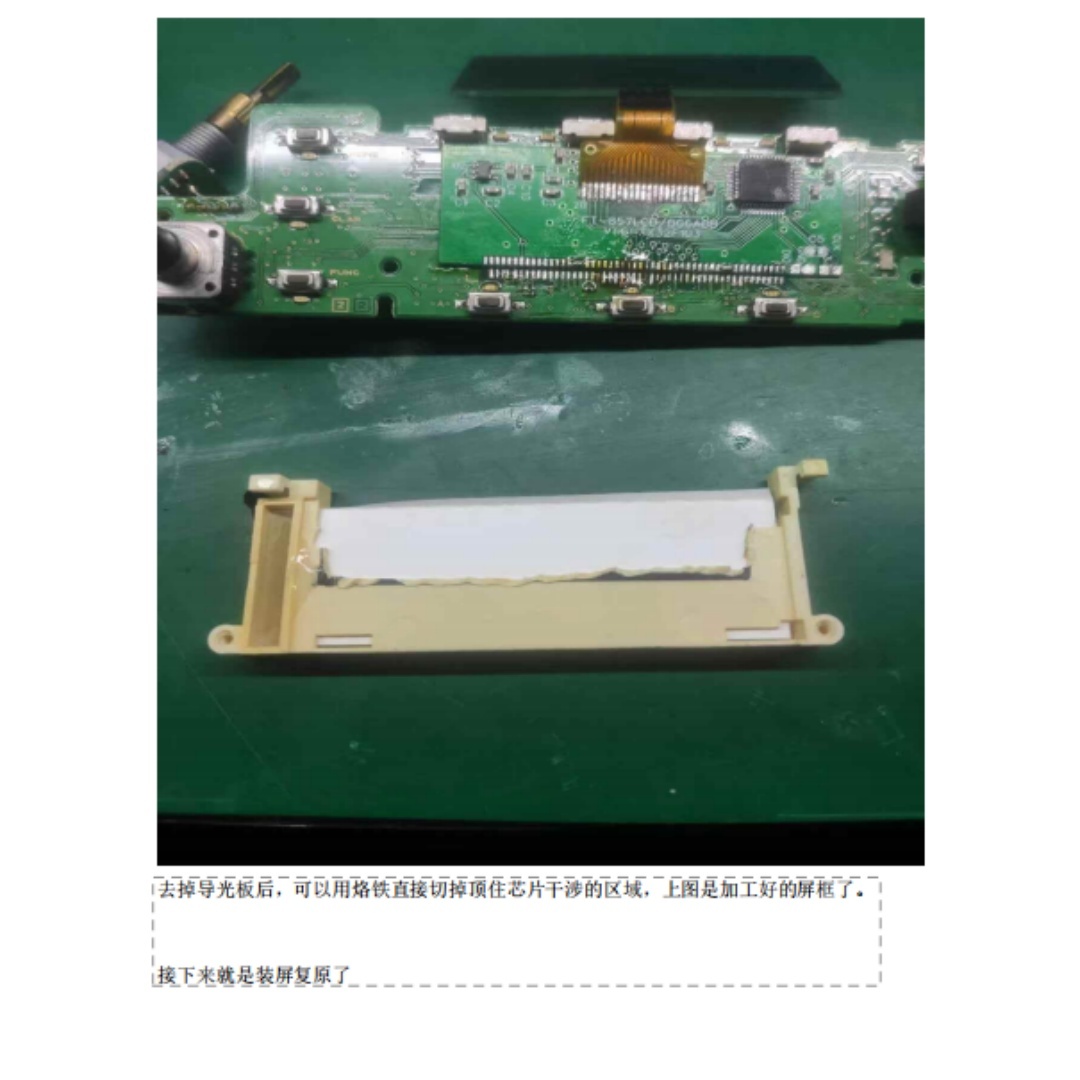
9:Next, reinstall the screen and reassemble the device.
Key notes for reassembly:
Fold the screen cable into a Z-shape at the edge of the driver adapter board—this will ensure a snug fit during installation.
Cut off the two fixing buckles at the bottom of the backlight frame with a knife and discard the gasket at the bottom as shown in the diagram.
Peel off the protective film from the double-sided tape at the bottom of the LCD screen to expose the black adhesive layer.
There is minimal dimensional tolerance when fitting the components into the case. Patience and careful handling are required to ensure proper installation.
An improper fit will result in loose panel buttons that cannot be pressed down fully.
Note:
We will reply your message or e-mail within 48 hours . Customers satisfaction is very important to us!
Please email or ebay message us before leaving any Negative and Neutral feedback or open any dispute on paypal.
Please give us the opportunity to resolve any problem.We understand the concernsand frustrations you might have, and will try our best to resolve the issues.
Shipping:
Item will be shipped out within 48 hours upon receipt of your full payment.
Please make sure your address in paypal is correct. If you want to change the address, please give us ebay message right away you make the payment.
Items are shipped from China or HongKong using Airmail, reach most of the countries within 10 to 20 business days.
Delivery time depends on destination and other factors, it may takes up to 25 business days.Other countries or remote area may take longer.
Please E-mail or eBay message us if the items did not deliveried within 31 days.And we can give you a satisfactory solution.
However, it may delay due to industrial strike action, severe weather, custom reasons or peak seasons, such as Christmas/New Year Holidays.
Returns:
If this item is defective upon receipt, customer has up to 30 days from date of receipt for exchange of a new one.
But buyers should be pay for the shipping charge for returning.
We care about our valued customers, and are always willing to work things out. If you have any problems, please e-mail us immediately.
Please give us the opportunity to resolve any problem. Thanks!