


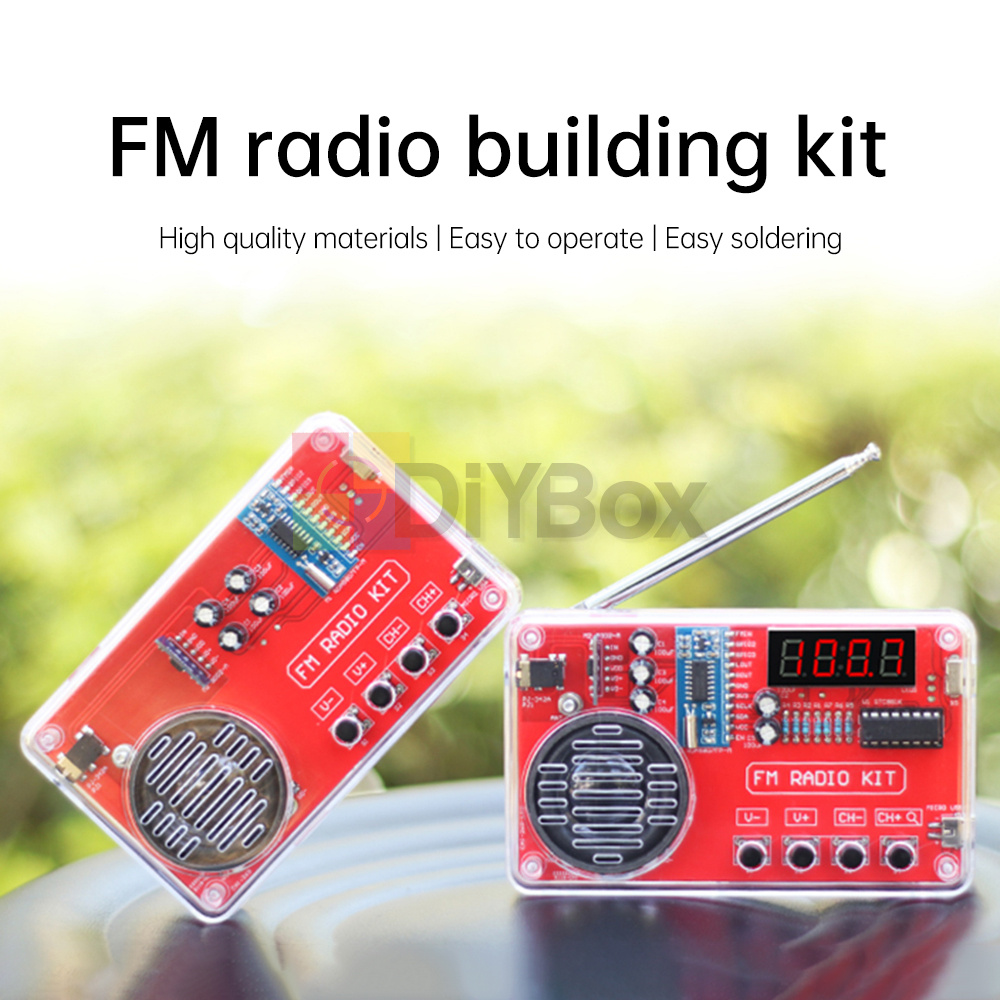

150Hz-20KHz DIY FM Radio Electronic Kits Adjustable Frequency Soldering Project
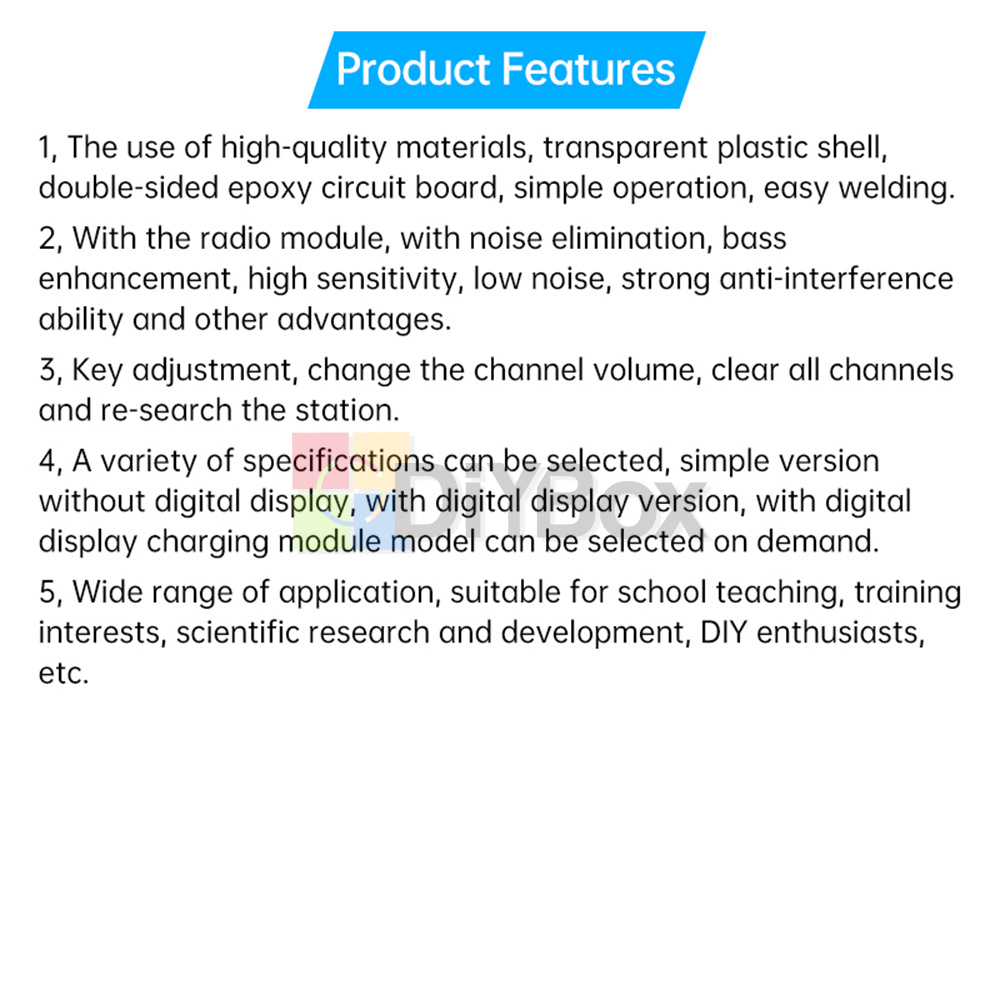
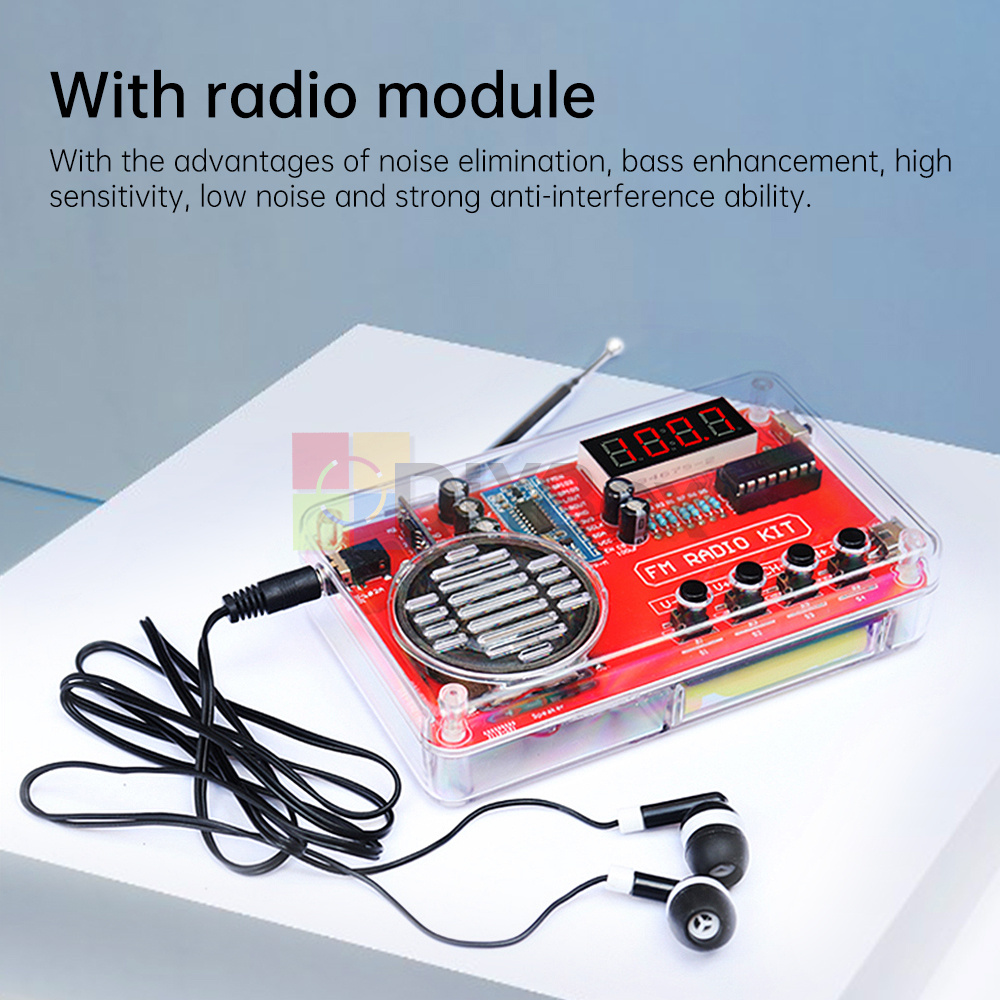
2、With radio module, with noise elimination, bass enhancement, high sensitivity, low noise, strong anti-interference ability and other advantages.
3, key adjustment, switch channel volume up and down, clear all channels and re-search and save the station.
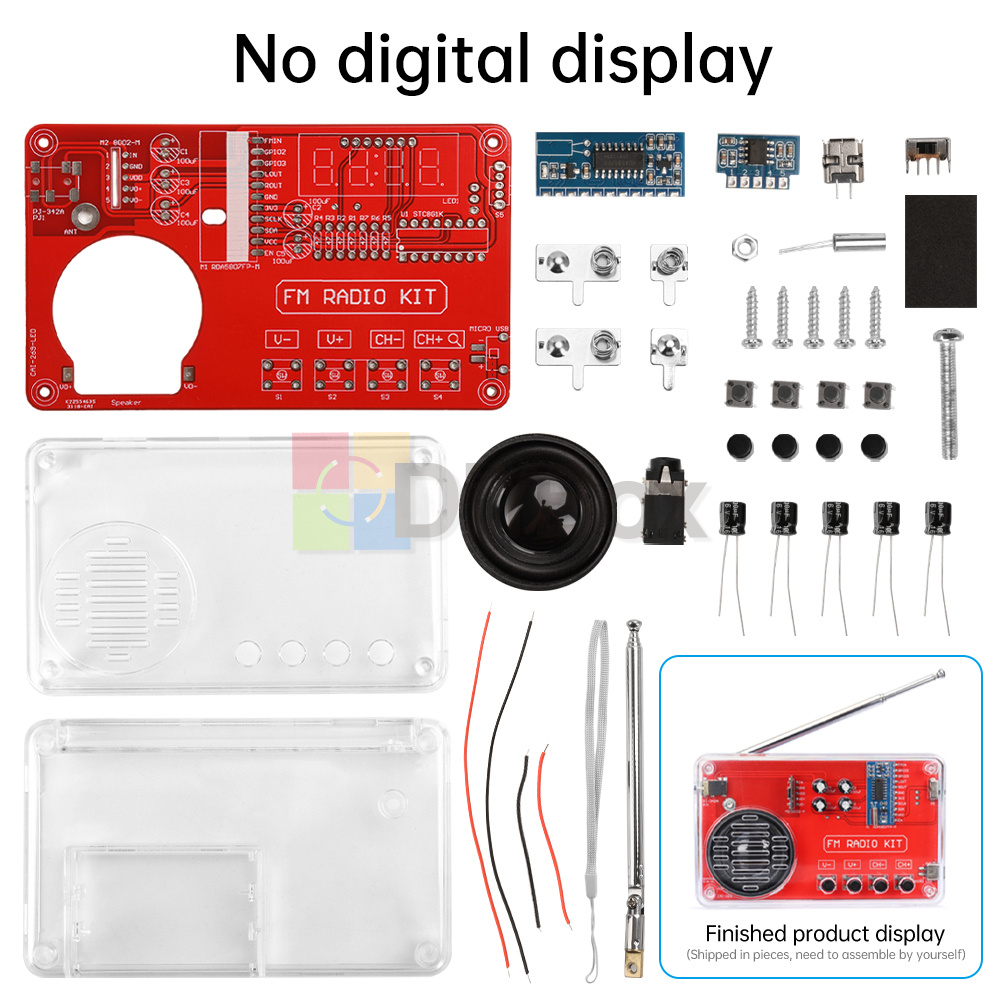
4, a variety of specifications can be selected, simple version without digital display, with digital display version, with digital display with charging module models can be selected according to need.
5、Wide range of application, suitable for school teaching, cultivate interest, scientific research and development, DIY enthusiasts.
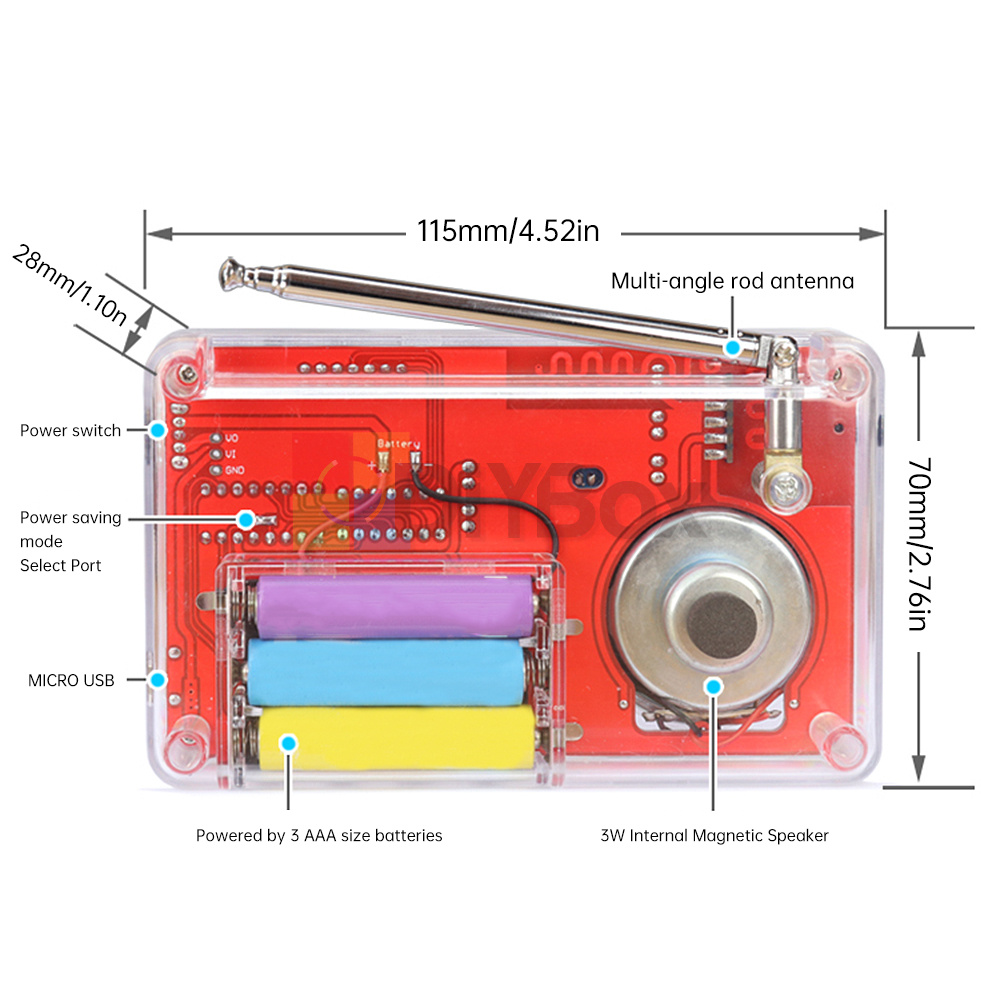
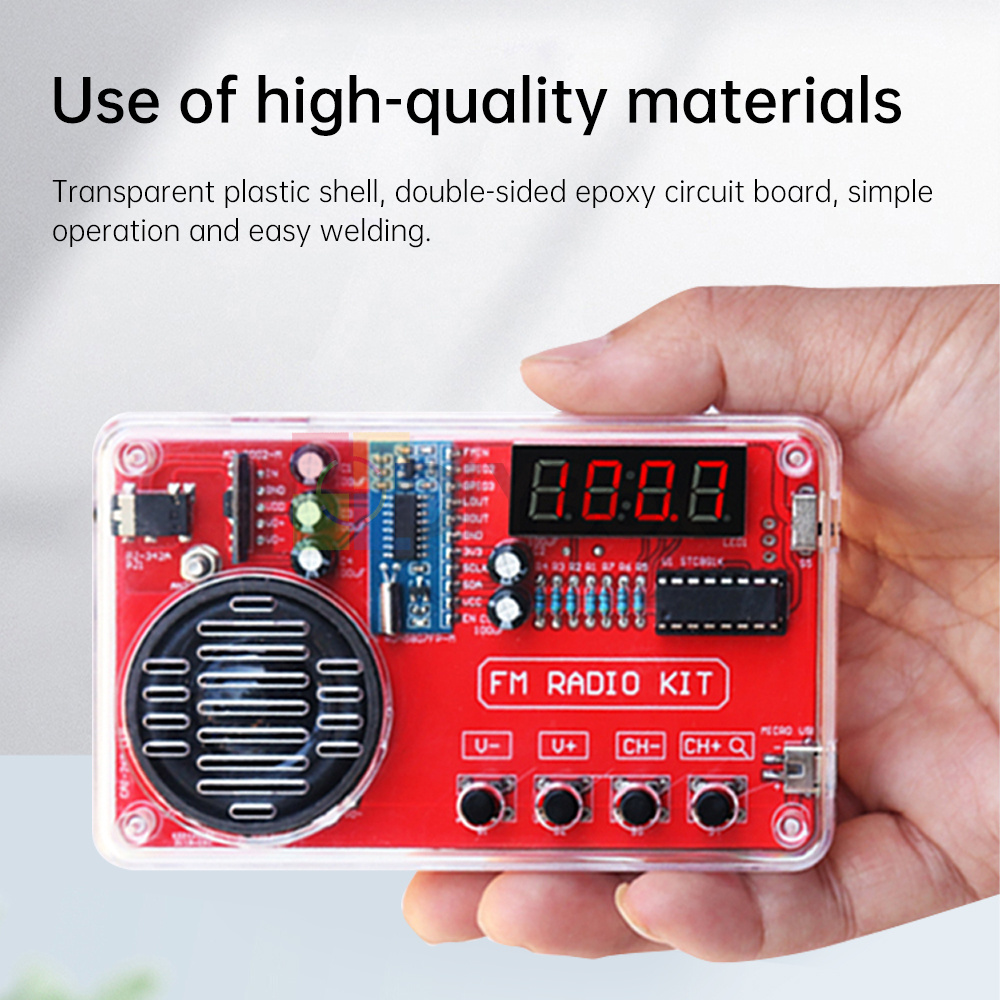
Material: transparent plastic shell, double-sided epoxy circuit boards
Name: FM radio production kit
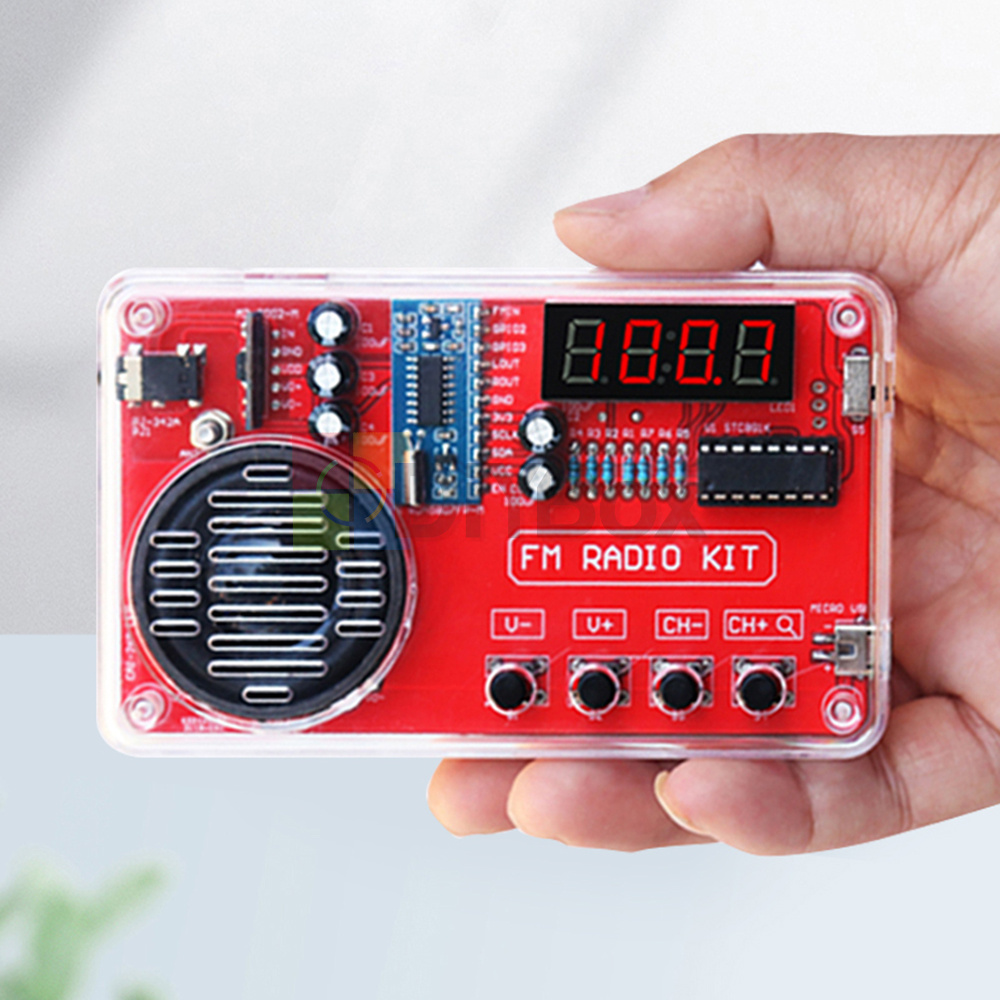
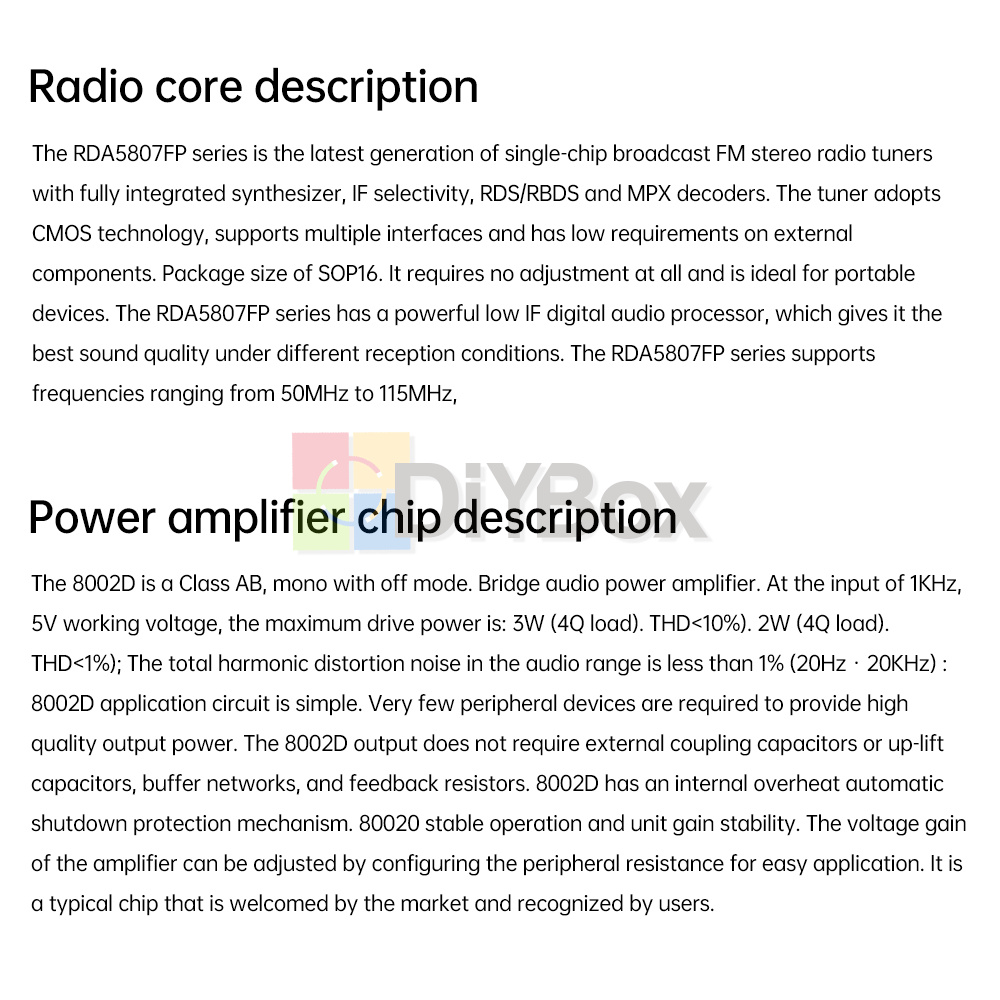
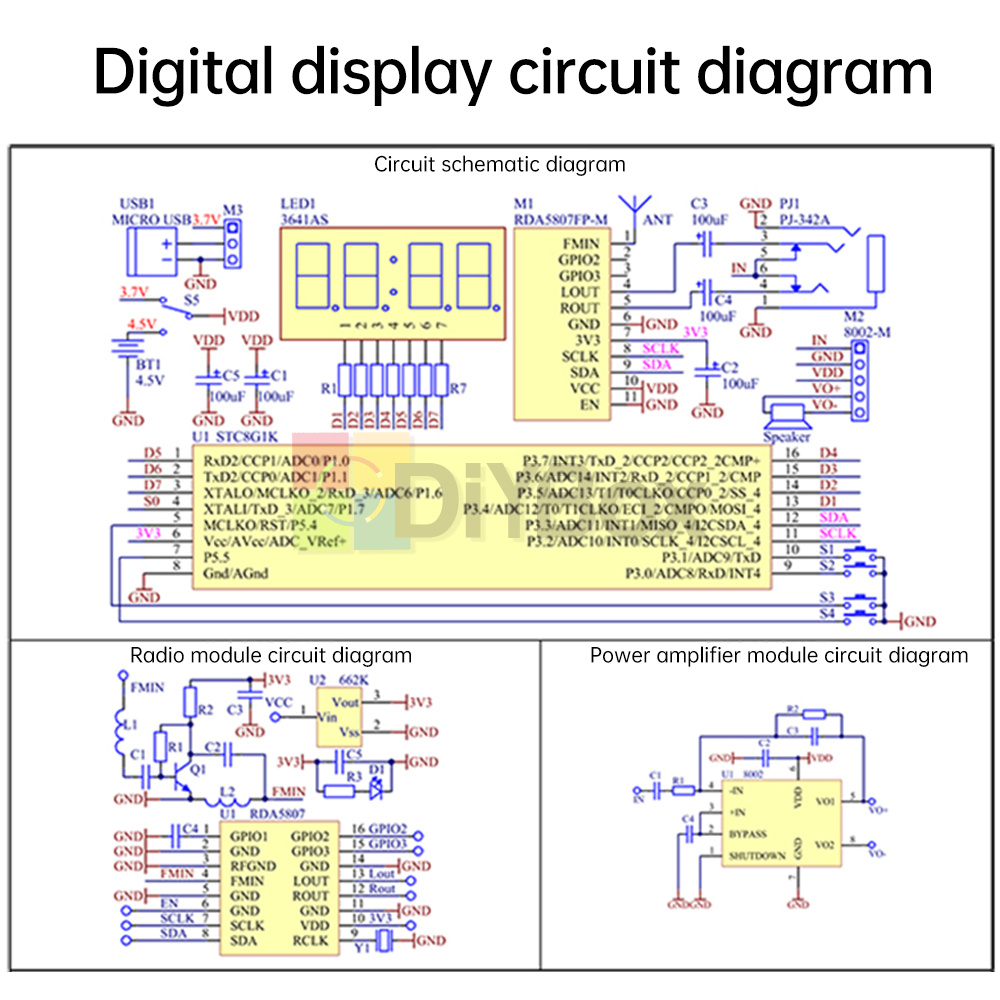
Control chip: RDA5807 8002D (STC81K17 digital display version)
Power supply: 3 7 batteries, 3.7V lithium batteries need to be provided
Speaker: 1.5-inch 4 ohm 3W speaker (OD 40mm)
Search range: 50-108 MHz
Signal-to-noise ratio: >60dB
Sensitivity: <10uV
Frequency Response: 150Hz-20KHz
Product size:115*70*28mm
1、Digital display version of the bulk - with shell: a set of bulk delivery with a shell, can display the radio frequency, need to provide their own power supply of 3 section 7 batteries.
2、Simple version of the loose parts - with shell: a set of loose parts with shell delivery, can not display the radio frequency, need to prepare their own power supply of three 7 batteries.
3、Digital display version loose parts - with shell with - charging module: a set of loose parts with shell delivery, with charging module, with charging cable, with lanyard, you can add their own lithium battery, can display the radio frequency, need to prepare their own lithium batteries or 3 section of No. 7 batteries.
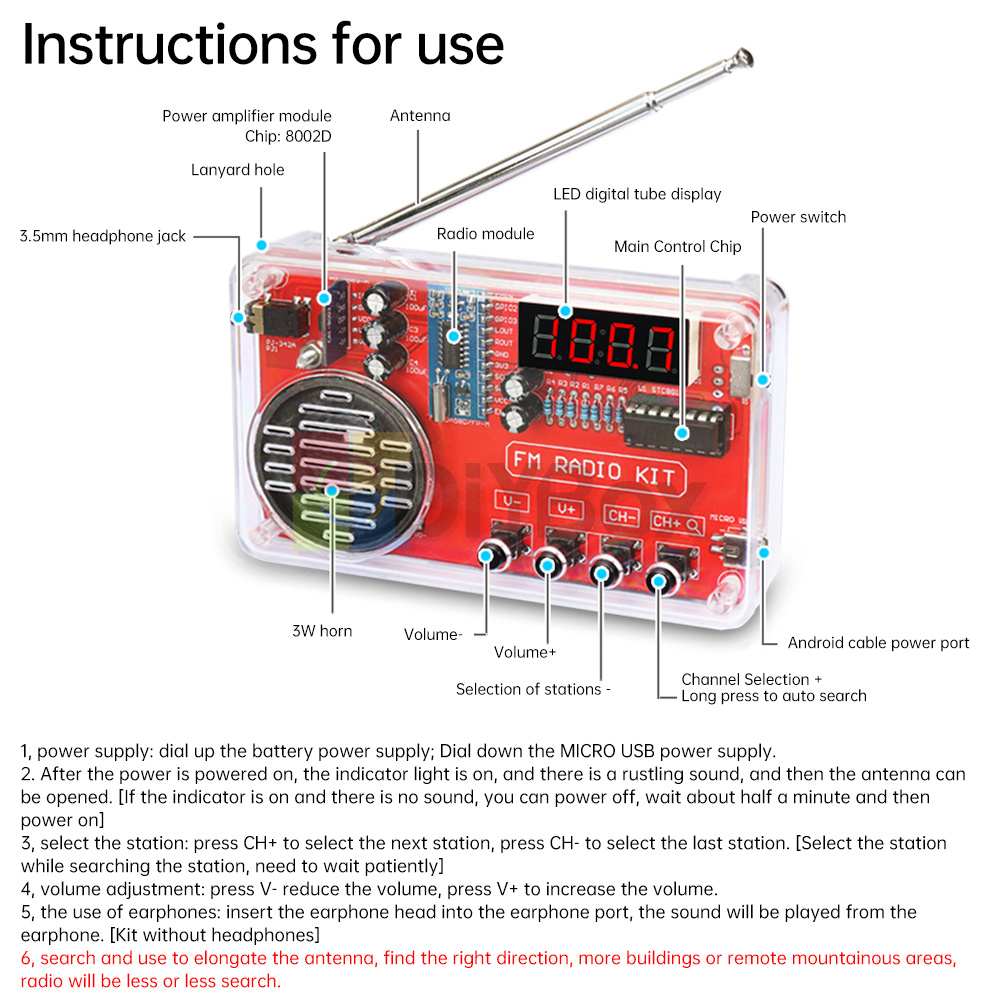
1, power supply: upward dial to connect the battery power supply; downward dial to connect the MICRO USB power supply.
2, after power on the indicator light, and rustling sound, then you can pull open the antenna tuning. [If the indicator light is on and there is no sound, you can disconnect the power and wait for about half a minute before powering on again.]
3、Select station:Press CH+ to select the next station,press CH- to select the previous station. [Selection of stations at the same time in the search for stations, need to wait patiently.]
4、Volume Adjustment:Press V to reduce the volume, press V+ to increase the volume.
5, headphone use:Insert the headphone head into the headphone port, the sound will be played from the headphone. [Kit does not come with headphones].
6, Search for stations and use to stretch the antenna to find the right direction, places with a lot of buildings or remote mountainous areas, the radio station will be less or can not be searched.
1, solder wire selection requirements:Diameter 0.8-1mm melting point of 183 degrees or so, please do not use high melting point solder.
2, circuit iron selection requirements: 30-40W
3, keep the iron head clean: iron head surface oxidation of a layer of black impurities to form a heat insulation layer, so that the iron head to lose the role of heating.
4, the welding steps as follows: for general welding point about 2-3 seconds to complete the welding.
1、Please check the quantity and model of accessories first. Try to measure with a multimeter if you can.
2、According to the tutorial steps to install.
3、When installing, install the short component first then install the tall component.
4、Every time you install a part of the components, weld a part of the components, and promptly cut off the component pins.
5, welding, pay attention to the welding temperature can not be too high, welding time can not be too long, otherwise it will damage the circuit board or damage components.
6, after welding again to check whether the solder joints are qualified, whether the components are installed incorrectly.
7, power commissioning, pay attention to the power supply positive and negative can not be reversed. Voltage can not exceed 3V.
8, with screws to fix the shell, pay attention to the screws tighten on the line, can not be over-tightened.
9, if there is a failure, first determine whether the power supply is correct, and then check the component installation and solder joints.
1 x Radio kit (DIY loose parts, need to solder by yourself.)
Domestic
We believe you need to get your purchases as quick as possible. As a general rule your item will be shipped within 24 hours of you purchasing it. We pack and post from Tuesday to Sunday (Mondays we are closed) but definitely get all our mail off to the post office first thing Monday morning for you. Mail gets picked up at 12pm so chances are if you buy before lunchtime your item will leave the same day.
International
Same as above but understand that depending on what part of the world you are from it does take a little longer to send, delivery can be from 7-15 working days. Also other factors to take into consideration are quarantine and customs regulations in your country. It is also a consideration that customs duties and GST/VAT may be payable at the buyers expense.
Combined Postage (for items with shipping charges):
We are more than happy to combine postage, just use the Buy it Now function in eBay (but DO NOT PAY after purchasing each item) to buy all the products you need, when you have finished request a combined invoice, we will base the shipping cost on the size, weight and your location.
* When you satisfied with our product and services please leave us positive feedback.
* If you have got the package, please confirm "Delivery on time" For us.
* If a problem occurs, contact us immediately with any email request.
* Just contact us using the " Ask the seller a question" link on eBay.
Your Satisfaction is our Priority. Our goal is to make all our customers as happy as possible while shopping with us.
For anything problem about product, price, shipping or order status, pleasecontact us via eBay message.Just contact us using the " Ask the seller a question" link on eBay.
We expect positive feedback and 5 scores DSR from you.
- We believe our items are so outstanding. We are convinced you will be happy with your Purchase.
- If you do not satisfy with our items. Please simply return to us within 30 Days in original condition. Just pay for the returned postage. Then we can issue full refund to you after the returned item arrived at our warehouse.
- Please include your eBay ID and item number with any email requests.